REVIEW · VANCOUVER
Photography & Walk in Stanley Park
Book on Viator →Operated by Nature PhotoHikes · Bookable on Viator
Few places teach photo skills like Stanley Park.
This easy, small-group walk mixes old-growth forest views with classic Vancouver angles, then catches the sunset mood at English Bay. I especially like that you get practical help on both smartphone shooting and DSLR settings, so you leave with real skills, not just pretty stops.
One thing to plan for: this is a walking tour, and the experience notes a strong physical fitness level. If you’re limited on mobility, you’ll want to speak up early so the guide can tailor how far you go into the park.
In This Review
- Key things to know before you go
- Stanley Park at Golden Hour With a Real Photo Coach
- Pricing That Makes Sense for What’s Included
- Cameras Covered: iPhone to DSLR, No Stress
- Stop 1: Brockton Point Totem Pole Start With Scale and Story
- Stop 2: Stanley Park Old-Growth Forest Walk and Practical Composition
- Stop 3: Vancouver Seawall Views With Sunset-Ready Photo Choices
- Stop 4: English Bay Sunset on a Vancouver Favorite Beach
- Stop 5: Lost Lagoon for Texture and a Calmer Finish
- The Instruction Style That Actually Sticks
- Transportation and Pacing: Easy to Follow, Not a Sprint
- Weather Matters More Than You Think
- Who This Stanley Park Photo Walk Is Best For
- Should You Book This Photography & Walk in Stanley Park Tour?
- FAQ
- How long is the Stanley Park photography walk?
- Where does the tour start, and what time does it begin?
- Will an iPhone or smartphone work for the photos?
- Can I borrow a DSLR camera?
- Do I receive photos after the tour?
- Is pickup available, and is this a small group tour?
- What happens if the weather is poor or I need to cancel?
Key things to know before you go
- One-on-one photo coaching focused on the way you frame shots, not just where you walk
- Smartphone tips plus DSLR basics (aperture, shutter speed, ISO) so you can use what you have
- Golden hour timing built around Seawall and English Bay, right before sunset
- Complimentary photos at the end, a nice fix if you’re usually behind the camera
- Small group cap of 7 people, which keeps instruction personal and the pace comfortable
- Multiple scenery styles in a short loop: totems, rain-forest trails, ocean edges, and a quiet lagoon
Stanley Park at Golden Hour With a Real Photo Coach
Stanley Park is one of those Vancouver places where everything looks like a postcard, even before you raise a camera. What makes this tour different is how quickly you learn why those scenes work and how to recreate the look yourself.
You’ll spend about two hours walking, with the route designed to hit the park’s classic textures—tall trees, misty forest light, and ocean angles—then shift to sunset at English Bay. That’s a smart setup, because light changes fast at this time of day. The guide’s job is to help you see the light and turn it into photos you’ll actually want to keep.
The guide is Nature PhotoHikes, and the instruction feels friendly and direct. The experience also highlights that the guide will customize how far you go based on physical ability, so you can choose more scenic trail time or just stay with the main viewpoints.
You can also read our reviews of more tours and experiences in Vancouver.
Pricing That Makes Sense for What’s Included
At $39.49 per person for roughly two hours, you’re paying for more than the walk. You’re getting:
- a professional photographer guide
- transportation included in the tour price
- options to borrow a DSLR camera
- hands-on instruction for smartphone and DSLR shooting
- a photoshoot plus complimentary photos at the end
When you put it like that, the value comes from the coaching and the photos you take home. If you’ve ever spent hours trying to figure out settings on your own—only to end up with blurry sunsets—this kind of guided structure is usually where the cost actually pays off.
Small groups matter here too. With a max of 7 people, you’re less likely to get stuck waiting for attention while others get set up.
Cameras Covered: iPhone to DSLR, No Stress
This is one of the most practical parts of the experience. You can bring any camera. The guide will work with what you have, and smartphone shooting is a core focus.
Expect instruction that covers:
- composition basics (how to frame the scene so it looks intentional)
- smartphone tips and tricks
- DSLR settings concepts including aperture, shutter speed, and ISO
If you’re using a DSLR, you may find the explanation helps you connect the numbers to what you see—like how shutter speed affects motion near water or how ISO changes your image in dim forest light. If you’re using an iPhone, the coaching is still about choices you can control: angle, timing, and how to handle light.
And yes, there’s a DSLR borrowing option if you want to learn with a more traditional setup. That’s useful if you’re curious but don’t want to rent gear.
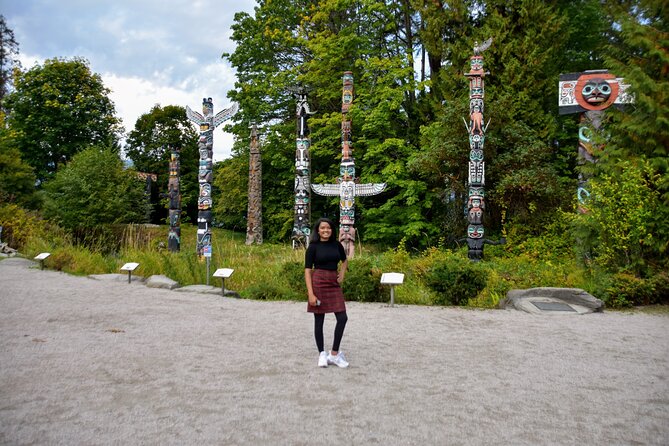
Stop 1: Brockton Point Totem Pole Start With Scale and Story
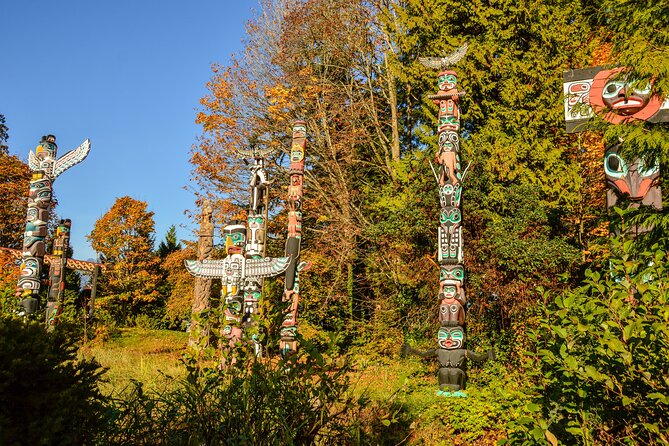
Your walk begins at Brockton Point Totem Pole, a great first stop because it gives you a clear subject right away. Totem poles are visual stories—layered shapes, carving textures, and strong vertical lines. That’s useful for beginners because it teaches the basics fast:
- How to use vertical framing to match the subject
- How to control background clutter so the pole stays the focus
- How to find light angles that show texture instead of flattening it
Also, starting here gets your “photo eyes” online before you move into the forest. By the time you hit the denser scenery later, you’ll be thinking more like a photographer and less like a tourist scrolling.
One caution: if you’re photographing close-up details, give yourself a few test shots. Totem carving texture can look amazing one second and washed out the next depending on sun and haze.
Stop 2: Stanley Park Old-Growth Forest Walk and Practical Composition
Then you’re into the heart of Stanley Park—its old-growth rainforest feel, with tall trunks and softer, shifting light under the canopy. This is where beginners often struggle, because forest scenes can be dark and contrasty.
This is also where the coaching pays off. You’ll get help with composition and how to adapt your settings when light drops. If you’re shooting on a smartphone, you’ll likely focus on:
- finding a stable stance on uneven ground
- composing around lines and layers (trees, branches, trail edges)
- timing shots so the light hits the scene the way you want
The experience notes that the guide can tailor how deep you go, so you can choose more forest time or stick to the main spots depending on your comfort level. I like that flexibility. It means you’re not forced into a pace that doesn’t match you.
Potential drawback: forest light can be tricky. Even with a guide, you may end up with a short stretch where fog or low contrast makes shots harder. That’s normal in a coastal rainforest environment—bring patience.

Stop 3: Vancouver Seawall Views With Sunset-Ready Photo Choices
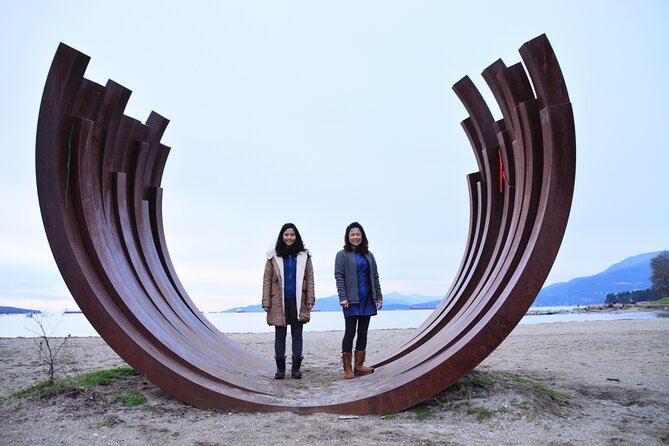
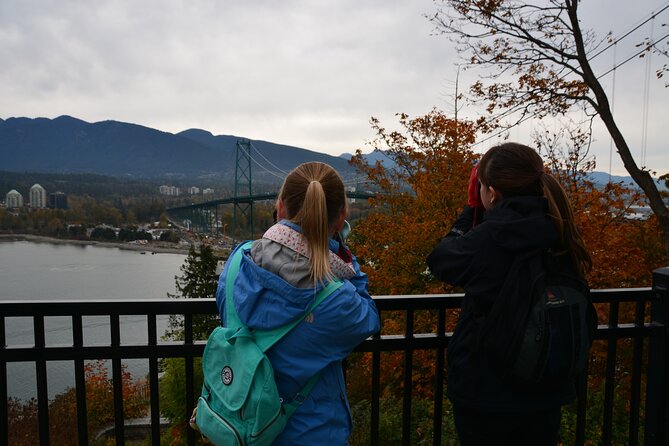
Next comes the Vancouver Seawall, one of the best places in the city for water-and-mountain framing. This stretch is valuable for photo learning because the scenery gives you easy “rules” to practice:
- horizons and leading lines along the path
- reflections and layered depth from water to sky
- wide-angle composition that still feels structured
This is the kind of location where your settings matter. If you’re using DSLR, shutter speed and ISO are the tools. If you’re using a smartphone, the timing is the main lever—catch the exact light, then reframe slightly until it looks right.
Also, Seawall scenes can include moving elements (people, waves). The guide’s approach helps you choose whether you want crisp detail or a slightly softer feel. That’s a real skill, not just a lucky shot.
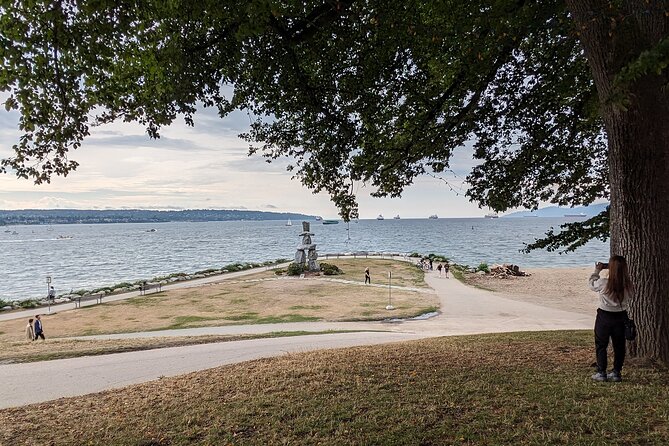
Stop 4: English Bay Sunset on a Vancouver Favorite Beach

As the tour heads toward English Bay, the vibe shifts from forest shade to ocean horizon light. This is where the timing earns its keep.
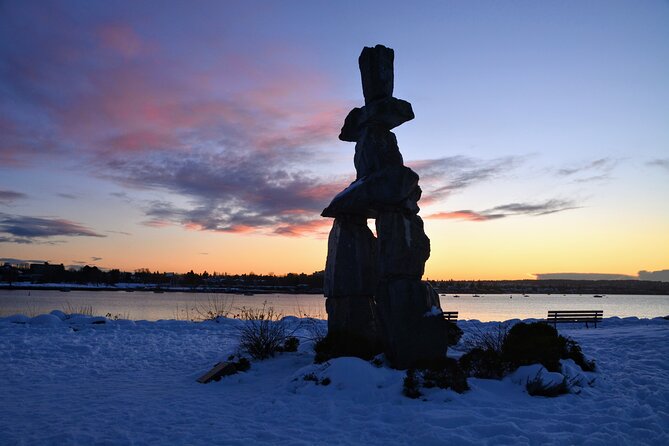
The experience is designed to catch sunset mood at Vancouver’s most popular beach area—exactly when the sky starts doing that mix of warm and cool tones you can’t recreate with editing later. Golden and blue hour are both relevant here because the color temperature changes quickly.
If you want photos that look cinematic without heavy processing, English Bay is ideal. The coaching focus on composition helps you avoid the classic “I got the sunset, but it looks flat” problem. You’ll be thinking about foreground and frame edges by the time you shoot.
One more practical note: beaches are windy. If you’re holding a phone or camera, expect it to feel harder to steady. Use a stance that doesn’t lock your knees and take a quick moment to breathe before you press the shutter.
Stop 5: Lost Lagoon for Texture and a Calmer Finish
The final stop is Lost Lagoon, a quieter counterpoint after the beach. Even if your main goal is sunset shots, this stop is smart because it gives variety without taking you across the city.
Lost Lagoon helps you practice a different kind of scene: calmer water feel, softer light, and more natural framing opportunities. It’s also a good place to review what you learned earlier:
- do you like your horizons and framing?
- are you using the background to keep attention on your subject?
- are your settings holding steady as light fades?
The tour returns to the original meeting area at the end, so you’re not left guessing how to get back while your camera bag is heavy.
The Instruction Style That Actually Sticks
What stands out in the experience is that the guide doesn’t just point at the best view. Instruction is hands-on, with plenty of one-on-one time. That’s huge for beginners, because you can ask about your exact device and get direct fixes.
The guide name you may hear from other visitors is Nafees. The feedback emphasizes two things that matter to you as a learner:
- he shares clear photography guidance without making it feel complicated
- he gives practical smartphone tips, not just generic advice
The complimentary photos at the end are another confidence-builder. If you’re traveling solo, it’s tough to get good images of yourself in front of big scenery. Having someone capture you during the tour means you leave with real memories, not only scenery shots.
Transportation and Pacing: Easy to Follow, Not a Sprint
You’ll likely start at 655 Burrard St with the tour beginning at 3:00 pm. Pickup is offered, and the pickup/drop-off location can be decided when booking—with a downtown preference noted. For 2 or more people, the pickup can be anywhere in Vancouver (as arranged).
The route is a walking tour with a relaxed feel, and the guide customizes depth based on your physical ability. That said, the experience also calls for good weather and a strong physical fitness level. Translation: you should be ready to walk on uneven ground and keep moving for about two hours, even if the pace is manageable.
If you get tired easily, ask for the modified version early. The earlier you communicate, the easier it is to build a route that works for you.
Weather Matters More Than You Think
This tour requires good weather. If conditions are poor, you’ll be offered a different date or a full refund.
I like that the expectation is clear. In Vancouver, light can change hour to hour. When weather is good, you’ll get better sky color for English Bay, better visibility along the Seawall, and more usable light under the trees.
If you’re booking near a rainy window, consider flexibility in your schedule. Sunset tours are sensitive to cloud cover and mist—sometimes clouds look dramatic, other times they flatten everything.
Who This Stanley Park Photo Walk Is Best For
This experience fits you if:
- you want to improve smartphone and camera skills quickly
- you like structured sightseeing with direct instruction
- you want to hit multiple Stanley Park classics in a short window
- you’re traveling in a small group and prefer a guided pace over DIY guesswork
It may be less ideal if:
- you want a fully seated, low-walking experience
- you’re sensitive to uneven park paths and changing weather
- you’re hoping for a food-focused outing (there’s no food or drinks included)
If you bring your own water and a light layer, you’ll be more comfortable while the light changes around sunset.
Should You Book This Photography & Walk in Stanley Park Tour?
I think this is a smart booking when you want both the scenery and the skill-building. For the price, you’re not just paying for access to great spots—you’re paying for coaching you can reuse on your next Vancouver day.
Book it if you:
- want complimentary photos as part of the deal
- care about getting better framing and settings fast
- want a guide who can work with your camera type, from iPhone to DSLR
Skip it (or choose carefully) if walking on uneven ground sounds stressful or if you’re visiting during a week where you can’t be flexible about weather.
If you’re ready to learn in one of Canada’s most famous urban parks, this two-hour Stanley Park photo walk is a solid, practical way to get better images and better confidence—without turning the day into a complicated production.
FAQ
How long is the Stanley Park photography walk?
It lasts about 2 hours.
Where does the tour start, and what time does it begin?
The tour starts at 655 Burrard St, Vancouver, BC V6C 2R7, Canada and begins at 3:00 pm.
Will an iPhone or smartphone work for the photos?
Yes. The tour includes smartphone tips and tricks, and any type of camera you bring will work.
Can I borrow a DSLR camera?
Yes. A DSLR camera can be borrowed, but you can also use any camera you have.
Do I receive photos after the tour?
Yes. There is a photoshoot during the tour and you receive complimentary photos at the end.
Is pickup available, and is this a small group tour?
Pickup is offered. The group is limited to a maximum of 7 people, and transportation is included.
What happens if the weather is poor or I need to cancel?
The tour requires good weather. If it’s canceled due to poor weather, you’ll be offered a different date or a full refund. You can cancel for a full refund up to 24 hours in advance.