REVIEW · VANCOUVER
Photography & Rockies Road Trip
Book on Viator →Operated by Nature PhotoHikes · Bookable on Viator
Jasper to the Icefields with a camera plan. What makes this trip stand out is how it turns tight mountain timing into better photos. I like that you’re not just driving past big sights—you’re being guided to the right spots and moments, then taught to use what you’ve got (phone or DSLR) to capture it.
Two things I’d prioritize: Nafees shares practical camera settings for both smartphones and DSLRs, and the route is packed with wildlife opportunities, hot springs, canyons, and the big lake-and-glacier stops you came for. One thing to keep in mind is weather: the experience is weather-dependent, so you should expect some flexibility and bring a backup attitude (and a lens cloth).
In This Review
- Key highlights at a glance
- The photo-first Rockies road trip plan (and why it matters)
- Your day-by-day route: Jasper to Yoho, with photo timing built in
- Day 1: Vancouver to Jasper National Park via Kamloops and the Rockies
- Day 2: Maligne Canyon, Sulpher Skyline trail, and a hot springs reset
- Day 3: Jasper town, lakes, Athabasca Falls, and Icefields water-and-ice variety
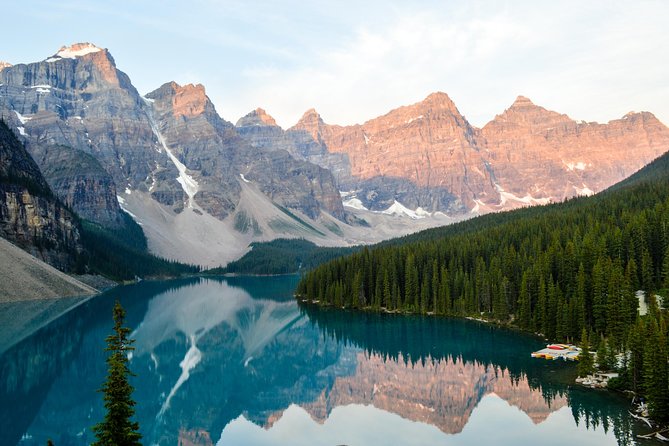
- Day 4: Lake Louise, Plain of Six Glaciers + Teahouse, and Moraine Lake stops
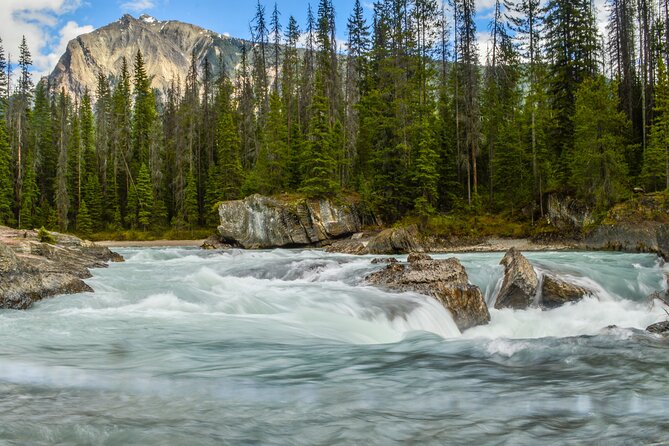
- Day 5: Emerald Lake and Natural Bridge, short but sweet
- What you’ll actually get from the photographer guide (beyond “take better photos”)
- Camping and hiking: what this means for your comfort
- Logistics that affect your day (timing, group size, and transport)
- Price and value: what you’re paying for
- Weather dependence: how to plan your mindset and packing
- Who this tour suits best
- Should you book Photo & Rockies Road Trip?
- FAQ
- How long is the Photography & Rockies Road Trip?
- What is the start time and pickup setup in Vancouver?
- How many people are in the group?
- What does the tour include?
- What is not included in the price?
- Do I get help if I use a smartphone instead of a DSLR?
- Is there hiking on the trip, and how hard is it?
- Does the tour depend on weather?
- What are the cancellation rules?
Key highlights at a glance
- Small group (max 5) keeps the pace human and the photo time useful
- Professional photographer guide helps with both smartphone and DSLR settings
- Daily photo planning focuses on where and when you shoot for scenic results
- Rockies loop with major hits: Jasper, Maligne Canyon, Icefields, Lake Louise, Moraine, Yoho stops
- Hiking plus hot springs breaks up the drive days with variety
- Bring traction and light gear so you can actually enjoy the trails without wrestling your setup
The photo-first Rockies road trip plan (and why it matters)
This is a 5-day Rockies drive built around photography and time outdoors, not a bus-and-museum style tour. You’ll start in Vancouver with pickup available, then roll into the mountains with a guide who thinks in terms of light, composition, and when the best moments tend to show up. That difference matters because Rockies days can be long, weather can change quickly, and you don’t want to waste prime daylight.
Price is $1,158.78 per person, which is not cheap—so here’s how I’d judge value. A big chunk is going to transportation plus a driver/guide, national park fees, and a professional photographer guide. On top of that, the tour includes professionally led hiking and camping. If you were to add up a similar level of guidance, park access, and transport on your own, the total can grow fast. The trade-off: food and drinks are not included, and accommodation upgrades aren’t part of the price.
Group size is capped at 5 travelers, and that small number changes how the day feels. You’re less likely to get lost in a crowd, and it’s easier for the guide to help you troubleshoot settings, framing, or footwear choices before you step into the photo moment.
You can also read our reviews of more tours and experiences in Vancouver.
Your day-by-day route: Jasper to Yoho, with photo timing built in
Day 1: Vancouver to Jasper National Park via Kamloops and the Rockies
On day one, you’ll set off at 8:00 am and drive toward Jasper, passing through Kamloops and the Rockies. The day lists 8 hours with Jasper National Park as the first major stop, and park admission is included.
This is the kind of start that works best if you accept a simple reality: day one is about getting you positioned. That’s not thrilling in the abstract, but it’s how you earn better time for the stops that follow. Once you’re in Jasper territory, you’re closer to the wildlife chances and the shorter “go hike, shoot, return” rhythm the trip keeps repeating.
What to expect here:
- A long, steady drive day (plan for comfort and snacks)
- An arrival into Jasper National Park area with room to settle into the outdoors mindset
Potential drawback: it’s a full-on travel day. If you hate early mornings and long car time, you’ll feel it more on day one than on the later hikes.
Day 2: Maligne Canyon, Sulpher Skyline trail, and a hot springs reset
Day two is 6 hours, and it stacks variety: Maligne Canyon, wildlife watching, a hike called the Sulpher Skyline trail, and time at Miette hot springs (including a dip).
This is a strong day because it gives you multiple shooting types in a single block:
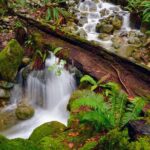
- Water and canyon textures at Maligne Canyon
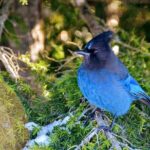
- Wildlife potential (the guide actively looks for opportunities)
- A trail segment for perspective shots
- Then hot springs time, which shifts the mood from “chase the view” to “breathe and recover.”
The hiking part isn’t presented as extreme, and reviews back that up: the hiking is not too demanding for someone in reasonable shape. Still, the guide’s approach is practical—use broken-in shoes with traction, and wear layers so you don’t melt on the climb and freeze afterward.
One more smart tip from experience-based feedback: bring a cloth to wipe your camera lens (and smartphone screen). Mountain weather can be unpredictable, and you don’t want haze, drizzle, or dust to ruin your shots right when the light changes.
Day 3: Jasper town, lakes, Athabasca Falls, and Icefields water-and-ice variety
Day three is 8 hours and is basically the “big scenery hits” day. It includes:
- Jasper town
- Pyramid and Patricia Lakes
- Athabasca Falls
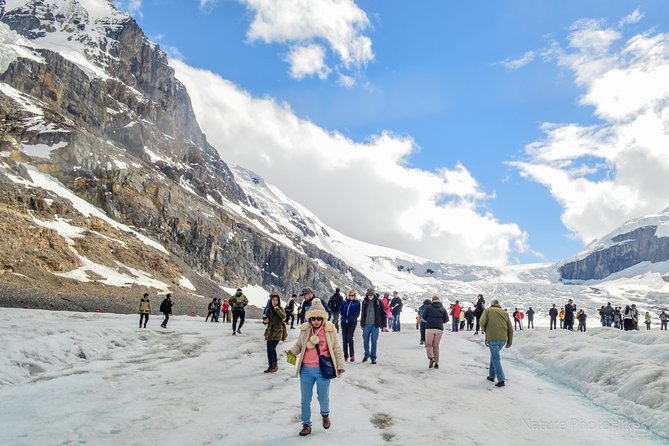
- Columbia Icefields
- Peyto Lake
You’ll get multiple classic “look up and shoot” moments, but the way to make this day work is to think photo-first. The trip’s structure is meant to optimize where you stand and how you time your shots—so rather than sprinting from spot to spot, you’ll likely stop, reset, and shoot with purpose.
This is also a day where wildlife chances can show up, and the guide’s focus on timing and location helps you react quickly when an animal appears. Even if you’re not hunting for wildlife, this kind of guidance makes the whole day feel smoother.
Hike factor note: day three has hikes implied by the overall “professionally led hiking” concept, but the specific day-by-day hikes only name the plain hiking effort on other days. Either way, you’ll still want the basics: comfortable traction shoes, layers, and a camera setup you can keep light and moving with.
Day 4: Lake Louise, Plain of Six Glaciers + Teahouse, and Moraine Lake stops
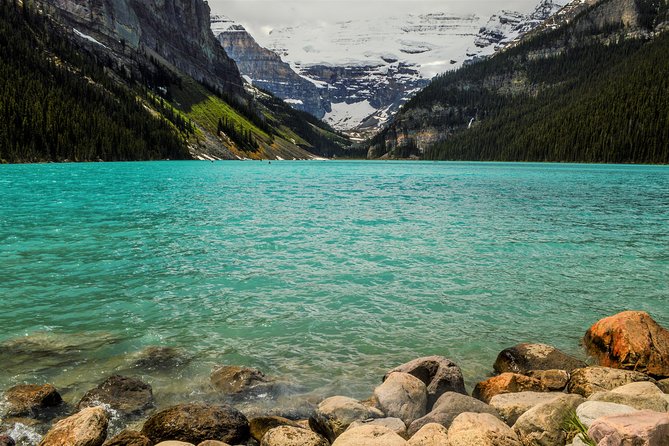
Day four is 8 hours, and it’s the day most people picture when they think “Canadian Rockies.” It includes:
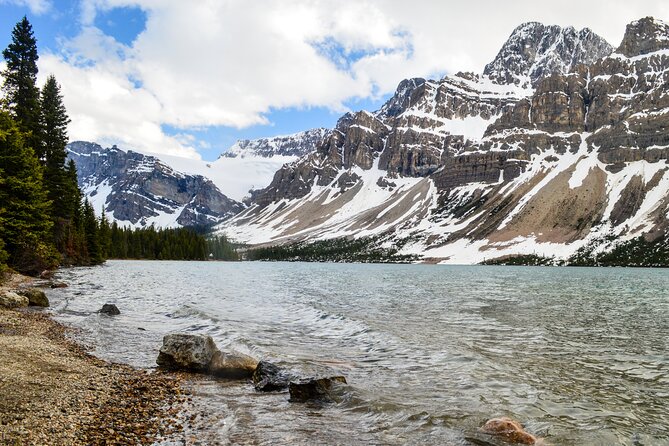
- Lake Louise
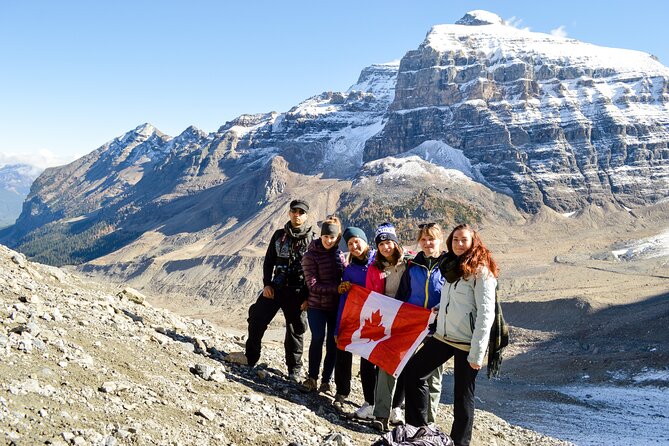
- A hike on Plain of Six Glaciers to the Teahouse
- Stops at Moraine Lake
This day can feel like a highlight sandwich: lakes for immediate photo impact, a hike for stronger compositions, and then Moraine as the “save the best for later” moment.
The practical advice that keeps coming up is simple:
- Bring snacks for Lake Louise and Moraine Lake.
- Plan layers. Mountain air can swing fast.
- Keep your camera gear light and compact so you’re not walking on discomfort while trying to frame shots.
Also, the guide’s photography coaching is not theory-only. If you’re using a DSLR like a Nikon SLR, you’ll likely get hands-on help with how to use it properly. If you’re using a smartphone, you’ll still get guidance—settings and technique matter, even without interchangeable lenses.
Day 5: Emerald Lake and Natural Bridge, short but sweet
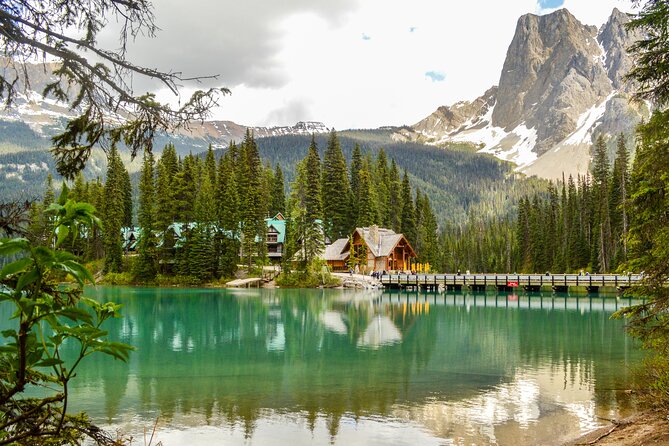
Day five is listed as 1 hour for the day’s main stop: Emerald Lake, plus a visit to Natural Bridge (within Yoho National Park).
This is a short day by design, and it can be a good way to end. After days of long drives and hikes, a shorter finale gives you time to breathe, look back at what you captured, and not feel like you’re sprinting on your last morning.
If you like getting the final shots done cleanly (no rushing, no last-minute scramble), this ending can feel surprisingly satisfying.
What you’ll actually get from the photographer guide (beyond “take better photos”)
The standout strength here is that photo guidance is woven into the day, not added as a separate class. Based on what the guide is known for, you’ll get specific help with both smartphone and DSLR camera settings. That’s useful because many tours treat phone users as second-class photographers. Here, it’s treated as real—settings, framing, and timing.
Two practical elements you should pay attention to:
- Lighting and location optimization: the trip is structured to find scenic angles when conditions help. That’s why the weather matters. If the sky cooperates, you get rewarded. If it doesn’t, the guide still tries to keep you shooting from worthwhile spots.
- Gear discipline: you’ll be encouraged to keep your equipment light and compact. It sounds basic, but it changes everything. If you carry too much, you hike slower, you miss moments, and your photos get worse because you’re tired.
There’s also a confidence factor. If you’re going solo, small-group travel can still feel secure when the guide knows the area well and keeps the pace organized.
Camping and hiking: what this means for your comfort
The inclusions mention professionally led hiking and camping. The exact camping setup isn’t spelled out in the information you provided, so I can’t promise whether you’ll be in tents, what the sleeping arrangements look like, or where camps are located. But the trip is clearly not built around upgraded hotels as the default experience.
So pack like you’ll be outdoors for real. That means:
- Comfortable, broken-in shoes with traction
- Layers (not just one warm layer)
- A camera setup you can carry without pain
- A cloth to clean your lens/screen when the weather shifts
One review point that’s easy to take seriously: hiking is not too demanding if you’re in reasonable shape. Still, reasonable doesn’t mean effortless. You’ll enjoy the trip more if you’ve got some walking stamina and you’re ready for uneven ground.
Logistics that affect your day (timing, group size, and transport)
This tour starts at 8:00 am. Pickup is offered, and you meet at a prearranged Vancouver location of your choice. From there, the drive days are long: you’ll hit 6 to 8 hours several days in a row. That means comfort matters. Bring snacks, keep hydrated, and think about how you’ll handle camera breaks during long transfers.
Group size max is 5 travelers, which helps with two things:
- Photo coaching stays personal enough to be actionable
- The guide can keep everyone on track without turning the trip into a queue
English is the tour language, and confirmation is handled within 48 hours of booking if there’s availability.
Price and value: what you’re paying for
At $1,158.78 per person, this is a guided, fee-inclusive trip with real instruction. The included basics:
- Driver/guide
- National Park fees
- Professional photographer guide
- Professionally led hiking and camping experience
- Transportation
Not included:
- Food and drinks
- Activities like canoe rentals or gondola tickets
- Accommodation upgrades to hotel/hostel
So the value equation is this: you’re paying for access, transport, and guidance—plus the photo coaching that most people can’t replicate easily on their own. If you’re the kind of traveler who enjoys learning how to shoot (and not just looking at the view), the price starts making sense.
If you only want roadside photos and don’t care about camera settings, you might feel like you paid more than necessary. But if you want better results, this is aimed directly at that.
Weather dependence: how to plan your mindset and packing
The experience requires good weather, and that’s not a small detail. The best wildlife moments and the cleanest light for photos depend on conditions. If the tour gets canceled due to poor weather, you’re offered a different date or a full refund.
That means you should:
- Be flexible with dates if possible
- Pack for sudden changes (layers and a lens cloth)
- Keep your expectations realistic: the goal is great photos, not a guaranteed weather show
Also, build in small resilience: bring snacks on the days that include Lake Louise and Moraine Lake, and treat long days as part of the adventure rather than a problem to fix.
Who this tour suits best
I’d point you toward this trip if:
- You want a photo-guided Rockies experience, not just sightseeing
- You shoot with a smartphone or DSLR and want concrete settings and composition tips
- You like a small group pace and want a guide who manages both safety and timing
- You’re comfortable hiking at a level that works for a reasonably fit traveler
- You’re okay with the camping component and not expecting a hotel upgrade by default
You might think twice if:
- You hate early starts and long drive blocks
- You want guaranteed short days or lots of free time
- You don’t want to bring snacks, layers, and lens-cleaning tools for changing mountain conditions
Should you book Photo & Rockies Road Trip?
If your main goal is better photos with less guesswork, I think this is a strong booking. The mix of Jasper, Maligne, Icefields, Lake Louise/Moraine, and Yoho stops is exactly the kind of route where a guide’s timing and coaching pays off. Add a small group size, professional photo instruction for both phones and cameras, and practical hiking advice like traction shoes and light gear, and you have a trip that’s built to help you get real results.
Before you book, do two quick checks:
- Can you be flexible with dates if weather changes?
- Are you comfortable with long drive days and a camping-included style of travel?
If you can say yes to both, you’ll likely leave with more than memories—you’ll have photos you actually feel proud of.
FAQ
How long is the Photography & Rockies Road Trip?
It runs for 5 days approximately.
What is the start time and pickup setup in Vancouver?
It starts at 8:00 am. Pickup is offered, and you meet at a prearranged Vancouver location of your choice.
How many people are in the group?
The maximum group size is 5 travelers. A minimum of 2 people is required per booking.
What does the tour include?
Included are the driver/guide, national park fees, a professional photographer guide, professionally led hiking and camping experience, and transportation.
What is not included in the price?
Food and drinks are not included, and activities like canoe rentals or gondola tickets are not included. Accommodation upgrades to hotel/hostel are also not included.
Do I get help if I use a smartphone instead of a DSLR?
Yes. The photography tips are shared for both smartphone and DSLR camera settings.
Is there hiking on the trip, and how hard is it?
Most travelers can participate. The hiking is described as not too demanding for someone in reasonable shape, but you should wear comfortable, broken-in shoes with traction.
Does the tour depend on weather?
Yes. The experience requires good weather. If it’s canceled due to poor weather, you’ll be offered a different date or a full refund.
What are the cancellation rules?
Free cancellation is available up to 24 hours in advance for a full refund. If you cancel less than 24 hours before the start time, you don’t get a refund.