REVIEW · LONDON
Private Tour: Photography Walking Tour from Trafalgar Square to Covent Garden
Book on Viator →Operated by London Photo Tours and Workshops · Bookable on Viator
London becomes your photo lab on foot. This private photography walking tour from Trafalgar Square to Covent Garden is built around real-world shooting lessons, so you’re not just sightseeing—you’re learning how to frame, focus, and use light. I like that you get hands-on instruction at every stop, plus a chance to review and improve the images you capture. I also like the route choice: it layers classic London icons with street-level scenes that are perfect for practicing depth of field and composition. One drawback to consider: at $347.77 per person, it’s a premium way to do London, and you’ll want to bring a camera you’re ready to use for four hours.
You’ll meet near Charing Cross Strand and finish at Neal’s Yard, walking at a leisurely pace while a professional Fine Art photographer guides your settings and angles. The tour is designed for all digital cameras and smart phones, and it works in most weather conditions, so you’re learning year-round rather than waiting for perfect skies. Still, it’s a walking-focused experience—if you dislike long strolls or you’re short on energy, it may feel like a lot.
In This Review
- Key highlights I’d plan around
- Price and value: why this costs $347.77 per person
- Entering Trafalgar Square with camera settings in mind
- Leicester Square: portraits, statues, and depth-of-field practice
- Chinatown’s gate and side streets: color and creative focus
- Covent Garden and the Apple Market: shutter speed and focus modes
- Neal’s Yard courtyards: framing colorful mini-London
- Photo review and teaching style: why the feedback matters
- What to expect on the ground: pace, gear, and weather
- Who this tour is best for
- Should you book this Trafalgar Square to Covent Garden photo tour?
- FAQ
- Is this tour private or shared?
- How long does the photo walking tour last?
- Where does the tour start and end?
- What should I bring?
- Is refreshments included?
- What’s the minimum age?
- What language is the tour in?
- What if the weather is bad?
- FAQ
- Is there a ticket cost for the main photo stops?
- Can I bring a service animal?
- What is the cancellation policy?
Key highlights I’d plan around
- Pro Fine Art instruction while you shoot, not after the fact
- Aperture, depth of field, shutter speed, and focus modes taught through specific London scenes
- Photo review during the walk, using your own images as examples
- Iconic-but-practical route from Trafalgar Square to Covent Garden and Neal’s Yard
- Smart-phone friendly for composition and exposure practice
- Private to your group, so the guidance can match your level
Price and value: why this costs $347.77 per person
This is priced like a premium, small-group, instruction-heavy London tour, and that makes sense. You’re paying for a professional photographer who teaches settings and composition while you walk, plus time to look at and discuss your photos.
Here’s how I think about the value:
- You’re not just paying for locations. Most tours show you landmarks. This one aims to change how you photograph those landmarks.
- The private format matters. With exclusive time for your group, you can ask questions about your camera menus, how you’re aiming, and what you should try next.
- You get a skill payoff fast. By the time you reach Covent Garden and Neal’s Yard, you’ll have practiced multiple techniques (light angles, focus behavior, and shutter timing) in a way that’s hard to replicate on your own.
The main trade-off is that you’re paying more than for a standard walking tour. If you just want a low-cost photo walk and don’t care about learning camera controls, this may feel expensive. If you want to improve—quickly, on real streets—then the price feels more reasonable.
You can also read our reviews of more tours and experiences in London.

Entering Trafalgar Square with camera settings in mind
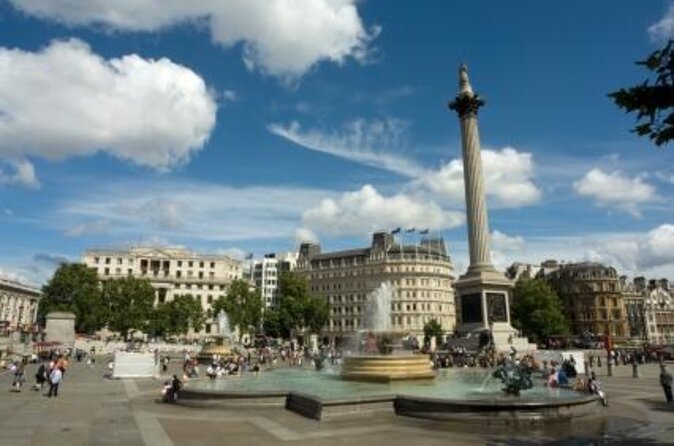
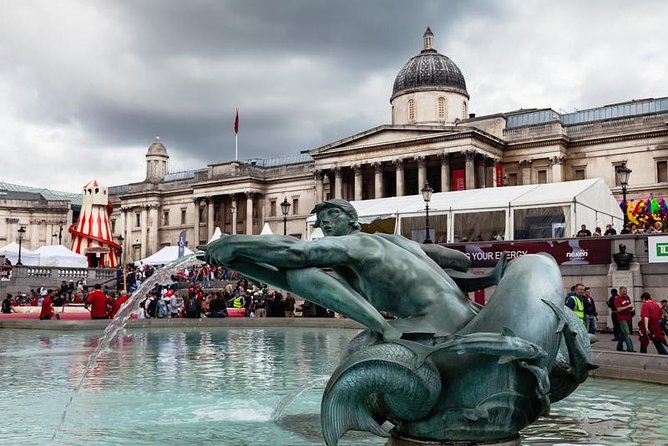
You start at Trafalgar Square (near the National Gallery area), a spot that’s almost unfair for photography practice. Wide views, strong monument shapes, and plenty of people create constant subjects, even if the weather is doing its own thing.
At this first stop, the lesson is built around basics that make a huge difference:
- Aperture and depth of field: You’ll practice how changing aperture affects what feels sharp versus what falls into blur.
- Light and angle: The square gives you multiple directions of light, so you can test how shadows and highlights behave across statues and buildings.
- Framing and composition: Your guide focuses on how to build a shot so the image feels deliberate, not accidental.
You also get the fun London street texture: street entertainers and pavement artists (including chalk scenes), which are great for learning to react quickly—spot the moment, adjust, and shoot before it disappears.
A practical tip here: set aside time at the edges of the square for long-view compositions toward Whitehall. You don’t need perfect weather; you need consistent framing choices, and this stop gives you both.
Leicester Square: portraits, statues, and depth-of-field practice
Next you walk toward Leicester Square, keeping a leisurely pace. This is where you shift from wide monument shots into more portrait-style scenes and tighter subject work.
The targets here are visual and practical:
- William Shakespeare statue becomes your anchor for experimenting with viewing angles and composition.
- Charlie Chaplin portrait is a strong subject for testing how your camera handles facial detail and background separation.
This stop is a clean place to learn how to control depth of field. A statue face is a forgiving teacher: if your focus or aperture choice is off, it shows immediately. You’ll also experiment with different camera angles so the result doesn’t look like a default postcard.
There’s a short working break for refreshments during this segment. The key word is working: you pause long enough to catch your breath and then your guide reviews what you’ve captured so far. That feedback is where this tour earns its keep.
If you like feedback sessions that are practical and fast (instead of vague compliments), you’re in the right place.
Chinatown’s gate and side streets: color and creative focus

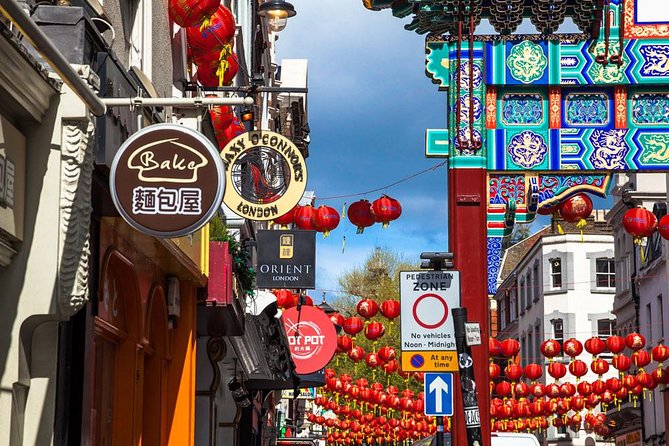
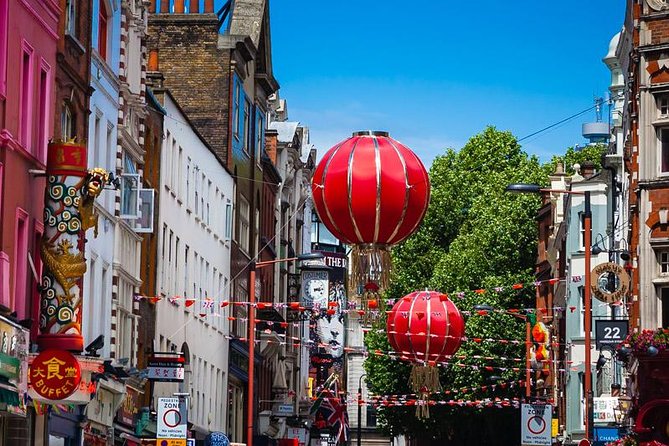
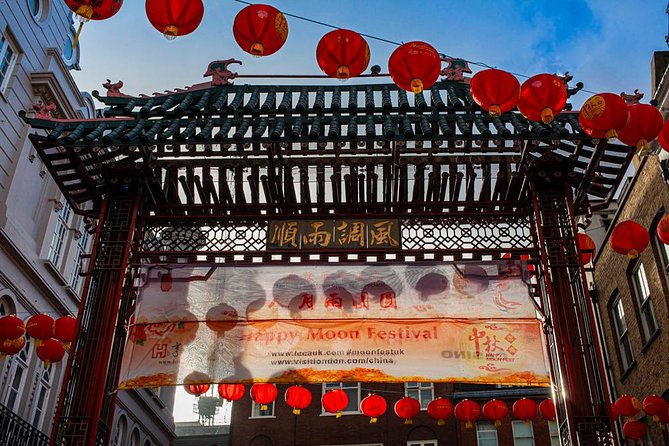
London’s Chinatown is one of the most useful photographic environments on this route because it’s visually busy in a good way. You’ll see a monumental entrance gate, colorful storefronts, lanterns, and all the small details that make street photography feel alive.
Here’s what your guide helps you practice:
- Using color deliberately: rather than letting the scene overwhelm your camera, you learn how to make color part of the composition.
- Depth of field for separation: you’ll work on how to isolate subjects within a crowded background.
- Finding the best viewpoints: you’re guided to angles that give you both wide context shots and tighter detail images.
One of the most helpful parts is that the walk includes small side streets, not just the main drag. That means you can work your way from a big establishing shot into more intimate compositions, like signs, food displays, and colorful textures.
If you enjoy photography where the subject is constantly moving or where the scene has layered details, Chinatown is exactly the kind of stop that keeps your shutter busy without feeling random.
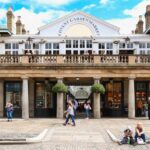
Covent Garden and the Apple Market: shutter speed and focus modes
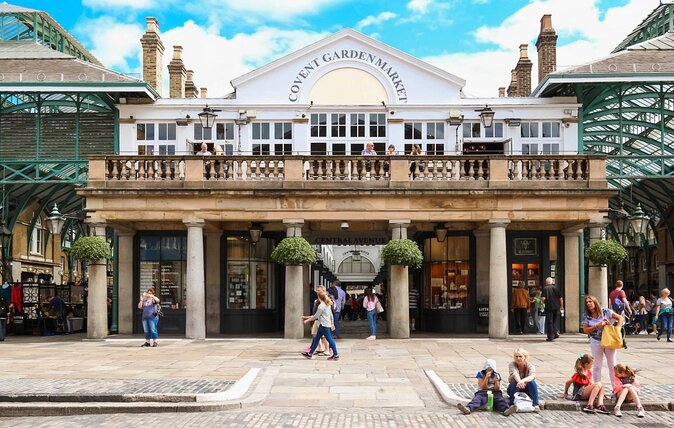
Then comes Covent Garden, with its mix of architecture, market texture, and performance energy. This is a stop where you can actually put your earlier lessons to work because the scene changes quickly: people move, light shifts, and performers create strong action moments.
You’ll spend time around:
- the Royal Opera House area
- Covent Garden Apple Market
- pedestrian piazza spaces with street entertainers
- side streets that give you architectural lines and angles
This is where the tour shifts into more advanced camera behavior:
- Shutter speed: you practice capturing motion from street performers, including the difference between freezing action and creating a sense of movement.
- Focus modes: you learn how your focus setting affects what stays sharp when subjects move.
- Architecture angles: you experiment with vantage points so buildings don’t look flat or like simple snapshots.
Covent Garden’s Apple Market also adds visual variety—artisan stalls, displays, and the layered look of a market environment. You can practice close-to-mid-range compositions while still keeping the broader “Covent Garden” feel in your frame.
Tip: when you’re learning shutter speed and focus modes, don’t try to change everything at once. Pick one setting goal (like motion control), then keep the framing and aperture consistent while you test.
Neal’s Yard courtyards: framing colorful mini-London
Your final photography lesson is at Neal’s Yard, known for its compact, colorful courtyard vibe. This is a satisfying closer because it shifts you from action and busy streets into a calmer scene with strong design elements.
You’ll focus on:
- composition and framing in tight spaces
- colorful wall and storefront details
- creating images that feel like Neal’s Yard rather than just a generic colorful corner
Because the area is smaller than the earlier stops, it’s also a good place to slow down and apply what you’ve learned. If you’ve been juggling technical settings all day, Neal’s Yard gives you a moment to test whether your composition choices are improving—not just your exposure.
Photo review and teaching style: why the feedback matters
One of the biggest strengths of this tour is that instruction doesn’t stop at pointing. During the walk, you get time to look at what you’re capturing and how to improve it.
A working break includes a review of the photos you shot, with comments on what’s working and what you could try differently. That approach turns your camera into a learning tool instead of a device that just records.
In particular, the teaching tends to cover:
- camera setup basics for your specific menus and controls
- composition ideas like positive and negative space (using both subject and empty area to shape the image)
- color use so the scene’s colors become part of the message, not a distraction
- close-up versus wide choices, so you know when to go tight and when to step back
If you’ve ever felt like you own a camera with a lot of settings but you don’t know which ones matter, this kind of review is where things click. You can compare different perspectives of the same subject and learn how small changes create big results.
And yes, the tour is private, so your guide can tailor the pace and advice to your level and the way you like to shoot.
What to expect on the ground: pace, gear, and weather
This is a 4-hour walking tour. The pace is described as leisurely, but you should still plan for continuous movement between stops.
A few practical notes from the tour details:
- You should bring your own camera and a fully charged battery.
- It helps to bring extra memory cards, since you’ll likely take more photos than you planned.
- The tour supports all digital cameras, including smart phones.
- The tour operates in all weather, so wear what you’d wear for London walking in real conditions.
Age is minimum 16, and service animals are allowed. The tour is offered in English, and it’s suitable for all skill levels, which matters because you can join even if you’re starting out.
If you want the best results, come with one or two questions in mind. For example: how do I get sharper faces? how do I stop street motion blur? how do I keep colors from looking too oversaturated? Then your guide can steer your practice.
Who this tour is best for
This tour is a strong fit if:
- you want a structured way to improve photography fast
- you’re visiting London for the first time and want a route that balances landmarks and street scenes
- you like learning from a teacher who gives specific guidance on settings and framing
- you want private time so you’re not sharing attention with strangers
It’s less ideal if:
- you just want a casual walk with photos as a bonus
- you dislike spending part of your day reviewing your images and adjusting technique
- you’re expecting museum-style stops with sitting down indoors for long stretches
Should you book this Trafalgar Square to Covent Garden photo tour?
My take: book it if you want more than photos—you want a repeatable way to get better ones. The route hits multiple photographic “problem types” (wide monuments, portraits, crowded color streets, and action performance), and the instruction connects those challenges to real camera controls like aperture, depth of field, shutter speed, and focus modes.
If you’re on a tight budget, or you’re hoping for a mostly sightseeing tour, look elsewhere. But if you’d like your London trip to teach you how to think like a photographer, this is one of the clearest ways to do it in a single afternoon.
FAQ
Is this tour private or shared?
This is a private tour. Only your group will participate.
How long does the photo walking tour last?
It runs for about 4 hours.
Where does the tour start and end?
It starts at Charing Cross Strand, London WC2N 5HF, UK and ends at Neal’s Yard, London WC2H, UK.
What should I bring?
Bring your own camera (digital camera or smart phone) and a fully charged battery. It also helps to bring extra memory cards.
Is refreshments included?
No. Refreshments are not included (you’ll have a short break where you can buy your own).
What’s the minimum age?
The minimum age is 16.
What language is the tour in?
The tour is offered in English.
What if the weather is bad?
It operates in all weather conditions, so dress appropriately for the conditions.
FAQ
Is there a ticket cost for the main photo stops?
The tour notes Admission Ticket Free for the stops listed.
Can I bring a service animal?
Yes. Service animals are allowed.
What is the cancellation policy?
You can cancel for a full refund if you cancel at least 24 hours in advance.