REVIEW · LONDON
Wildlife Photography Workshop in Richmond Park in London
Book on Viator →Operated by Photography Workshops by Matthew Williams-Ellis · Bookable on Viator
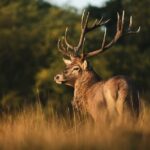
Richmond Park is a rare London escape you can photograph. In about three hours, you’ll learn how to find wildlife subjects, frame shots, and think through your camera settings in real time, with the park’s Red and Fallow deer as your backdrop. The timing matters here: this workshop is built for evening light, when the scene gets soft and wildlife often becomes more active.
I like the hands-on feel of the session. You’re not just staring at theory—you’re working in the field, building composition and a more proactive way of seeing. I also like the small-group setup (up to 8), which makes it easier to get personal guidance, whether you’re starting from scratch or refining what you already know.
One thing to plan carefully: Richmond Park gates can be locked depending on the time of day. If you’re late or you pick the wrong exit route, you can end up stressing over getting out, so build in time and double-check your route ahead of the workshop.
In This Review
- Key highlights at a glance
- Why Richmond Park Is a Smart Place to Learn Wildlife Photography
- The 3-Hour Reality Check: What the Timing Means for Your Photos
- Meeting at Queen’s Road and Navigating the Park Entrance
- Stop 1: Richmond Park Field Tutorials in Front of the Deer
- Composition and the Proactive Eye: What You’re Really Practicing
- Best-Lighting Teaching: Why the Evening Workshop Wins
- Birds, Birds-in-Flight Thinking, and Real-World Wildlife Variety
- Group Size, Guide Style, and Getting Value from the Instruction
- What to Bring (So You Don’t Lose Time)
- Who This Workshop Is For (and Who Should Reconsider)
- Price and Value: Is $161.56 Worth It?
- Should You Book This Wildlife Photography Workshop?
- FAQ
- How long is the workshop?
- Where does the workshop start and end?
- What is the maximum group size?
- Do I need to know photography already?
- What wildlife subjects will we photograph?
- Is it taught in English?
- What if the weather is bad?
- Are service animals allowed?
- What if I cancel?
Key highlights at a glance
- Evening-focused lighting for softer shadows and better-looking wildlife photos
- In-the-field instruction with Red and Fallow deer as your main photo subjects
- Small group size (max 8) for more attention and less waiting around
- Mindset + composition coaching, not just button-pushing
- Subject variety (birds and small wildlife can appear alongside the deer)
- Guide route-finding help so you can reach good spots without wandering
Why Richmond Park Is a Smart Place to Learn Wildlife Photography
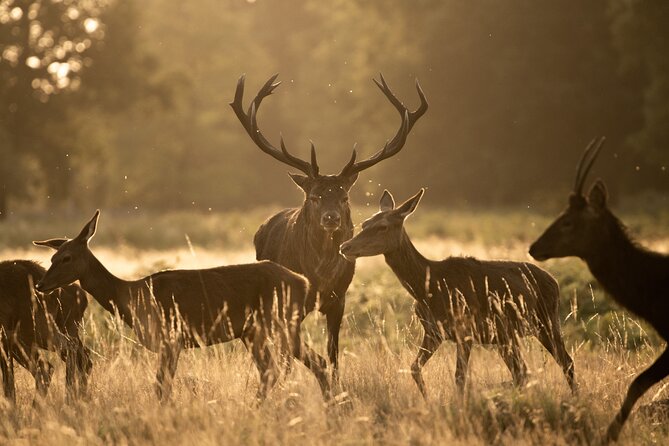
Richmond Park is one of the easiest places in London to practice wildlife photography without the long trip to a remote reserve. You get a genuine natural setting—trees, open areas, lakes, and lots of cover—right in the middle of the city. And because it’s designed for the deer that roam there, it’s also designed for you to observe and photograph what’s around you.
The workshop leans into that advantage. Instead of asking you to guess where to stand, the guide helps you move to strong sightlines and backgrounds, then teaches you how to turn what you see into a usable photo. That matters because wildlife photography has a common trap: you can take hundreds of shots and still feel like nothing looks right. Here, you’ll practice the thinking steps that make photos look intentional—composition, framing, and how to anticipate a moment.
A bonus for London photographers: the park’s variety helps you learn more than one visual style. You might shoot with deer near strong tree shapes like oak and silver birch backgrounds, then shift your attention to birds or smaller wildlife if the moment appears. Even if you don’t get every “perfect” shot, you still leave with a framework you can apply later.
You can also read our reviews of more tours and experiences in London.

The 3-Hour Reality Check: What the Timing Means for Your Photos
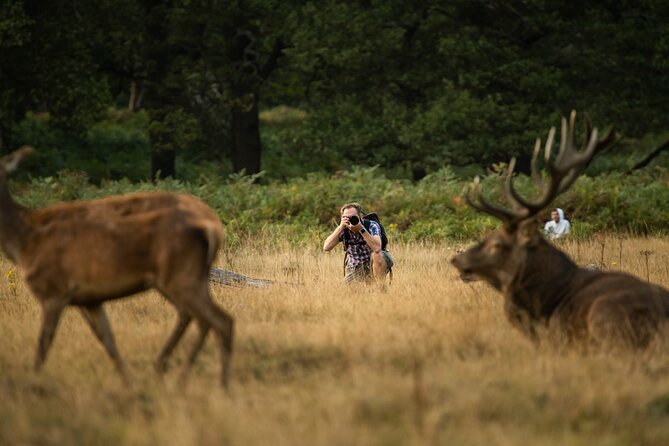
This is a short three-hour session, offered in English, so it’s built to move quickly and keep you shooting. That’s a good thing. With wildlife photography, time is part of the skill. You need enough time to practice adjustments, but you can’t spend too long stuck in one spot.
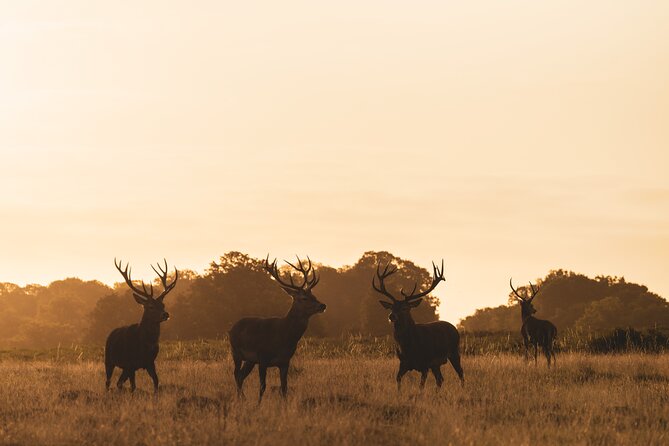
The best part of the timing is that it’s scheduled for the evening workshop window. Lower light can be intimidating if you only know your camera in daylight mode, but it’s also the time that makes wildlife photos look more natural: backgrounds soften, contrast changes, and you often get a cleaner feel to fur, feathers, and texture.
In a short workshop, the goal isn’t to create one “hero” picture and call it done. The goal is to help you leave knowing what to do next time. You’ll learn how to make choices fast: where to place your subject, when to wait, when to change settings, and how to keep your eye on the shot rather than on your camera menu.
Meeting at Queen’s Road and Navigating the Park Entrance
You’ll start at Queen’s Rd, Richmond TW10 6JJ, UK, and the activity ends back at the meeting point. You’ll make your own way to the park entrance to meet the guide, so don’t assume you’ll be picked up or dropped off at a private gate.
This matters for two reasons.
First, it helps you control your arrival time and reduce stress. When you arrive calm, you can focus on finding good positions rather than rushing to catch up.
Second, it connects directly to the biggest practical consideration: gate timing. One attendee described trouble getting out because many gates were locked, even after asking about closure time. You can’t treat that as guaranteed for every day, but it’s a clear signal to plan ahead. Check your route to the meeting point before you start, and give yourself extra margin so you’re not hunting for an open gate at the end.
If you want a simple approach: use the same route you used to enter, unless the guide directs you otherwise.
Stop 1: Richmond Park Field Tutorials in Front of the Deer
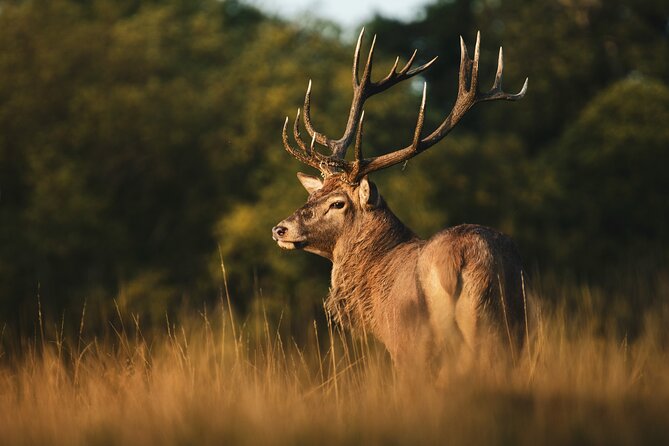
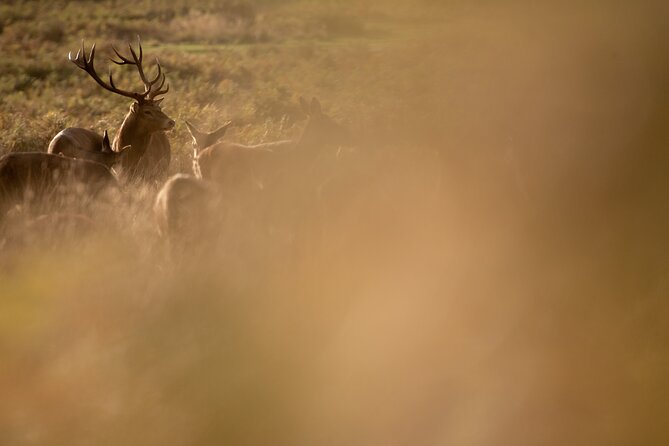
Everything centers on Richmond Park, where Red and Fallow deer roam freely. That sounds straightforward, but it changes the entire teaching method. Deer don’t pose. They move, pause, and disappear behind trees. So you learn how wildlife photography works in real conditions, not in an idealized “photo shoot” setup.
Expect in-the-field tutorials focused on two connected skills:
1) Technical photography basics or upgrades
2) The thought process behind the image
The technical part can be beginner-friendly, and the guide is used to mixed ability groups. That’s important because wildlife settings can feel complicated fast. If you’ve never photographed wildlife before, you might need help figuring out things like exposure and how to handle motion. If you already know basics, you’ll likely want more direction on how to adjust for specific situations.
The thought-process part is the secret sauce. You’ll talk about not just taking photos, but creating them. The guide helps you develop a more proactive mindset: how you position yourself before the animal arrives, how you choose what’s in the background, and how you frame so your subject looks like it belongs in the scene rather than pasted on afterward.
And because Richmond Park has so many visual backdrops—lone oak trees, silver birch copses, ferns, and lakes—you’re practicing composition with real environmental options, not just a blank wall.
Composition and the Proactive Eye: What You’re Really Practicing
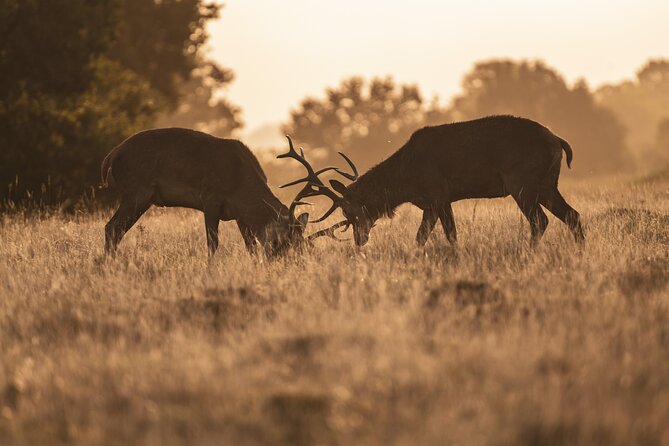
Wildlife photos often fail for one of two reasons: wrong framing, or “reaction mode.” Reaction mode means you wait until the subject shows up and then you scramble—focus, exposure, framing—while the moment passes.
This workshop pushes you toward proactive seeing.
You’ll get coaching on composition, including how to guide your photographic eye. In plain terms, that means you learn how to look beyond the animal itself: what the viewer’s eye should follow, how to create depth with tree lines or water, and how to avoid distractions in the background.
You’ll also practice a more intentional approach to settings. The goal isn’t memorizing a chart. It’s learning the logic behind adjustments so you can respond when conditions change. Evening light changes quickly. Shadows lengthen. The deer’s body angle changes. Birds might flick into view for seconds. If your process is solid, your camera settings become tools, not obstacles.
This is where value shows up for both beginners and intermediate photographers. Beginners get direction on what matters first. More experienced shooters can refine how they decide between options under changing light.
Best-Lighting Teaching: Why the Evening Workshop Wins
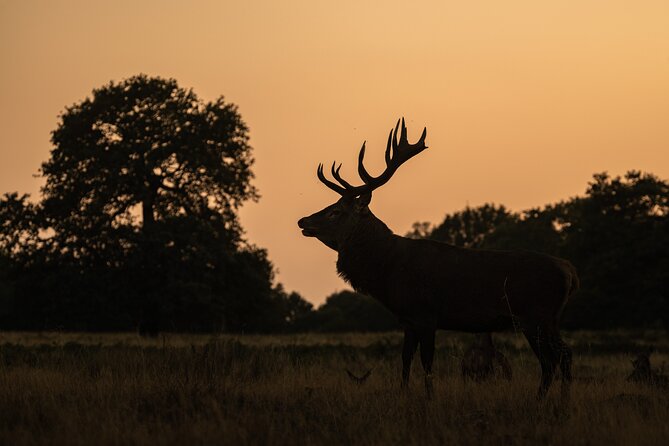
Evening light gets mentioned a lot in photography for a reason: it’s flattering and it builds mood. But it also creates a real challenge—less light means you may need to adjust your settings to keep the subject sharp and properly exposed.
In this workshop, the focus on evening timing isn’t just a scheduling detail. It’s part of the curriculum. You’ll learn how to work with the lighting conditions that match when you’re most likely to want to photograph wildlife in a natural park setting.
A strong evening session helps you learn three practical things:
- How to keep your exposure from going too dark as light drops
- How to think about sharpness when animals move
- How to use softer light to make textures look better—fur, feathers, and leaf detail
And because the session includes people with different experience levels, the guide can help you with the kind of tweaks that actually apply to your camera setup, rather than giving a one-size-fits-all lecture.
Birds, Birds-in-Flight Thinking, and Real-World Wildlife Variety
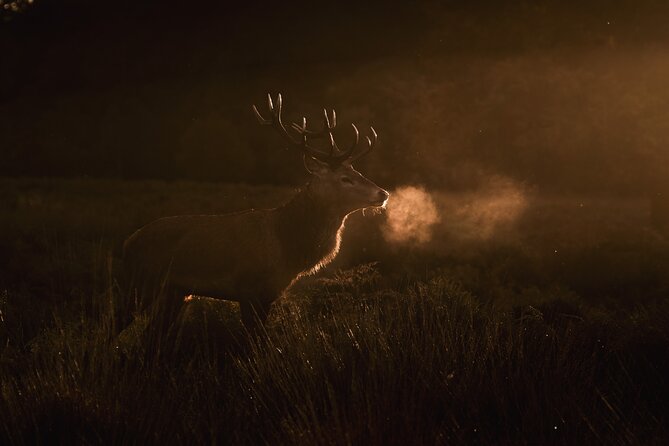
Even though deer are the core subject, Richmond Park can also deliver birds and other small wildlife moments. One attendee specifically mentioned seeing kestrels, woodpeckers, and a little owl.
That matters because wildlife photography becomes much more useful when you’re not stuck with only one type of subject. Birds force you to think about movement and timing, especially when they take off or shift position quickly.
One of the most concrete skill-boosting parts you can expect is help with manual settings for birds in flight. That kind of guidance is a big deal if you’ve only used auto modes for wildlife. Auto can miss the action when things change fast. Learning how to set your camera for motion can turn “nice attempt” photos into frames you’re proud to keep.
You won’t be promised a specific bird every time, of course. But the workshop prepares you to recognize the chance, then respond with a plan.
Group Size, Guide Style, and Getting Value from the Instruction
This workshop caps at 8 travelers, and that small group size is a key part of the value. In wildlife photography, people often cluster at one spot and block each other, or they get stuck waiting while someone else asks a long question. Here, the structure makes it easier for the guide to keep attention on the group and still respond to individual needs.
The instructor is Matthew Williams-Ellis (often referred to as Matt). Across accounts of the session, his teaching style comes through as practical and generous with tips. People liked that he could handle a mix of abilities without making beginners feel lost or making advanced photographers feel bored.
If you’ve ever taken a group class and felt like you were watching from the back row, the small group format is a good sign. It’s the difference between learning vague concepts and getting guidance you can apply immediately—like where to stand for better backgrounds or how to adjust settings for a specific kind of motion.
What to Bring (So You Don’t Lose Time)
The tour info doesn’t list gear requirements, but for a wildlife-focused workshop in evening light, you’ll be happiest if you bring gear you can adjust quickly. At minimum, think about:
- A camera with manual or semi-manual control
- A way to change settings fast (you don’t want to bury your hands in menus)
- Comfortable shoes for uneven park ground
- Layers for cooler evening air
Since the session is short, you’ll want to start focused. Don’t spend the first half hour figuring out your exposure mode. If you can, test basic settings before you arrive so you’re ready for coaching in the field.
Also remember the workshop requires good weather. If conditions are poor, the experience can be canceled and you’ll be offered a different date or a full refund.
Who This Workshop Is For (and Who Should Reconsider)
This is a great fit if you want an easy nature outing from London with real wildlife subjects nearby. It’s also a solid choice if you:
- want to learn photography basics or sharpen skills
- enjoy being outside and walking to good spots
- like structured instruction but still want the freedom to shoot
It’s especially good for people who feel frustrated by wildlife results. If you’re getting blurry shots, unclear subjects, or messy backgrounds, you’ll benefit from the composition and proactive-thinking coaching.
You might reconsider if you dislike walking or being out in the park for a short session with a moderate physical level requirement. You should also plan for gate timing at the end, especially if you hate improvising when you’re already tired and cold.
Price and Value: Is $161.56 Worth It?
At $161.56 per person for about three hours, this isn’t the cheapest way to spend a London evening. But it can be good value because you’re paying for two things that are hard to replicate on your own:
1) Real instruction in real conditions
2) A guide who knows where and how to set up for wildlife chances
You’re also not just getting generic photography tips. The workshop is oriented toward wildlife scenes in Richmond Park, with deer and a park environment designed to provide usable backgrounds. The evening timing and the small group size add further weight to the price. If you’ve ever tried to learn wildlife photography alone in a big park, you know how quickly confusion hits: where to stand, how to frame, what settings to try next.
If you’re hoping to be fully self-taught with no guidance, this might feel pricey. If you want a clear structure and a guide who can correct your approach while you shoot, it often lands as worth it.
Should You Book This Wildlife Photography Workshop?
I’d book it if you want a focused, time-efficient way to improve your wildlife photography in London without a major travel day. You’ll get in-the-field practice, composition coaching, and evening-light teaching that pushes you beyond auto mode habits.
It’s also a good pick if you like learning from someone who can work with mixed skill levels, and you want help thinking through your shots—not just clicking the shutter and hoping.
Just do two things before you go: bring layers and comfortable shoes, and plan your exit route early so the park’s gates don’t turn the end of your workshop into a scramble.
FAQ
How long is the workshop?
It runs for about 3 hours.
Where does the workshop start and end?
It starts at Queen’s Rd, Richmond TW10 6JJ, UK and ends back at the same meeting point.
What is the maximum group size?
The group is limited to up to 8 travelers.
Do I need to know photography already?
No. The workshop is designed for people who want to learn basics or enhance existing skills.
What wildlife subjects will we photograph?
The session takes place in front of the park’s Red and Fallow deer, with opportunities for birds and other wildlife depending on what you encounter.
Is it taught in English?
Yes, the workshop is offered in English.
What if the weather is bad?
The experience requires good weather. If it’s canceled due to poor weather, you’ll be offered a different date or a full refund.
Are service animals allowed?
Yes, service animals are allowed.
What if I cancel?
You can cancel for a full refund up to 24 hours before the experience start time. If you cancel less than 24 hours before, the amount paid is not refunded.