REVIEW · MOAB
Milky Way Photography in Arches National Park
Book on Viator →Operated by Rock Light Photo Tours · Bookable on Viator
You’ll stop guessing and start photographing. In Arches National Park’s dark-sky skies, this Milky Way tour turns night photography into something you can actually do, not just hope for. I love the hands-on DSLR or mirrorless instruction and the fact that you’ll shoot at least two locations inside Arches, so you’re not stuck with just one view.
You’ll also get practical help even if you’re new. In one recent booking, Colin Young sent an instruction sheet ahead of time, so you could get your camera settings rough before you ever head out. The possible drawback: this is a tiny, small-operator style tour (up to 4 people), and one customer had a cancellation tied to guide availability—so you’ll want to stay alert to your messages and timing.
In This Review
- Why this Milky Way tour works (even for beginners)
- Quick highlights you can plan around
- Milky Way photography in Arches: the real point of this night
- The 3.5-hour flow: timing that matches the sky
- What you’ll do at the Arches photo stops (and why two locations help)
- The camera lesson: what you need to bring, and what the guide handles
- Value at $275: where the money is really going
- Who this tour fits best (and who might feel annoyed)
- What’s included vs. what you handle yourself
- Planning tips that make your Milky Way shots better
- Should you book this Milky Way photography tour in Arches?
- FAQ
- What will I learn on the Milky Way photography tour?
- Do I need to bring my own camera?
- What lens should I bring?
- Is a tripod required?
- Can I do this tour with just a smartphone?
- When does the tour start during March through May?
- How many people are in the group?
- Where do we meet, and where does the tour end?
- Is the tour okay for everyone physically?
Why this Milky Way tour works (even for beginners)
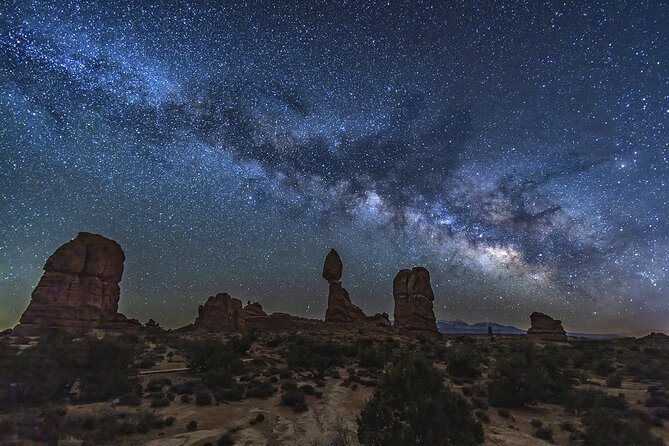
This tour is built around real results: a quick crash course on settings, then time under the stars to put it into practice. I like that it includes the basics you’d otherwise have to hunt down—snacks and water plus guidance on how to capture the Milky Way with your gear.
There’s also room for non-photographers. If you’ve got a late-model iPhone (or you’re simply curious), you’ll still get to see the Milky Way like it’s supposed to look—especially if you normally live under city light. The main consideration is equipment: you’re expected to bring a DSLR/mirrorless that can handle at least 3200 ISO, plus a sturdy tripod.
Quick highlights you can plan around
- Arches dark-sky setting: Dark sky protection means the Milky Way is far easier to see and photograph.
- Two+ night photo stops: You’ll photograph from more than one spot inside the park, not just one turnout.
- Small group size (max 4): More time for personal troubleshooting with your camera.
- Real camera coaching: A crash course on settings for DSLR/mirrorless, focused on capturing the Milky Way.
- Red-light headlamp tip: You’ll be told to bring a light that won’t ruin night vision.
You can also read our reviews of more tours and experiences in Moab.
Milky Way photography in Arches: the real point of this night
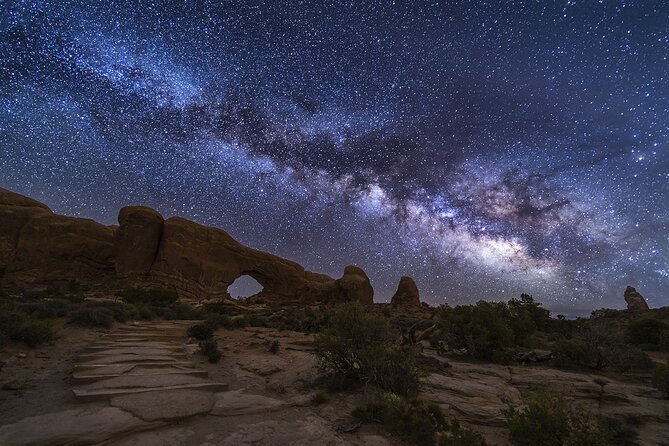
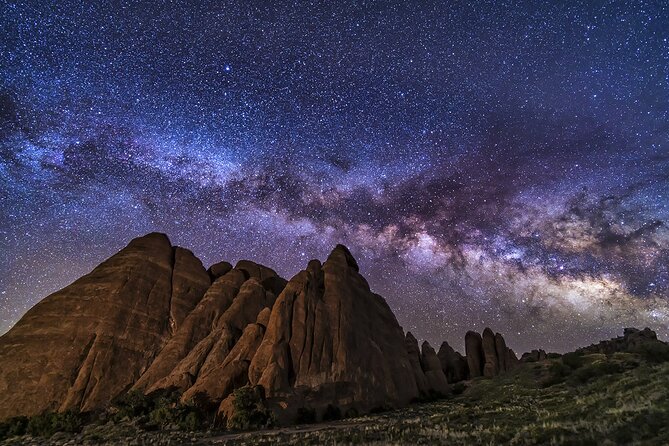
Arches National Park is famous in the day. At night, it becomes something else entirely. The big win here is the location: you’re working in an internationally recognized dark sky park, which means less light pollution and more “visible galaxy” energy than you’ll find near big cities.
What I like about this style of tour is that it treats the night sky like a skill, not a lottery ticket. You don’t just show up and hope your settings are right. You get a crash course first—then you move to at least two spots in the park to test what you learned. That sequence matters. Star photography rewards doing one small thing correctly at a time: set up, adjust, confirm, and try again.
And because this is a small group, the guide can help you faster. If you can’t tell why your first shots look too dim or blurry, you’re not stuck waiting for your turn. That’s the difference between a fun night walk and a night where you actually come home with photos.
The 3.5-hour flow: timing that matches the sky
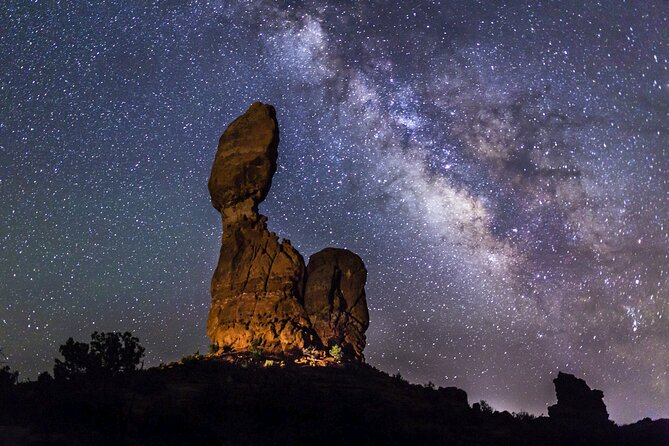
The tour runs about 3 hours 30 minutes, and it keeps things simple: meet in Moab, go into Arches at night, photograph the Milky Way in at least two locations, then return to the start point. The exact start time matters most because of seasonal Milky Way timing.
Here’s the key seasonal note you should plan around: March through May is tricky. During those months, the Milky Way doesn’t really show up until after midnight. So this becomes a late-night experience with a late pickup, and the tour is offered as a standalone tour in that time window.
In the fall, the operator runs a different pattern: you’ll only find the combo sunset + night tour option, not just a pure night shoot. That’s useful because fall evenings often give you a smoother transition from light to dark, letting you build your camera setup step-by-step before the Milky Way is up.
Bottom line: check the month you’re going and be ready for a late schedule in spring. If you’re the type who wants an early dinner and sleep at a normal time, this one may test your patience—but it’s also the reason the Milky Way is worth chasing.
What you’ll do at the Arches photo stops (and why two locations help)
You’ll head into Arches National Park and photograph the Milky Way from at least two locations. Even without knowing the exact viewpoints ahead of time, the strategy is easy to understand: you’re trying to balance a few things at once—darkness, composition, and how the stars line up with the rock shapes.
One of the most practical benefits of multiple stops is that you can compare results. If your first frames are too tight, too wide, or just don’t make the Milky Way look interesting, the next location gives you another chance without giving up the whole night.
You’ll also get composition suggestions. In a positive review, a photographer called out that the guide knew the area well and offered clear ideas for framing. That’s huge for first-timers. When you’re under a sky full of stars, it’s easy to point the camera up and call it done. A good guide pushes you toward including the rocks and arches in a way that feels intentional.
And because this tour is about astrophotography, you’ll likely hear context about what you’re seeing. One customer specifically mentioned explanations that tied in park features and even geology/history-natural details. That kind of talking breaks up the technical focus and makes the night feel more like a guided experience and less like gear fiddling.
The camera lesson: what you need to bring, and what the guide handles
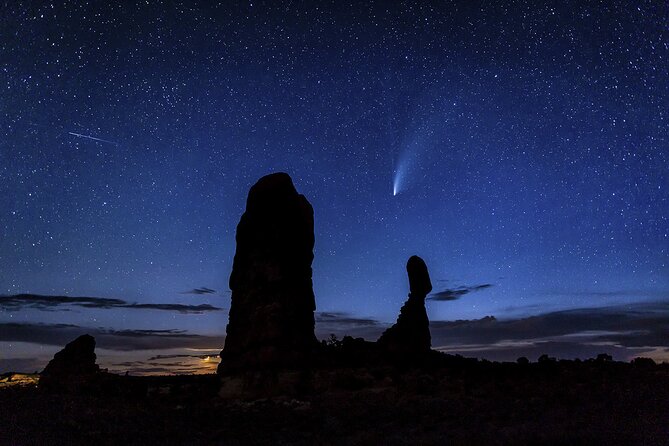
This is a photography tour, but it’s not only for experts. It’s structured as a crash course on how to capture the Milky Way with a DSLR or mirrorless camera. The goal is simple: get you off the random-guess settings and onto something that works.
Your equipment expectations are spelled out, and you should treat them as real requirements:
- Your camera should be capable of shooting at at least 3200 ISO
- Bring a wide-angle lens, ideally a prime or zoom roughly 14mm–35mm on full frame, or 10mm–24mm on a crop sensor
- Your lens should open to at least f/3.5 or lower
- Bring a sturdy tripod (this is non-negotiable for long exposures)
- Bring a headlamp or flashlight, and a red setting is best
If you don’t have a tripod, the operator says they may be able to loan a spare tripod. That’s a helpful safety net, but don’t count on it as your plan A. Night photography relies on stability.
If you only have a cell phone: the tour isn’t excluding you. It specifically notes that late-model iPhones or other advanced cell phone cameras may be able to capture the Milky Way. Even if your phone shots aren’t perfect, you’ll still get the best part—the view itself—without needing to master a whole camera setup.
And if you’re worried about being totally new, take comfort from how the guide teaches. In one review, a beginner said the guide helped with their camera and they came away with great Milky Way images. Another mentioned a friendly, patient approach with plenty of room for questions. That’s what you want when you’re learning in the dark.
Value at $275: where the money is really going
At $275 per person, this isn’t the cheapest way to spend a night in Moab. So you should ask: what am I buying?
You’re paying for three big things:
- Instruction you can use immediately
The tour includes settings guidance for DSLR/mirrorless, which is hard to replicate if you just rely on internet tutorials while standing outside in the dark.
- Dark-sky time with a plan
Arches is dark on purpose. Access plus timing—especially during spring when the Milky Way only arrives after midnight—has real value. This isn’t just “walk outside and look.”
- Small group attention (max 4)
With only a handful of people, the guide can help you troubleshoot your setup instead of giving generic advice to the whole group.
You also get practical extras: snacks (with gluten-free options) and bottled water, with ice water provided to refill your reusable bottle. Those small comforts matter when you’re out late and trying to keep focus. It’s one less thing you have to think about.
If you’re a first-timer, $275 can still feel like a lot—but compare it to the cost of renting gear, buying “mystery settings” software, and then spending hours guessing without a coach. A focused night with a mentor often saves you time, frustration, and missed shots.
Who this tour fits best (and who might feel annoyed)
This tour is a strong match if you want:
- A guided night photography experience (not just a viewpoint)
- Hands-on help learning Milky Way settings
- A chance to photograph from more than one location inside Arches
- A small group atmosphere where questions are welcomed
It’s also great for couples or friends who want to see the sky clearly and who don’t mind a late start in certain seasons.
Two caution notes:
- Moderate physical fitness level is required.
This isn’t pitched as an extreme hike, but you should expect a night outdoors with some walking.
- Not recommended for poor night vision.
If you struggle at night without good visibility, this may feel stressful instead of fun. The tour is in darkness by design.
Also, because this is a small operator with limited group size, it’s smart to keep your expectations grounded. One cancellation issue was raised by a customer—tied to guide availability and a calendar mix-up. That doesn’t mean every booking will have problems, but it does mean you should check your confirmations and plan your itinerary with a little flexibility.
What’s included vs. what you handle yourself
Here’s the practical breakdown you’ll care about before you go.
Included:
- Snacks (with gluten-free options)
- Water: the guide provides a cooler of ice water to refill reusable bottles
- Instruction on capturing the Milky Way with your DSLR or mirrorless camera
Not included:
- Cameras (you bring your own device)
- Tripod isn’t guaranteed, though the guide may loan a spare if you don’t have one
What you should bring:
- DSLR or mirrorless camera, and it must handle ISO 3200
- Wide-angle lens sized for your sensor type and able to open to f/3.5 or lower
- A tripod
- Headlamp/flashlight with a red setting if possible
- If you’re using a phone, bring a late-model iPhone or advanced phone camera
You’ll also see that the tour offers pickup and uses a mobile ticket. That’s helpful, especially for a late-night schedule when you don’t want to stress about parking.
Planning tips that make your Milky Way shots better
You can get better results even before you arrive, and the tour gives enough structure to make that worth it.
First, get your camera ready ahead of time. In at least one case, Colin Young sent an instruction sheet before the tour so a photographer could set up before night. If you can do anything similar for yourself, do it: confirm your lens, set up your tripod, and make sure you know how to switch into manual modes quickly.
Second, commit to the tripod. You’re doing longer exposures, and handholding will fight you. A sturdy tripod also helps with composing at different stops—so you can compare results and adjust framing calmly.
Third, use night-friendly lighting. Bring a headlamp or flashlight with red mode. It makes everything easier for your eyes, and it keeps the atmosphere comfortable for the group.
Finally, be ready to adjust. The sky won’t care if your first settings aren’t perfect. This tour’s value is that you’ll learn, test, and refine as you move between Arches photo locations.
Should you book this Milky Way photography tour in Arches?
Book it if you want a guided Milky Way night with real teaching, small-group attention, and multiple photo stops in a dark-sky park. The $275 price makes sense if you’re serious about getting photos and you don’t want to waste your trip time guessing settings in the dark.
Consider skipping (or switching to a different style of experience) if:
- You have poor night vision or you hate being outdoors after midnight
- You don’t have the required camera capability or you can’t bring a tripod
- You need an ultra-flexible schedule, since small operators run with limited headcount and a few things can change
If you do book, plan around the season. March–May means late-night timing. Fall might mean a sunset + night combo. Get your gear ready, show up on time, and treat the first test shots as practice—you’re building confidence while the sky is actually cooperating.
FAQ
What will I learn on the Milky Way photography tour?
You’ll get instruction on how to capture the Milky Way using your DSLR or mirrorless camera, including a crash course on the best camera settings to use.
Do I need to bring my own camera?
Yes. The tour does not provide cameras. The tour notes that you should bring your own DSLR or mirrorless camera capable of at least 3200 ISO.
What lens should I bring?
You’ll get the best results with a wide-angle lens. The tour suggests roughly 14mm–35mm on full frame, or 10mm–24mm on a crop sensor, and a lens that opens up to at least f/3.5.
Is a tripod required?
A sturdy tripod is required for this experience. The operator says they may be able to loan a spare tripod if you don’t have one.
Can I do this tour with just a smartphone?
Yes, non-camera members can still enjoy the tour. The tour specifically notes that late-model iPhones or other advanced phone cameras may be able to capture the Milky Way.
When does the tour start during March through May?
During March through May, the Milky Way does not appear until after midnight, so this tour starts with a late night pickup.
How many people are in the group?
The tour has a maximum of 4 travelers.
Where do we meet, and where does the tour end?
The meeting point is the Moab Information Center at 25 E Center St, Moab, UT 84532, USA. The tour ends back at the same meeting point.
Is the tour okay for everyone physically?
The tour recommends a moderate physical fitness level. It is also noted that it is not recommended for travelers with poor night vision.