REVIEW · LONDON
History of London Photography Tour
Book on Viator →Operated by Westland Place Studios · Bookable on Viator
London turns into a photo set fast. This walking London photography tour takes you through the City’s working-street feel and landmark scale, with a professional photographer guide helping you frame shots instead of just sightseeing.
I especially like the way it pairs composition and lighting tips with real London locations you can actually point your camera at. I also like that it ends with Tate Modern, so you finish with dramatic modern architecture after the older, stone-and-steel City vibe. One thing to consider: you’ll get the most from it if you can shoot right away, since you need a camera or camera phone.
Key points I’d focus on before booking
- Professional-led, not just a sightseeing walk: you get photo advice as you go, not a lecture before you start.
- Short stops, strong outcomes: each location is timed so you can experiment with angles quickly.
- City landmarks + backstreets energy: the route mixes major buildings with the kind of views that feel off the main tourist route.
- Free entry at every stop: the schedule is built around easy access while you concentrate on photography.
- Small group size: up to 18 people, which makes it easier to get individual help.
- Built for different ability levels: the pace and guidance work whether you use auto mode or want more control.
In This Review
- A London Photo Walk That Teaches You How to See
- Price and Value: Why $71.63 Can Make Sense
- What You Really Get in 2 Hours (and What You Don’t)
- How to Prepare: Bring the Right Gear and Use the Time
- City of London to Tate Modern: Photo Targets and What Each Stop Teaches
- Stop 1: St. Mary Woolnoth Church (City roots, old stone, and Roman traces)
- Stop 2: Royal Exchange Building London (Institutional lines and classic grandeur)
- Stop 3: Bank of England (Massive architecture, best-angle practice)
- Stop 4: Guildhall (Gothic drama in a tight timeframe)
- Stop 5: St. Mary Le Bow Church (Iconic church + local London folklore)
- Stop 6: St. Paul’s Cathedral (Big storytelling building with a guide’s help)
- Stop 7: National Firefighters Memorial (A dramatic statue moment)
- Stop 8: Millennium Bridge (Line work and bridge rhythm)
- Stop 9: Tower Bridge (Panoramic payoff)
- Stop 10: Tate Modern (Industrial roots + modern art big finish)
- Group Size, Pace, and Getting Help Without Feeling Lost
- Weather, Timing, and Why “Good Conditions” Matter for Photos
- Who This Tour Fits Best
- Should You Book This London Photography Tour?
- FAQ
- How long is the London Photography Tour?
- How much does the tour cost?
- What’s included in the tour price?
- Do I need to bring a camera?
- Where does the tour start and end?
- Is there an admission fee for the stops?
- What are the age requirements?
- What happens if the weather is bad?
A London Photo Walk That Teaches You How to See
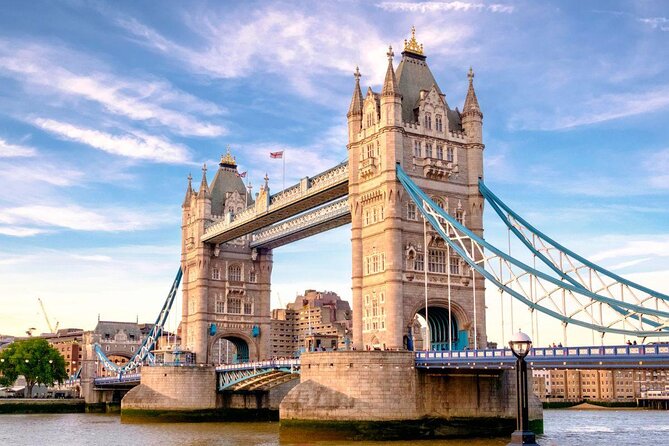
This is the kind of tour that makes you stop taking the same safe angles. You’re walking through London’s financial district and historic church cluster, then pushing onward to the river views and Tate Modern. The win isn’t just the skyline. It’s that a working photographer shows you how to shape what you see—how to stand, where to look, and what to change in your frame.
The route has a clever flow. You start with smaller, older religious architecture in the City, then move into the heavier hitters—Bank of England, Guildhall, and St Paul’s. After that, you get monuments tied to London’s 20th-century survival, plus classic bridges and river panoramas, ending with a modern art giant that still carries the weight of industrial London.
I’d call it practical sightseeing with camera homework. And the homework is doable because the stops are short and free to enter.
Price and Value: Why $71.63 Can Make Sense
At about $71.63 per person for roughly 2 hours, this isn’t a full-day budget killer, but it also isn’t the cheapest way to wander London. So here’s the value math you should do.
You’re paying for three things that matter:
- A pro guide who can correct your framing in the moment
- Photo opportunities at major locations without having to figure out where to stand alone
- Technical help focused on composition and lighting
If you’ve ever taken a dozen photos and thought, Why do they all look flat? this format helps. The tour is short enough that you stay engaged, but long enough to practice. And since the entrance tickets listed are free for each stop, you’re not getting surprised by extra costs once you arrive.
You can also read our reviews of more tours and experiences in London.


What You Really Get in 2 Hours (and What You Don’t)
You get a guided photography walk with photo advice and historical context tied to the spots you’re shooting. The emphasis is on making your images better—settings, angles, and lighting—while you move from one subject to the next.
You do not get:
- A camera rental (you’ll need to bring one)
- Long time at each location for elaborate setups
- A private, one-on-one experience (you’re capped at 18)
So go in with the right expectations. Think: quick experiments, guide feedback, and a handful of strong keepers at the end. That lines up with how the schedule is built.
How to Prepare: Bring the Right Gear and Use the Time
The tour specifically notes you should bring a camera or camera phone. That’s not just a formality. The whole experience depends on you being able to shoot while the guide points out what to try.
Here’s what I’d do the day before:
- Make sure your camera (or phone) is charged and ready to shoot immediately.
- If you use an SLR or mirrorless, confirm you know how to change basic settings even if you keep it simple at first.
- If you’re using auto, that’s fine. The guidance is meant to help you experiment and refresh your approach.
Also, dress for standing and walking. A lot of the “best shot” moments are based on where you can physically position yourself.
And one more practical note: the tour requires good weather. If it’s canceled for poor weather, you’ll be offered a different date or a full refund.
City of London to Tate Modern: Photo Targets and What Each Stop Teaches
This route is basically a photo syllabus disguised as a walk. Each stop gives you a different subject type—stone church detail, institutional grandeur, bridge lines, and modern architecture.
Stop 1: St. Mary Woolnoth Church (City roots, old stone, and Roman traces)
You start at St. Mary Woolnoth Church on Lombard Street, in the heart of the City of London. The site has been used for worship for at least 2,000 years, and traces of Roman and pagan religious buildings were found under the current foundations. The church was rebuilt in 1727, commissioned from Nicholas Hawksmoor.
Photo angle idea: photograph it like a subject, not a background. Look for symmetry, street-level perspectives, and detail shots that show age and texture without needing a wide view.
This stop is only about 10 minutes, so expect quick framing decisions and a few test shots.

Stop 2: Royal Exchange Building London (Institutional lines and classic grandeur)
Next up is the Royal Exchange building. This is one of those London landmarks where the architecture rewards clean composition: straight edges, repeating shapes, and a sense of order.
Photo angle idea: try looking up for vertical structure, then step back for a more formal wide frame. The guide helps you find angles that make the building feel solid and not flat.
Ten minutes here is short, so the goal is to get one “good one” fast.
Stop 3: Bank of England (Massive architecture, best-angle practice)
Then you hit the Bank of England, a building packed with history and architecture that’s made for serious photography. The guide helps you find angles that work with the space around it.
Photo angle idea: focus on how light hits the stone and metal surfaces. Even when the weather is gloomy, you can still get strong contrast if you frame deliberately.
This is 15 minutes, which gives you a bit more time to try the building from multiple positions.
Stop 4: Guildhall (Gothic drama in a tight timeframe)
At Guildhall, you get Gothic splendour from an approximately 800-year-old building. This is the kind of architecture that can look either impressive or messy depending on how you shoot it.
Photo angle idea: isolate a section—arches, carvings, or vertical spans—then shoot again from slightly different levels to control how cluttered the background becomes.
You have 15 minutes at this stop, so take at least one close-up and one wider “whole structure” shot.
Stop 5: St. Mary Le Bow Church (Iconic church + local London folklore)
St Mary Le Bow Church brings in a classic London tradition: true Cockneys, according to tradition, must be born within earshot of the church bells. That folklore adds color, but your camera work is what turns it into an image.
Photo angle idea: capture the church in a way that shows it belonging to street-level London. Don’t over-tighten—let the environment hint at the neighborhood context.
This stop is 10 minutes.
Stop 6: St. Paul’s Cathedral (Big storytelling building with a guide’s help)
The tour spotlights St. Paul’s Cathedral, which has witnessed major events like:
- the marriage of Catherine of Aragon to Prince Arthur in 1501
- a visit by Queen Elizabeth I after the Spanish Armada defeat in 1588
- Guy Fawkes and his co-conspirators being hung, drawn and quartered for plotting to assassinate James I by blowing up Parliament
This is your major centerpiece. You’re given 20 minutes, which is a lot more than earlier stops, and that extra time matters here because St Paul’s is big. It can be hard to frame it well without trying a few positions.
Photo angle idea: use the guide to figure out where to stand so the cathedral feels tall and intentional. Don’t rely only on wide shots—try also for lines and partial details that make the image feel composed.
Stop 7: National Firefighters Memorial (A dramatic statue moment)
You then shift tone at the National Firefighters Memorial, made by sculptor John Mills. It commemorates people who helped London survive the Blitz, including male and female firefighters—the heroes with grimy faces, a phrase attributed to Winston Churchill.
This is where the tour leans into dramatic photography. The memorial is set among London’s iconic landmarks, so you can play with contrast between stone, sky, and surrounding architecture.
Photo angle idea: shoot from a low-to-mid viewpoint to give the statue presence. If you can, time your shots so the background doesn’t swallow the subject.
Ten minutes here.
Stop 8: Millennium Bridge (Line work and bridge rhythm)
Next is the Millennium Bridge, the 325m-long London Millennium Footbridge opened on June 10th, 2000. It links Tate Modern, the City of London, and St Paul’s Cathedral.
This is pure geometry and leading lines. The bridge is also a great place to practice clean horizon control and consistent framing while you move.
Photo angle idea: line up the bridge spans to point toward a landmark. Try a shot where the bridge acts like a frame, then one where it becomes the main subject.
Ten minutes.
Stop 9: Tower Bridge (Panoramic payoff)
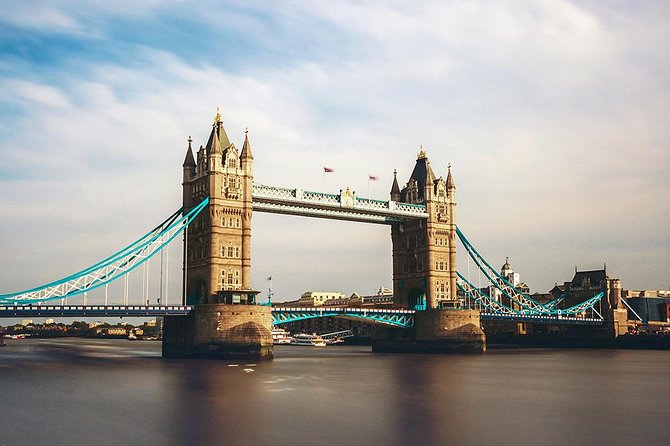
You get panoramic views of the River Thames and Tower Bridge. This is a classic photo subject, but the value here is getting help with where to stand so you don’t end up with a busy, low-impact shot.
Photo angle idea: shoot one wide view for context, then a tighter frame that emphasizes the bridge structure over river clutter.
Ten minutes.
Stop 10: Tate Modern (Industrial roots + modern art big finish)
The tour ends at Tate Modern. You’ll shoot the imposing brick building that dominates the South Bank. Tate Modern sits in the former Bankside Power Station, originally designed by Sir Giles Gilbert Scott—the same architect behind Battersea Power Station. It’s Britain’s national gallery of international modern art, making the building itself a fitting end to a photography-focused walk.
This ending matters because it gives you a modern subject after older stone and memorials. If your earlier photos lean historic, your Tate shots can shift the tone toward industrial architecture and bold form.
Ten minutes to wrap up.
Group Size, Pace, and Getting Help Without Feeling Lost
The tour caps at 18 travelers, which is a big deal for a photography walk. It’s not a tiny group, but it’s small enough that a guide can notice if someone’s always shooting too high, too far, or with settings that don’t match the light.
From real experiences with this kind of guided format, the best result is when you treat it like a practice session. Show the guide your camera, ask what to try next, and don’t worry if you’re not already confident with settings. When the leader is Richard, the tone tends to be friendly and hands-on—helping people who weren’t fully up to speed and encouraging them to experiment before continuing the walk.
Even if you shoot with auto, you can still get better quickly when someone tells you what to change and why.
Weather, Timing, and Why “Good Conditions” Matter for Photos
This experience requires good weather. That doesn’t just mean you’ll be more comfortable outdoors—it affects the quality of light and the clarity of distant views, especially for:
- bridge and river panoramas
- wide cathedral frames
- contrast-heavy stone and memorial photography
If skies are grey, you can still shoot, but you’ll need better framing to keep images from looking flat. The tour’s structure is designed to give you several chances at strong subjects in one sitting, so weather matters enough that the provider plans cancellations or date changes when conditions are poor.
Who This Tour Fits Best
This works well for:
- first-time London visitors who want more than the usual postcard angles
- London locals who want to see familiar landmarks from different viewpoints
- people who are new to photography but want practical direction rather than theory
- photographers who feel rusty and want to refresh their habits fast
It’s also a good fit for a range of camera abilities because the approach is supportive and focused on getting you shooting.
Minimum age is 18, and children must be accompanied by an adult who has paid tickets.
Should You Book This London Photography Tour?
If you want a 2-hour walking route that helps you build a small, personal set of London images with real photo guidance, this is a solid buy. The key reason is simple: you’re not left alone with a checklist of sights. You get photo advice while you’re standing in front of the subject.
I’d pass or think twice if:
- you hate moving quickly between locations
- you want a long, slow session to set up elaborate shots
- you don’t plan to bring any camera or phone at all
If you bring your gear and you’re willing to try the next angle the guide suggests, you’ll leave with photos that feel more intentional than accidental.
FAQ
How long is the London Photography Tour?
It’s approximately 2 hours.
How much does the tour cost?
The price is $71.63 per person.
What’s included in the tour price?
You get a guided photography tour led by a professional photographer, plus photo opportunities, professional photography advice, and historical facts.
Do I need to bring a camera?
Yes. You’ll need a camera or a camera phone to get the most out of the tour.
Where does the tour start and end?
It starts at IMPRINT Church London: St Mary Woolnoth, 10-13 Lombard St, London EC3V 9AN and ends at Tate Modern, Bankside, London SE1 9TG.
Is there an admission fee for the stops?
The schedule lists free admission tickets at each stop.
What are the age requirements?
The minimum age is 18. Children must be accompanied by an adult, and both must have paid tickets.
What happens if the weather is bad?
The tour requires good weather. If it’s canceled due to poor weather, you’ll be offered a different date or a full refund.