REVIEW · LONDON
Discover Photography
Book on Viator →Operated by Westland Place Studios · Bookable on Viator
Manual mode becomes friendly in 2.5 hours.
This London course is built for people who want better photos fast, with an instructor-led approach you can actually apply the same day. I like the small group size (max 12) and the fact the teaching I’ve seen discussed includes instructors such as Vehbi Koca and Pierre, who focus on explaining the settings in plain language.
I especially like how the class turns intimidating camera controls into something you can test yourself—so aperture and shutter speed stop being abstract numbers. You work through the relationship between exposure settings and then use a practical exercise to see the results right away, not just read about them.
One drawback to consider: you’ll get the most out of it only if you bring a DSLR or compact digital camera with manual settings. If you rely on a phone-only setup, you may feel slightly out of your depth.
In This Review
- Key things to know before you go
- Why this 2.5-hour photography lesson beats trial-and-error
- Getting set up at Westland Place Studios (and what to bring)
- The exposure triangle: aperture, shutter speed, and ISO in plain language
- Aperture and shutter speed practice you can repeat on your own
- Lenses, focal length, and perspective you’ll recognize immediately in London
- White balance and colour temperature: stop guessing why the sky looks wrong
- Semi-automatic vs manual modes: when to use each
- Small-group coaching: what good instruction looks like
- Price and camera requirements: is $95.80 good value?
- Who should book Discover Photography (and who might not)
- Should you book this photography course?
- FAQ
- How long is the Discover Photography course in London?
- What does the class cost?
- What is the group size?
- Where is the meeting point?
- What camera do I need?
- Does the course teach manual settings?
- Will I learn about white balance and colour temperature?
- Is there a hands-on exercise?
- Is there a minimum age?
- What is the cancellation policy?
Key things to know before you go
- Max 12 students: You’ll get real help while you experiment, not just a lecture.
- Manual camera training: You’ll practice switching between auto, semi-automatic, and manual modes.
- Aperture and shutter speed, connected: You learn how they work together to change your image.
- White balance and colour temperature: Your photos start matching what you remember seeing.
- Lenses and perspective: Focal length, angle of view, and perspective are explained in usable terms.
- Depth of field practice: You’ll learn what to change when you want more sharpness (or more blur).
Why this 2.5-hour photography lesson beats trial-and-error
If you’ve ever taken a great-looking travel scene… then gone back home and wondered why your photo looks dull, blurry, or oddly colored, this kind of class fixes that. Discover Photography is short enough to fit into a London plan, but it’s structured like a skill-building session. You’re not just learning what buttons do—you’re learning what to change when the light shifts and your subject moves.
The best part is that the fundamentals are taught as relationships. Instead of treating aperture, shutter speed, ISO, and focus like separate topics, you learn how they combine to create one outcome: a properly exposed image with the look you want. That matters because your next photo problem won’t ask you, what’s ISO? It’ll ask, why is this shot too dark, too soft, or the wrong color?
Also, the small-group format makes a difference. When there are no more than 12 people, you can ask questions and actually get feedback while you still remember what you just tried.
You can also read our reviews of more tours and experiences in London.


Getting set up at Westland Place Studios (and what to bring)
The course meets at Westland Place Studios3, 11 Westland Pl, London N1 7LP. It ends back at the meeting point, so you’re not spending your day guessing transport or adding extra logistics.
Plan to arrive with a camera you can control manually. The course is designed for a DSLR or a compact digital camera with manual settings. That’s important because a big chunk of the session focuses on dialing in your own exposure and then seeing how the photo changes when you adjust aperture and shutter speed.
If your camera is older or you only know auto mode, don’t panic. The instruction is geared toward beginners, and instructors are there to help you operate your camera in semi-automatic and manual modes. Still, bring the hardware that can actually follow your choices.
One practical note: you’ll have a mobile ticket, which makes check-in straightforward, but it also means you should make sure your phone battery is healthy before you head out.
The exposure triangle: aperture, shutter speed, and ISO in plain language
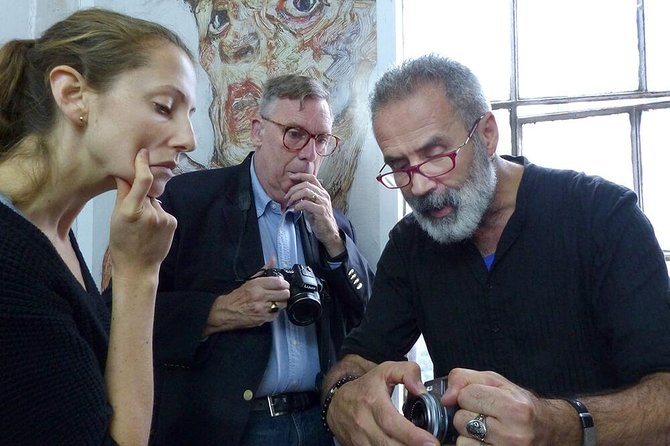
This class is at its strongest when it explains exposure as cause and effect. You learn how to set the correct exposure and how the three big controls interact:
- Aperture affects depth of field (how much is sharp from near to far) and also influences how much light reaches your sensor.
- Shutter speed affects motion blur and the brightness of the image.
- ISO adjusts the camera’s sensitivity, helping you cope when light levels drop.
The course doesn’t treat ISO as a last resort. You learn how exposure works so you can make intentional choices. That’s the difference between getting lucky with one photo and getting consistent results across a whole trip.
A huge win here is the focus on the relationship between aperture and shutter speed. When you understand how changing one affects the other, you can make creative tradeoffs instead of feeling trapped by your camera settings.
Aperture and shutter speed practice you can repeat on your own
You’re not just shown a couple of diagrams and sent on your way. There’s a practical exercise built around exploring the effects of aperture and shutter speed. The idea is simple: use the same scene or a controlled subject setup, then intentionally change one setting at a time and notice what changes in your results.
This is how your brain finally “gets it.” You stop thinking, what does f-stop mean, and you start thinking, this looks too blurry, so I need more depth of field, which likely means changing aperture. Or, the subject is moving, so I need a faster shutter to reduce blur.
Depth of field is part of that same learning loop. The session includes instruction on how depth of field works and how to use it for different creative effects. In travel terms, that can mean the difference between:
- a background that steals attention from your subject, and
- a background that falls softly away while your main detail stays crisp.
Lenses, focal length, and perspective you’ll recognize immediately in London
Even if your camera is a point-and-shoot or a DSLR with a fixed lens range, the concepts here matter. You cover lenses and how focal length shapes what you see.
You’ll learn about:
- Focal length and what it does to the image
- Angle of view (how much fits in the frame)
- Perspective (how distances feel in the photo)
Here’s the travel value: once you understand perspective, you stop accidentally turning your favorite street scene into a warped mess. You also learn how to frame big London backdrops in a way that feels natural, not stretched. This helps especially when you’re shooting people in front of architecture, or when you’re standing close to buildings and want them to look convincing.
Composition is also included, which matters because manual settings alone can’t save a photo with messy framing. You learn how to think about what should be in the shot and where the visual weight goes.

White balance and colour temperature: stop guessing why the sky looks wrong
London light can be tricky. Even when the scene looks great to your eyes, a camera can render colors too warm, too cool, or just off.
This course includes colour temperature and white balance. That means you learn how to correct the color cast instead of only adjusting exposure. Once you understand white balance, you can make a photo look like what you remember seeing—rather than accepting whatever the camera decided.
In practical terms, this helps with:
- buildings that start looking strange in mixed light,
- portraits where skin tones shift unnaturally, and
- night scenes where the camera can struggle with light sources.
If you’ve ever wondered why two photos taken minutes apart look like they were shot in different seasons, white balance is often the reason.
Semi-automatic vs manual modes: when to use each
A beginner trap is treating manual mode as a religion. You don’t need that. The course helps you understand when to use semi-automatic modes and when to switch fully to manual.
You’ll learn how to operate the camera in semi-automatic and manual modes, which is a big deal because it makes your camera feel flexible. Semi-auto can help when light changes quickly, while manual can give you control when you’re working with consistent conditions.
By learning the differences, you’ll start making choices based on the situation rather than defaulting to whatever your camera usually does. That alone can improve your photos within the first day of practicing.
Small-group coaching: what good instruction looks like
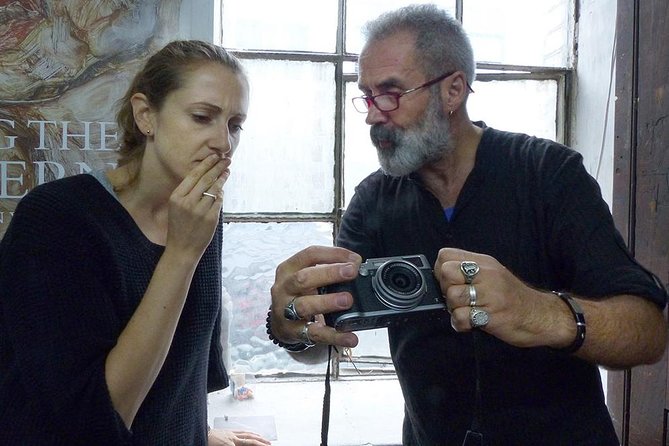
One of the standout themes from the teaching style is how willing the instructors are to help you experiment. In the feedback I’ve seen, tutors like Vehbi Koca and Pierre are described as supportive and able to explain settings simply, with answers to specific questions and a focus on hands-on learning.
In a class with up to 12 people, you can get that kind of attention without feeling like you’re asking questions at the wrong time. If you’re stuck on where to find a setting, or you’re unsure why your exposure keeps changing, you’re far more likely to get a clear fix while you’re still at the moment of trying.
This is also why the small-group format is valuable for beginners. Photography is technical, but it’s also emotional. When you’re not feeling frustrated, you learn faster.
Price and camera requirements: is $95.80 good value?
At $95.80 per person for about 2 hours 30 minutes, the value depends on one thing: whether you’ll use the skills immediately.
If you’re the kind of traveler who keeps buying camera gear or changing settings without understanding what’s happening, this is a practical investment. You’re paying for instruction plus real practice, not just information. With manual settings, that hands-on part is where the money turns into better photos.
You’ll get the most out of it if you bring a DSLR or a compact digital camera that supports manual settings. If you don’t have that, you may feel limited during the manual portion of the course. One of the reviews I saw referenced an iPhone session, but the course materials emphasize manual camera control—so don’t count on phone-only learning.
Finally, the time matters. Two and a half hours is long enough to teach concepts and run a practical exercise, yet short enough that you can still enjoy the rest of your London day without feeling stuck indoors.
Who should book Discover Photography (and who might not)
This course is a great fit if:
- you want better photos but don’t understand aperture, shutter speed, and ISO,
- you have a DSLR or compact digital camera with manual settings,
- you’d like a structured class instead of scattered online tutorials,
- you enjoy learning by testing settings and seeing the results.
It may be less ideal if:
- your camera can’t do manual settings,
- you want a purely street-walk sightseeing experience with no focus on controls,
- you’re only interested in phone photography and don’t want to apply anything to a camera.
If you’re unsure, the biggest decision point is your camera. The course is built around using manual controls and making deliberate creative choices.
Should you book this photography course?
Yes, if you want a beginner-friendly way to understand your camera instead of just using auto mode and hoping for the best. The small group coaching, the focus on the aperture and shutter speed relationship, and the included practical exercise make this one of the more effective “learn it fast” options.
But book it with the right expectations: bring a camera that can do manual settings, and be ready to experiment. If you do that, you’ll leave with a toolkit for taking more consistent photos across changing London light—plus the confidence to adjust settings without panic.
FAQ
How long is the Discover Photography course in London?
It runs for about 2 hours 30 minutes.
What does the class cost?
The price is $95.80 per person.
What is the group size?
The course is limited to a maximum of 12 travelers.
Where is the meeting point?
The meeting point is Westland Place Studios3, 11 Westland Pl, London N1 7LP, UK.
What camera do I need?
You’ll need a DSLR camera or a compact digital camera with manual settings to get the most out of the course.
Does the course teach manual settings?
Yes. You’ll learn how to use your camera’s manual settings, and you’ll also cover semi-automatic modes.
Will I learn about white balance and colour temperature?
Yes. Colour temperature and white balance are included.
Is there a hands-on exercise?
Yes. There’s a practical exercise exploring the effects of aperture and shutter speed.
Is there a minimum age?
The minimum age is 18. Children must be accompanied by an adult, and both must have paid tickets.
What is the cancellation policy?
This experience is non-refundable and cannot be changed for any reason. If it’s canceled because the minimum number of travelers isn’t met, you’ll be offered a different date or a full refund.