REVIEW · NEW YORK CITY
NYC Central Park Night Time Photography Tour
Book on Viator →Operated by New York City Photo Safari · Bookable on Viator
Night Central Park feels like a secret class. This small-group Central Park night photography tour turns dark skies into repeatable photo skills. I like that you get hands-on help for both beginners and folks who already shoot, and you’ll hit major landmarks after sunset. One thing to consider: you must bring your own tripod, or your night results will be limited.
The route is built for practical low-light shooting: long exposures near Bethesda Fountain, skyline frames from quieter spots, and stop-and-shoot coaching along the way. The pace is walk-and-photo, not museum-watching, and the group stays small enough that your questions don’t get lost. Still, it’s a nighttime walk—so plan to move at an easy, steady pace and dress for cooler temps.
With a maximum of 6 travelers and a professional photographer guide, this is the kind of tour where you actually learn something useful. The guide I’m basing this on, Zim, is specifically praised for keeping the group together while still working one-on-one when needed. If that sounds like your style, you’re in the right place.
In This Review
- Key Things You’ll Notice on This Central Park Night Shoot
- Central Park After Sunset: Why the Photos Look Different
- Meeting at Pulitzer Fountain and Working the 8:30 pm Light
- The Small-Group Advantage: Professional Coaching That Stays With You
- Stop-by-Stop Guide: What Each Central Park Spot Adds
- Stop 1: Your NYC Photo Safari Start
- Stop 2: Bethesda Fountain for Long Exposure
- Stop 3: The Plaza Quick Frame
- Stop 4: The Notable Bridge Walk
- Stop 5: Dairy Visitor Center and Gift Shop Skyline Time
- Stop 6: Bethesda Terrace at Night
- Stop 7: The Mall and Literary Walk Photo Sessions
- Stop 8: Naumburg Bandshell Quick Hits
- Gear Reality Check: Tripod Rules and Night-Shooting Prep
- Value for $150: What You’re Really Paying For
- Who Should Book This Tour (and Who Might Not)
- Should You Book This Central Park Night Photography Tour?
- FAQ
- How long is the Central Park night photography tour?
- What time does the tour start?
- Where does the tour start and end?
- How much does the tour cost?
- How many people are on the tour?
- Is a tripod provided?
- What’s included with the ticket?
- Is the tour offered in English?
- What is the cancellation policy, and is there a minimum age?
Key Things You’ll Notice on This Central Park Night Shoot
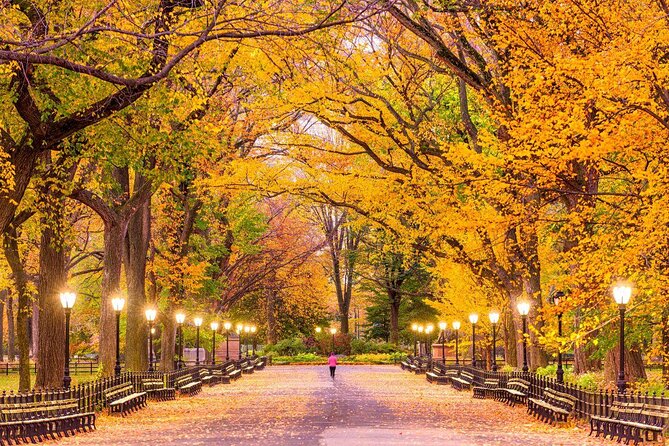
- Small group coaching (max 6) keeps attention focused where you need it
- Long-exposure practice at Bethesda Fountain teaches the core technique of night shots
- Manhattan skyline angles from the Dairy area give you that big-city contrast
- Multiple Central Park “photo zones” means you won’t waste time getting to decent compositions
- No tripod included forces you to prep gear before you arrive
Central Park After Sunset: Why the Photos Look Different
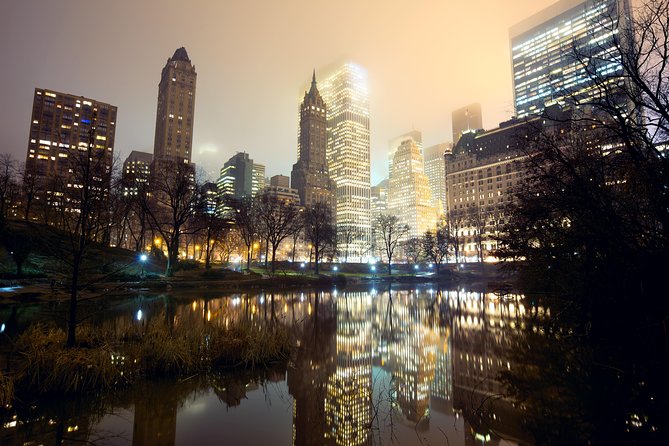
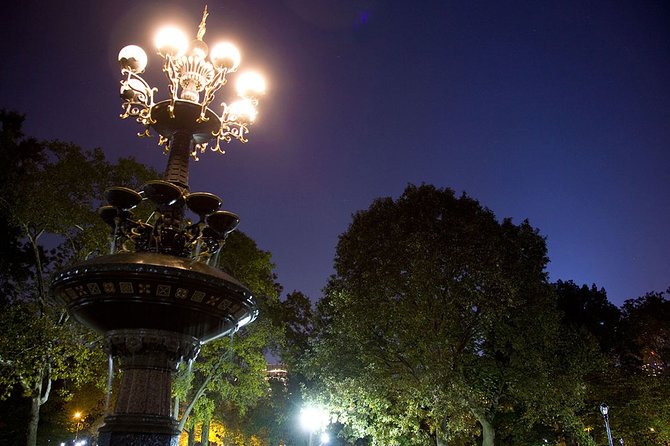
At night, Central Park changes its personality fast. Daytime images can feel flat—bright sky, busy foot traffic, and bright building lighting compete. After dark, the park lighting becomes your guide, and you start seeing reflections, glowing stone, and cleaner sightlines.
This tour makes night photography feel less mysterious. You’re not just told where to stand—you learn how to control exposure long enough to let lights paint your photo. That’s the real payoff, because the skills carry over beyond just this one walk.
I also like how the itinerary nudges you toward variety. You’ll move from fountains and terraces to open walkways and skyline viewpoints. That variety helps you learn what changes when you go from foreground detail to wide city backgrounds.
One more practical upside: the area has predictable “anchors.” Places like Bethesda Fountain and Bethesda Terrace are easy to find even when it’s dark, so you can focus on camera settings and framing instead of wandering.
You can also read our reviews of more tours and experiences in New York City.

Meeting at Pulitzer Fountain and Working the 8:30 pm Light
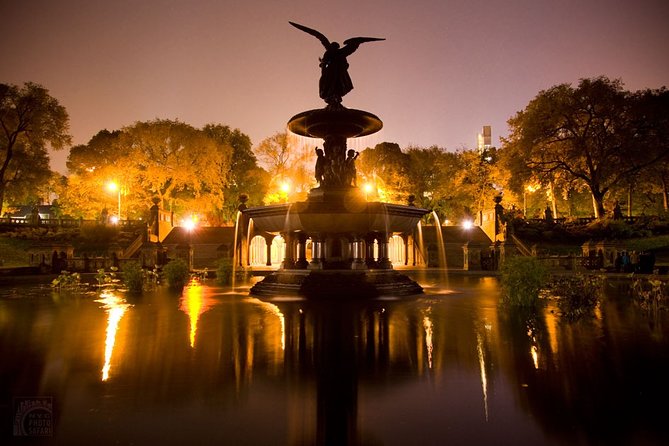
The tour meets at Pulitzer Fountain, 764 Central Park S, New York, NY 10019. It starts at 8:30 pm and ends at Bethesda Terrace, New York, NY 10024.
That timing matters. Around this hour, light is low enough for the classic night look, but you still have enough ambient glow to see and compose. It’s a sweet spot for learning because your camera settings actually change the photo results in a noticeable way.
You’ll want to arrive early enough to settle in calmly. In night photography, the first 10 minutes often determine how relaxed your whole session feels. Once you’re at the meeting point, you can double-check gear, confirm you have your tripod, and get your camera ready before you start moving.
Because the tour is near public transportation, getting there is straightforward. It’s also described as easily reachable via subway near the Plaza Hotel area. That’s helpful if you’re coming straight from dinner and don’t want a complicated detour.
The Small-Group Advantage: Professional Coaching That Stays With You
This isn’t a big bus-tour situation. The experience caps at 6 travelers, which changes everything when you’re learning a technical skill like night photography.
The biggest reason this feels worth it is the coaching style. Zim (the guide mentioned in the reviews) is praised for knowing how to work with both novice and experienced photographers. That’s a big deal: beginners often need basics explained more than once, while experienced shooters want specific adjustments, not generic advice.
A small group also helps with flow. At night, staying together isn’t only about convenience—it’s about timing. If you drift, you miss the lighting window for that location, and your photos can look noticeably different from what you planned.
You should expect a walking rhythm with short stops. The guide can spot what you’re doing wrong quickly—focus issues, shutter length, or exposure choices that are too bright or too dark. Then you can correct it before you move on.
If you’re the type who likes getting direct feedback (instead of just being left to experiment), this tour is built for you.
Stop-by-Stop Guide: What Each Central Park Spot Adds
This route is designed like a photo lesson. You don’t just hit famous places—you practice techniques that match the scene. Here’s how the key stops work and what to pay attention to.
Stop 1: Your NYC Photo Safari Start
The tour kicks off with a guided photo safari segment centered on Central Park at night. You’ll have time with your photographer guide to set up for the rest of the evening, including learning basics of nighttime photography.
What makes this stage valuable is that it helps you stop guessing. Night photos often go wrong for predictable reasons: you set the wrong shutter speed, you don’t stabilize the camera enough, or you don’t expose for the light source. A good early coaching block reduces trial-and-error later.
You’ll also get oriented to the way the guide thinks about framing. Look for instructions that focus on composition and exposure choices, not just where the camera points.
Stop 2: Bethesda Fountain for Long Exposure
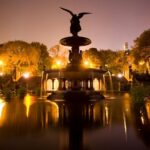
Bethesda Fountain is where the tour gets very hands-on. You’ll spend about 20 minutes here, and the emphasis is on photographing it at night with long exposure.
Long exposure is the heart of night photography because it lets you capture steady light rather than freezing it mid-flicker. If you’ve never done this before, this stop is ideal because it’s a clear subject with lots of light sources and strong visual shapes.
The practical thing to remember: long exposures require stability. Since the tour does not include a tripod, this is exactly the kind of stop where you’ll feel the difference if your tripod is missing or shaky.
During this portion, pay close attention to the guide’s setup advice—where to place your tripod, how to keep the composition consistent between shots, and how to adjust exposure to avoid blowing out bright highlights.
Stop 3: The Plaza Quick Frame
The Plaza stop is short—about 5 minutes. That means it’s less about learning a single technique and more about getting you a fast, useful shot with coaching direction.
Short stops like this work best when you move quickly to action. Come in ready: camera powered on, settings close to what your guide suggests, and you’re looking for a single strong frame instead of photographing everything at once.
Stop 4: The Notable Bridge Walk
You’ll walk by a bridge that’s described as one of the most notable bridges in Central Park. This is a “look and frame” moment.
Bridges can be great at night because of the geometry and the way they create leading lines through the park. Keep an eye out for the relationship between the bridge and nearby light sources. That’s where night shots often become more dramatic than daytime versions.
Since the tour doesn’t state a specific bridge name here, don’t stress about identification. Focus on what the guide’s doing: aligning lines, choosing a vantage point, and controlling exposure so the bridge doesn’t turn into a silhouette.
Stop 5: Dairy Visitor Center and Gift Shop Skyline Time
At about 15 minutes, the Dairy Visitor Center and Gift Shop area becomes your Manhattan skyline stop. This is the part of the tour where the city comes into your frame.
Skyline photos at night are about balancing two worlds: the glowing buildings in the distance and the darker foreground in the park. If the distant lights are too bright, your skyline can wash out. If your foreground is too dark, the photo loses depth.
This stop is also useful for learning how to re-think exposure once you shift from a park landmark (like the fountain) to faraway city lights. It’s a different challenge, and that’s exactly why it belongs in the itinerary.
Stop 6: Bethesda Terrace at Night
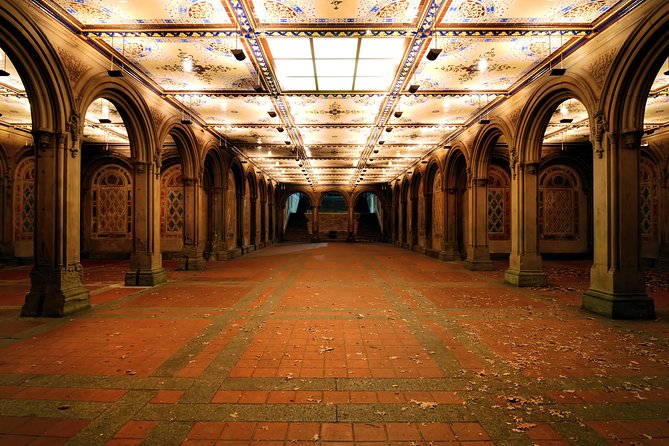
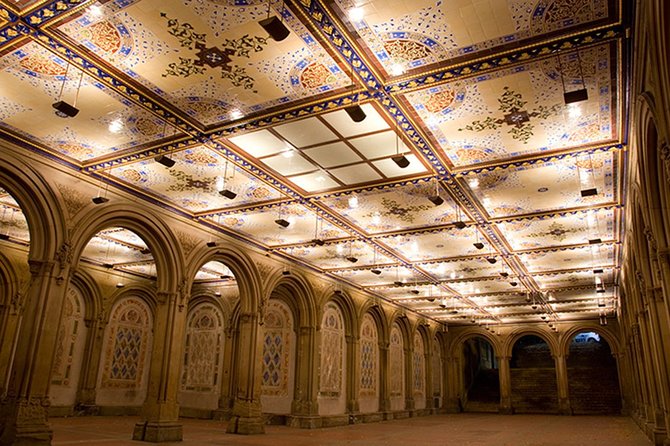
You’ll spend around 30 minutes at Bethesda Terrace, photographing it at night. Terrace scenes often combine architectural detail and lighting that creates texture—perfect for learning how exposure affects stone, arches, and shadow.
A longer stop here means you can work through a few compositions. Try wide shots that show the terrace shape and tighter frames that highlight details. Night light can be especially good for textural surfaces, as long as your camera isn’t overexposing highlights.
If you’re still learning, this is where you can practice the basics you worked on earlier. Do a shot, check it, and adjust. The guide’s job is to help you make those adjustments faster than you would alone.
Stop 7: The Mall and Literary Walk Photo Sessions
The Mall and Literary Walk gets about 15 minutes. This section is great for practicing consistency across multiple similar compositions. Long, structured walkways help you learn how to keep the horizon level, how to handle repeating patterns, and how to frame depth.
If you want photos that feel cinematic rather than just scenic, this is often where that style starts. Night lighting can create a “tunnel” effect along paths and between trees—especially when you place the subject in the foreground and let the background fade slightly.
Stop 8: Naumburg Bandshell Quick Hits
The Naumburg Bandshell stop is brief—about 5 minutes. Quick hits are good for experimenting. In just a few minutes, you can try a different lens setting (if you have one), a new composition angle, or a slightly different exposure approach.
Treat it like a warm-up or a chance to test what the guide taught you. Even a short stop can produce a keeper if you’re ready with your settings and your framing idea.
Gear Reality Check: Tripod Rules and Night-Shooting Prep
Here’s the big “don’t get caught” item: Tripod is not included. You must bring your own tripod.
For night photography, a tripod isn’t just “nice to have.” It’s what lets you use longer shutter speeds without turning the image into blur. With moving groups and a walking route, you’ll want a tripod you can set up quickly.
Before you head out, do a quick gear sweep:
- Bring your tripod (and make sure it locks securely)
- Charge your camera battery and clear space on your memory card
- Have your camera settings ready to adjust fast when the guide tells you to change
If you’re new to this, the guide will teach basics of nighttime photography, but you still need the hardware that makes those tips work. Without a tripod, you may end up stuck with shorter exposures and higher noise, especially in darker spots.
Also, plan for your camera to feel heavier at night than usual. If you’re moving between stops, keep straps secure and avoid fiddling with cables in public.
Value for $150: What You’re Really Paying For
The price is $150.00 per person for an experience designed for a small group. On paper, that might sound like a “tour price.” In practice, you’re buying coaching time plus the right locations.
The value equation is simple:
- You get a professional photographer guide
- You get Central Park entry included
- You get a route built around photo-focused stops, not random sightseeing
If you’ve ever tried night photography on your own in a busy place, you know how frustrating it can be. You’ll spend time finding a viewpoint, guessing settings, and still missing the shot because you didn’t know what to adjust. This tour reduces that chaos by giving you a guided path and a framework for learning.
And the group size matters here. With up to 6 travelers, the guide can handle multiple learning needs without letting the session turn into one long lecture.
If you already own good night gear and you want specific feedback, that also fits. The reviews highlight that Zim knows how to work with both novice and experienced shooters, and that flexibility is part of the value.
Who Should Book This Tour (and Who Might Not)
This tour is a strong fit if you:
- Want to learn night photography basics with real coaching
- Like photographing landmarks like Bethesda Fountain and Bethesda Terrace
- Prefer a small group over crowded tours
- Have a tripod already or are ready to bring one
You might think twice if you:
- Don’t have a tripod and you’re not willing to bring one
- Want a totally relaxed, no-instruction walk
- Are expecting a short stop at every location without setup time
Also, the tour calls for a moderate physical fitness level. You’ll be walking between photo spots. It’s not described as a strenuous hike, but it is a real walking route.
Should You Book This Central Park Night Photography Tour?
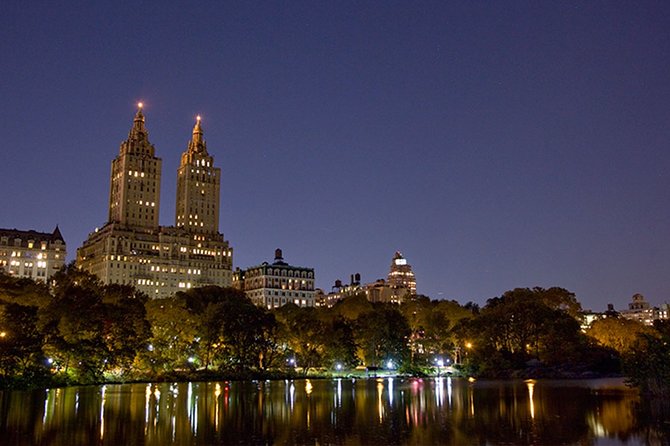
If you’re serious about improving your photos—not just collecting a few nighttime pictures—this is a smart choice. The biggest reasons are the small group limit, the hands-on nighttime photography focus, and the fact that the guide (Zim) is praised for helping both beginners and experienced photographers. Plus, the itinerary gives you landmark variety: fountain light, terrace texture, and skyline contrast.
Book it if you want to leave with more than souvenirs. You’ll walk away with photo know-how you can use the next night you shoot in any city.
Skip it if you’re tripod-free and hoping to get professional results anyway. Night photography is technical, and this tour is built around the assumption that you’re ready to stabilize your camera.
If you’re reading this and thinking, I can bring a tripod, and I want practical instruction—then yes, book it.
FAQ
How long is the Central Park night photography tour?
The experience is listed as approximately 2 hours.
What time does the tour start?
It starts at 8:30 pm.
Where does the tour start and end?
It starts at Pulitzer Fountain, 764 Central Park S, New York, NY 10019 and ends at Bethesda Terrace, New York, NY 10024.
How much does the tour cost?
The price is $150.00 per person.
How many people are on the tour?
The tour has a maximum size of 6 travelers.
Is a tripod provided?
No. A tripod is not included, so you must bring your own.
What’s included with the ticket?
Included items are a professional photographer guide, Central Park entry/admission, and taxes/fees. The tour also highlights photo opportunities like the Bethesda Fountain and Manhattan Skyline.
Is the tour offered in English?
Yes, it’s offered in English.
What is the cancellation policy, and is there a minimum age?
You can cancel for a full refund up to 24 hours before the experience starts. The minimum age is 18, and service animals are allowed.