REVIEW · LUCERNE
Best of Lucerne Walking Photography Tour
Book on Viator →Operated by Passenger Diaries Switzerland Tours & Experiences · Bookable on Viator
Lucerne through your lens in two hours. I love how the route focuses on Chapel Bridge framing and how guide Luis shares hands-on photography tips you can use on the next street, not just today. One possible drawback: you’ll keep moving between sights, including some uphill sections, so it is not a lazy stroll.
This works because it’s a small-group experience capped at 8 people. You get the kind of attention that helps when you want to swap settings or lenses and keep going without feeling rushed.
You also get the kind of variety that makes a photo walk feel like a real outing: lake views, medieval towers, wall panoramas, and a final monument stop. Expect moderate physical fitness and comfortable walking shoes.
In This Review
- Key highlights to know before you go
- Why this Lucerne photo walk feels worth $212.65
- What I’d pack and how you’ll shoot (DSLR to smart phone)
- The meeting point: start at Torbogen Luzern Bahnhofpl.
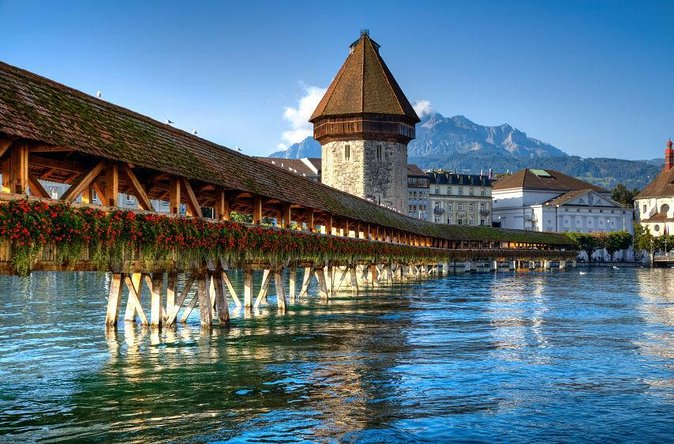
- Stop 1: Chapel Bridge, history, and framing that looks intentional
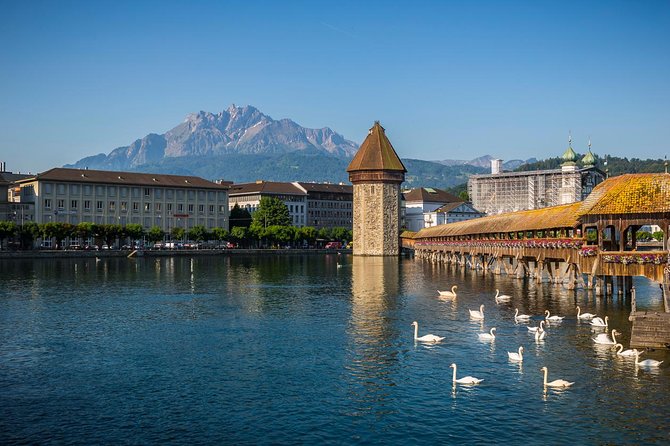
- Stop 2: Lake Lucerne and the Swiss Alps for wide-angle practice
- Stop 3: Lucerne’s city wall and the 9 original medieval towers
- Stop 4: City castle panorama—when to wait and when to shoot
- Stop 5: Uphill along the ancient wall for “above it all” angles
- Stop 6: Fortification area and three towers in summer, nine towers in winter
- Stop 7: Chaff bridge design—learn the shot, then recreate it
- Stop 8: Lucerne’s most important Swiss monument
- The guide effect: Luis, patience, and real feedback you can use
- Who this Lucerne photography tour suits best
- Price and value: what you’re really paying for
- Should you book this Lucerne walking photography tour?
- FAQ
- How long is the Lucerne walking photography tour?
- What time does the tour start?
- How big is the group?
- What languages is the tour offered in?
- Do I need a specific camera or photography experience?
- Is food or drinks included?
- Where does the tour start and end?
- Can I cancel for a refund?
- What should I plan for transportation?
Key highlights to know before you go
- Small group of max 8 means more feedback and less waiting for your turn
- Chapel Bridge history + camera angles for shots with meaning, not just postcards
- Lake Lucerne and Swiss Alps views give you wide-open composition practice
- City walls with 9 medieval towers plus uphill wall sections for perspective
- Fortification area and tower walks that change with the season
- Any camera works, from compact to DSLR to a smart phone
Why this Lucerne photo walk feels worth $212.65
A two-hour photography tour in Lucerne has to earn its price fast. This one does, because you’re not just walking past landmarks. You’re getting help turning what you see into repeatable photo skills.
You’re paying for three things that matter on a short outing: a pro photographer guide (Luis), tight planning around Lucerne’s most photogenic angles, and on-the-spot coaching. When the group is small, that coaching is more likely to land. You can ask a question, try an adjustment, and shoot again while the light is still good.
The other value play here is that the tour welcomes every skill level. I like that the message is practical: you don’t need fancy gear to get results. A compact camera or a smart phone is enough to learn framing, timing, and composition. That makes the tour a good fit if you’re the type who wants better photos without turning the trip into a camera workshop.
You can also read our reviews of more tours and experiences in Lucerne.

What I’d pack and how you’ll shoot (DSLR to smart phone)
Here’s the nice part: you do not need special equipment to enjoy this. The tour explicitly works with compact, professional, or just a smart phone. That also means Luis can tailor guidance to what you’re using.
Still, you should plan for two real factors:
- You’ll be walking between viewpoints, so keep your camera handling efficient.
- You’ll likely want at least one steadying trick (stable grip, support position, or steady stance) for sharp shots.
If you bring a DSLR or mirrorless, you might appreciate the chance to change lenses during the tour without losing the momentum of the session. One real-world detail: Luis was patient with a guest swapping lenses on and off while getting the shot right. That is the kind of calm teaching you want in a short, high-spotcount walk.
If you’re on a smart phone, you can still improve a lot. Focus control, horizon level, and deciding what to include (or cut out) can make a huge difference around water and historic stone.
The meeting point: start at Torbogen Luzern Bahnhofpl.
The tour starts at Torbogen LuzernBahnhofpl., 6003 Luzern, Switzerland. It also ends back at the same meeting point. That loop matters. You spend time photographing, not figuring out logistics mid-walk.
Starting at 3:00 pm is also a practical choice. Late afternoon light tends to be more forgiving for architecture and water reflections. You’ll be shooting Chapel Bridge, Lake Lucerne views, and city walls during the same window, so you can compare how your photos change with angle and light.
You’ll also find this area easy to reach via public transport since it’s near transit. Still, give yourself a few extra minutes. When you’re photo-watching the clock, being on time helps you get clean openings at each stop.
Stop 1: Chapel Bridge, history, and framing that looks intentional
Chapel Bridge is Lucerne’s “how did they build that” postcard—and that makes it tricky. Lots of people point and shoot. The better approach is to frame it so the bridge has structure in your photo.
This tour gives you both: you photograph Chapel Bridge and you get the history that explains why certain angles work. Luis will help you use that knowledge to compose like you mean it. That can mean:
- choosing a perspective where the bridge lines pull you into the scene
- deciding how much of the surrounding buildings to include
- placing yourself to reduce distractions along the edges
One reason this stop is a highlight is that it’s not just a single photo. You’re able to iterate—try one shot, adjust a little, and shoot again while the bridge and water stay consistent.
Stop 2: Lake Lucerne and the Swiss Alps for wide-angle practice
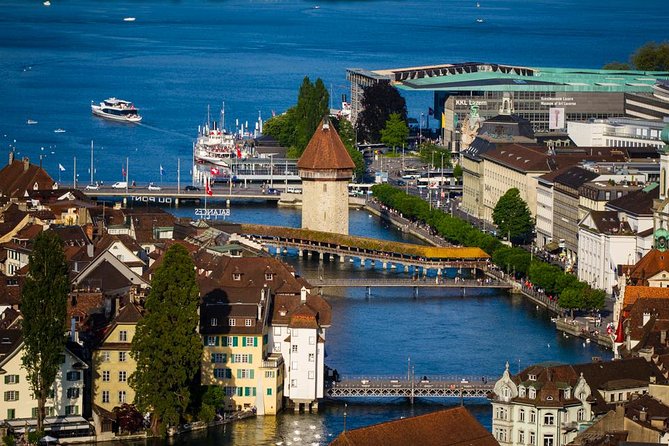
After the historic bridge, you shift into open views: Lake Lucerne and the Swiss Alps. This is where your composition skills start to matter more than your camera.
Lake scenes reward two habits you can learn quickly on the walk:
- Control what horizon line you use (too high and the mountains feel cut off; too low and the sky crowds the frame)
- Use foreground, middle ground, and background on purpose (not by accident)
If you like dramatic scenes, this is the part that delivers. Alps framing plus still water lets you experiment with reflections and depth. If your phone supports portrait or computational modes, you can test those too, but keep your main focus on basic framing: keep the subject clean and don’t let random poles or railings steal attention.
This stop is also great for people who want to improve fast. Wide views teach you to see the whole scene, not just the headline monument.
Stop 3: Lucerne’s city wall and the 9 original medieval towers
Then you move to the city’s fortifications—the city wall with its 9 original medieval towers. Towers repeat a pattern, and patterns can be either beautiful or messy depending on how you position.
Luis’s role here is important. A pro guide helps you see what to emphasize. You might find yourself adjusting your stance to:
- line up multiple towers in a single frame
- capture texture on stone while still keeping the sky balanced
- pick an angle that makes the wall feel like it has depth, not flat lines
This part of the tour is where you can start to feel the difference between “I took a photo” and “I composed a scene.” Even if you’re using a smart phone, the towers teach you structure.
Stop 4: City castle panorama—when to wait and when to shoot
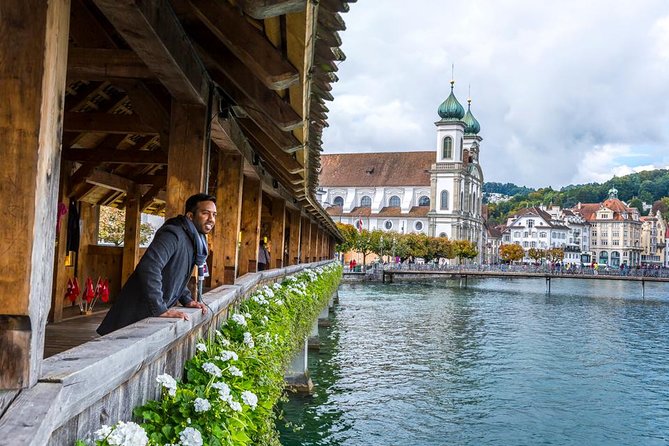
Next comes the city castle and the best panorama-style views of the city, the lake, and the mountains. Panoramas are where impatience ruins shots. If you rush, you end up with tilted horizons and crowded frames.
On this tour, you get the chance to slow down at viewpoint level and aim for a clean composition. The lesson isn’t complicated: stop, check alignment, then shoot. The castle area is ideal for testing whether you prefer a wider context photo or a tighter, subject-focused version.
Also, panoramas reward your ability to simplify. If you’ve got a phone, you can easily zoom and lose resolution. Better approach is often stepping slightly instead of cranking zoom. You’ll get the chance to try different ways of seeing the same view.
Stop 5: Uphill along the ancient wall for “above it all” angles
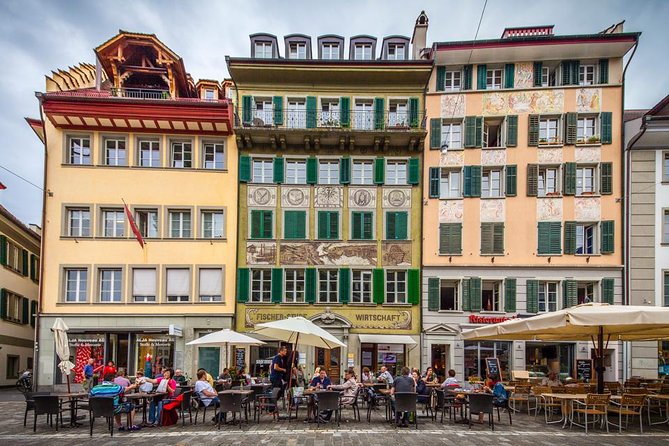
Lucerne’s walls do not only sit there—they climb. Part of the experience includes walking uphill along the ancient wall to enjoy the most beautiful alpine panoramic views.
This is more than exercise. The uphill movement changes your camera options fast. It gives you a higher vantage point that flattens rooftops less and separates layers of the city, lake, and distant mountains.
The drawback is physical, not creative. You should have moderate fitness and good shoes. The uphill is not described as a strenuous hike, but it is enough that you’ll want to be ready for steady steps while you frame shots.
If you’re prone to rushing uphill and breathing hard, you might miss the best moment for a steady shot. Pace yourself, then shoot once you’re settled.
Stop 6: Fortification area and three towers in summer, nine towers in winter
Fortifications bring variety, especially because what you walk and photograph changes by season. In summer time, you walk on the wall along three towers. In winter, you walk along the wall to admire the 9 towers and the wall.
I like this setup because it keeps the spirit of the experience intact while adapting to conditions. It also means you won’t get the same exact shot if you come in different seasons. Your composition changes with the route and where you can stand.
This stop is ideal for:
- architectural repetition shots (towers repeating, wall lines guiding the eye)
- texture detail photos (stone surfaces and small visual patterns)
- longer-look compositions that tell you where the city’s defenses actually sit
It’s also a good spot for people who want to practice manual control. If your camera has exposure tweaks, test them here. If you’re on a phone, test focus and exposure compensation. The wall gives enough detail to judge results quickly.
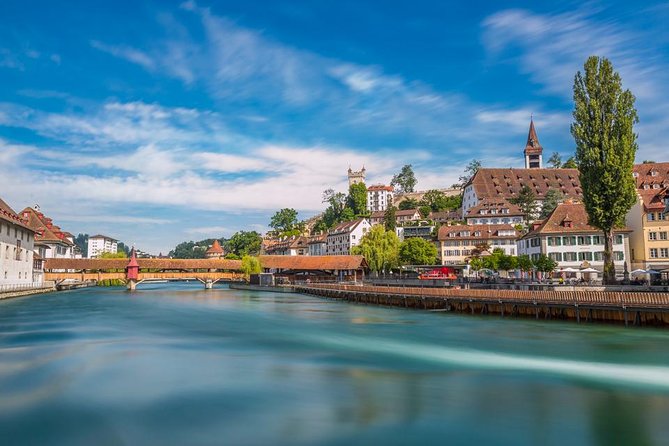
Stop 7: Chaff bridge design—learn the shot, then recreate it
Then you turn to the Chaff bridge and enjoy its design. The word design matters because bridges can be photographed two ways: as a backdrop or as a subject with geometry.
This is where you can use the same skills from Chapel Bridge and apply them with new intention. Think about angles, symmetry, and how the bridge shape connects to the water and city elements.
You’ll likely find that your second bridge experience improves your consistency. Once you learn how your guide thinks about lines and placement, your photos start to look less random. Same skill, different structure.
If you’re hoping for crisp architectural photos, this is a strong stop for that goal.
Stop 8: Lucerne’s most important Swiss monument
The tour finishes with a stop to discover the beauty of the most important Swiss monument. The key idea here is tone and payoff. After walls and bridges, the monument gives you a more grounded final photo moment—something to anchor your photo set.
This final segment is also where you’ll appreciate the coaching you picked up earlier. You know now what to check before you press the shutter: horizon, subject placement, and whether you’re including background clutter.
It’s a nice way to end: you don’t just collect landmark photos. You end with something meant to be remembered.
The guide effect: Luis, patience, and real feedback you can use
One of the most praised parts of this tour is Luis as a photographer guide. I like how the teaching style shows up in the practical moments. If you need time to get settings right or you want to change lenses, Luis keeps the experience moving without making you feel like you’re slowing everyone down.
There’s also a big difference between knowing where to stand and knowing how to help you stand there. Luis brings historical details, and those details matter because they give you a reason to choose a particular composition. You’re not just shooting a scene; you’re recording why it matters.
That historical context can help your photos feel more specific. Even if the technical side is what you came for, you’ll still walk away with a better sense of Lucerne’s story.
Who this Lucerne photography tour suits best
This tour is a great match if you:
- want a guided photo walk of Lucerne’s top sights without planning the route yourself
- like learning by doing, not by sitting through a lecture
- enjoy architecture, bridges, lake views, and wall panoramas
- carry a camera—or plan to use your phone—and want stronger results
It’s also a good fit for different ages and skill levels because all camera skills are welcome. You do need moderate physical fitness, due to uphill walking on the ancient wall and fortification areas.
If you hate walking or you want long pauses at one exact spot, this might feel too fast. It’s built for momentum and multiple viewpoints in a short time.
Price and value: what you’re really paying for
At $212.65 per person, the cost may look steep until you match it with what’s included. You’re getting:
- a professional photographer guide
- a small-group tour (max 8)
- photography tips
Food, drinks, and transportation are not included. That said, the tour value comes from focused coaching in a dense sightseeing route. Two hours is tight, so the guide’s guidance reduces wasted shots. That’s how a short photo tour can be worth it even when you’re only capturing a handful of minutes at each viewpoint.
Also, because the tour welcomes phone users, you’re not stuck paying for the experience only if you bring big equipment. You’re paying for instruction and access to a smart route through Lucerne’s best angles.
If you’re the kind of photographer who tends to shoot on autopilot, this can quickly become a “why didn’t I do this earlier” type of tour.
Should you book this Lucerne walking photography tour?
Book it if you want better photos with less stress. This tour is built for fast learning: Chapel Bridge, Lake Lucerne with Swiss Alps views, medieval towers along the city wall, castle panoramas, uphill wall shots, a fortification walk, and a final monument stop. You’ll leave with photos that feel intentional, plus tips you can reuse on the rest of your trip.
Skip it if you want a slow, contemplative walk or you need lots of downtime. It’s moderately active, and the whole point is moving through the sights so you can shoot multiple angles in a single afternoon.
If you’re deciding between doing it alone and hiring a guide, I’d choose the guide. Lucerne is photogenic, yes. But a pro helps you move from pretty scenes to strong images faster.
FAQ
How long is the Lucerne walking photography tour?
It’s about 2 hours.
What time does the tour start?
The start time is 3:00 pm.
How big is the group?
It’s a small group limited to a maximum of 8 travelers.
What languages is the tour offered in?
The tour is offered in English.
Do I need a specific camera or photography experience?
No. All camera skills are welcome, and a compact, professional camera, or just a smart phone can be used.
Is food or drinks included?
No. Food and drinks are not included.
Where does the tour start and end?
It starts at Torbogen LuzernBahnhofpl., 6003 Luzern, Switzerland and ends back at the same meeting point.
Can I cancel for a refund?
Yes. Free cancellation is available. You can cancel up to 24 hours in advance for a full refund.
What should I plan for transportation?
Hotel pickup and drop-off are not included, and transportation costs are not included unless mentioned above.