REVIEW · BANGKOK
Bangkok Photography Masterclass – Private Photography Lesson
Book on Viator →Operated by Aperture Tours · Bookable on Viator
Bangkok turns up fast on your camera, but it helps to have a guide with an eye. This private photography masterclass puts you with a local instructor who helps you turn what you see into photos you actually want to keep. I like that you can choose daytime or nighttime, then get taken through classic streets and big-photo landmarks like Chinatown and Wat Arun.
What I really like: you get personal attention, not a one-size-fits-all photo walk. And the coaching seems to focus on the stuff that matters in your frame, like Paul’s emphasis on composition and getting better shots through practical, step-by-step guidance.
The only thing to consider is timing: you’re out for about 3 hours, so you’ll want to be clear about what you want most—temple drama, street life, or night market lights—so the lesson fits your photo goals.
In This Review
- Key takeaways for better Bangkok photos
- Why Bangkok is a great place for a coach
- Private lesson energy: learn faster with real feedback
- Price and value: what $160 buys you in 3 hours
- Choosing daytime vs nighttime: pick your Bangkok mood
- From Rong Mueang to real scenes: how the tour flows
- Chinatown stop: street stories, composition practice, and color
- Erawan Shrine and Benjasiri Park: shift gears without losing momentum
- Wat Arun and the Giant Swing: geometry, angles, and big-frame impact
- Train Night Market Ratchada: the payoff for low-light practice
- So/ Spa area: a final scene to test what you learned
- What you’ll walk away with after 3 hours
- Who this masterclass fits best
- Should you book this Bangkok Photography Masterclass?
- FAQ
- How long is the Bangkok Photography Masterclass private lesson?
- What is the price per person?
- Is this a private tour or a group tour?
- Can I choose a daytime or nighttime experience?
- Where does the tour start?
- Where does the tour end?
- What’s included in the tour?
- Does the tour provide a mobile ticket?
- Are service animals allowed?
- What is the cancellation policy?
Key takeaways for better Bangkok photos
- Private, customizable coaching that matches your skill level and keeps you moving at the right pace
- Day or night shooting options, so you can photograph Bangkok in totally different moods
- Chinatown + temple stops in one flow, with practice opportunities at each setting
- Paul’s coaching style stands out for composition tips and leading you to unexpected spots
- Free bottled water helps you stay comfortable during the walk-and-shoot session
- Night market photo time gives you a chance to work on low-light skills
Why Bangkok is a great place for a coach
Bangkok is a photography playground, but it can also be a visual overload. Signs, food smells, bright temple colors, motorbikes, steam from cooking, and families moving through scenes all compete for attention. A good instructor helps you pick one thing to focus on, then gives you tools to make it look intentional.
That’s what makes this lesson worth your time. You’re not just sightseeing with a camera; you’re practicing while you’re walking. And because it’s private, you’re not stuck waiting for everyone else to figure out their settings or their angle.
I also like that the experience is built around real Bangkok neighborhoods and landmarks, not staged photo spots. You get the kind of variety that forces you to learn quickly—street scenes in Chinatown, shrines and parks for calmer framing, then big symbols like Wat Arun and the Giant Swing.
You can also read our reviews of more tours and experiences in Bangkok.
Private lesson energy: learn faster with real feedback
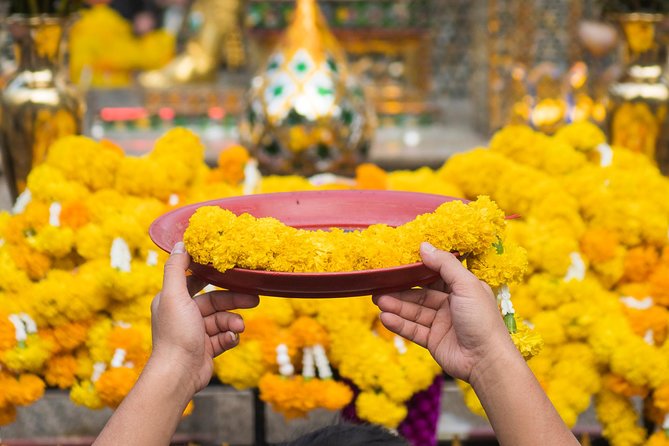
The strongest theme in the experience is coaching that feels direct and upbeat. In the guide’s approach, you’re treated like a photographer-in-progress, not a tourist with a camera strapped to their neck. Paul, specifically, is mentioned for being an enthusiastic coach who helped improve composition and shooting skills.
You’ll likely work on things like how to place your subject in the frame, how to create balance, and how to simplify what’s messy in front of you. Those are the kinds of skills that transfer. Once you learn them in Bangkok, you can use the same thinking later in other cities.
The session also feels flexible. Since it’s private, you can slow down when a scene clicks—or move on when it doesn’t. That matters in Bangkok, where the best shot might only last a few seconds, and your guide can help you catch it without wasting the whole tour.
And yes, you get hydration support too: free bottled water is included, which sounds small until you’re shooting under Bangkok heat and then realizing your energy is running on fumes.
Price and value: what $160 buys you in 3 hours
At $160 per person for about 3 hours, this isn’t a budget “walk and hope” kind of activity. You’re paying for two things: (1) a local instructor who can guide your eyes, and (2) private time, which is usually where photography workshops become worth it.
A group photo tour might save money, but it often turns into a lecture plus waiting. Here, you get the chance to practice with feedback while you move through real scenes. That’s the difference between collecting tourist photos and building shots you’d be proud to share.
You’ll also have a clear structure of stops, which makes the three hours efficient. Instead of wandering for hours and hoping you find good lighting, you’re taken to places that offer different photo challenges—street texture, religious architecture, skyline geometry, and night market lights.
If you’re the kind of person who enjoys learning by doing—changing a setting, trying a new angle, and then adjusting based on what your guide points out—this value makes sense fast.
Choosing daytime vs nighttime: pick your Bangkok mood
This experience gives you a choice: you can shoot Bangkok during the day or after dark. That’s not just about light. The whole city changes your photo story.
Daytime usually helps you:
- see more detail in temple colors and faces
- keep moving without struggling as much with exposure
- capture street life with a calmer pace
Nighttime usually gives you:
- brighter, moodier scenes with neon and market lighting
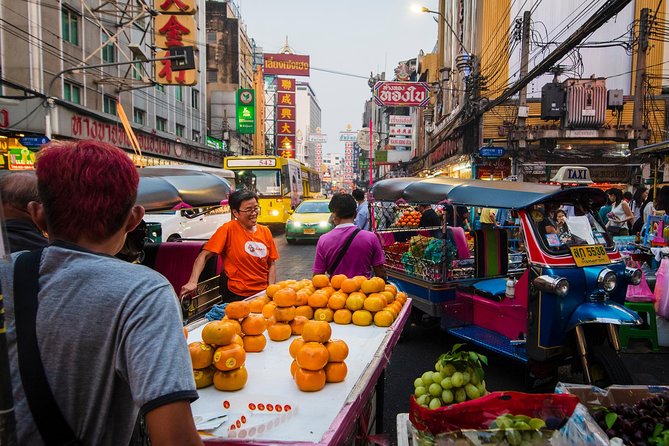
- a more intense “energy” in Chinatown and night markets
- more opportunities to practice low-light composition
The lesson is still private either way, so your instructor can tailor what you practice. If you’re serious about night photography, nighttime shooting is where you’ll get the most direct practice—especially with a night market focus.
One practical note: night shooting can be trickier even if you have a camera app you like. It helps if you’re ready to experiment instead of expecting perfect results immediately.
From Rong Mueang to real scenes: how the tour flows
You meet at Rong Mueang Station (สถานีรถไฟหัวลำโพง), in Pathum Wan, and the activity ends back at the meeting point. You can also expect it to be near public transportation, which helps if you’re juggling Bangkok transit between activities.
What I like about the flow is that it doesn’t feel random. You go from one type of subject to another:
- street life and signage
- shrine and crowd energy
- park framing
- major temple geometry
- large symbolic structures
- night market lights
- an additional urban stop for more practice
That variety is great for learning because it forces you to adjust fast. In three hours, you can’t just shoot one type of scene and call it “practice.” This setup pushes you to think about subject, angle, and lighting throughout.
Also, because it’s private and customized, you should expect the pace to be adjusted to your comfort level rather than driven by a cookie-cutter group timeline.
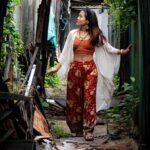
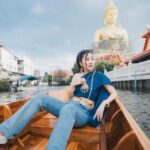
Chinatown stop: street stories, composition practice, and color
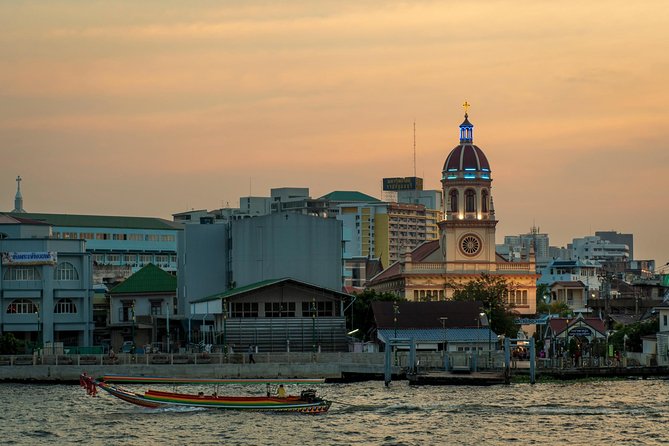
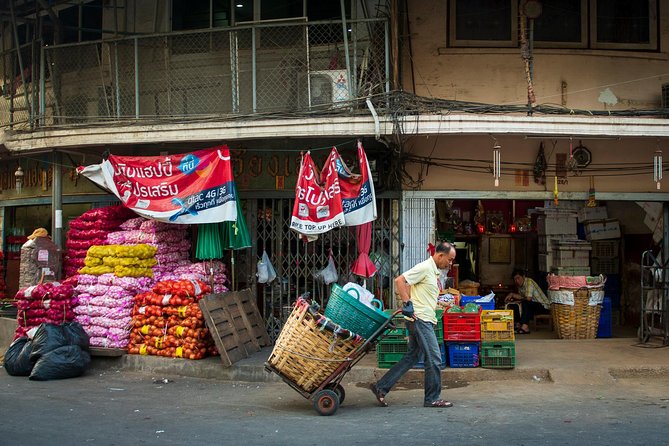
Chinatown is one of the best places in Bangkok to practice the basics that make street photos work. You’ll run into dense visual layers: shop fronts, food windows, signage, people moving in different directions, and lots of detail that can either become magic—or chaos.
This is where a coach helps you simplify. Paul’s coaching style (enthusiasm plus real composition guidance) is especially useful here. Instead of photographing everything, you’ll likely learn how to choose a clear subject, then use the surrounding environment to support it.
Expect to experiment with things like:
- framing your subject with lines or doorway shapes
- shooting from angles that show depth without losing the main focus
- timing your shutter so the scene includes people as part of the story, not just blurred background
If you’re aiming for photos that feel alive, this stop is where you can practice “decision-making.” You pick what matters, then you learn how to make it look deliberate.
Erawan Shrine and Benjasiri Park: shift gears without losing momentum
After Chinatown, the lesson moves you to Erawan Shrine (Thao Mahaprom Shrine) and then Benjasiri Park. This is a smart transition because it changes your photo assignments without stopping the momentum of the session.
Shrines tend to give you strong structure—ornament, religious symbolism, and a different kind of crowd activity. You can practice composition by working with symmetry and repetition, then using people as scale.
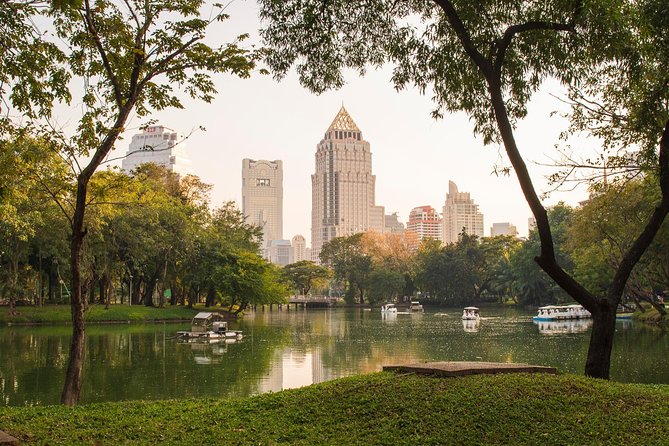
Then Benjasiri Park offers a break from the densest street visuals. Parks are useful because they give you calmer edges for practice. You can work on cleaner framing, background separation, and making space in your photos instead of just filling every corner.
If you’re unsure what to shoot next, this part of the lesson is helpful. It keeps you moving through Bangkok while giving you different visual challenges to learn from.
Wat Arun and the Giant Swing: geometry, angles, and big-frame impact
For many people, Bangkok photography has a “signature” phase: Wat Arun and the Sao Chingcha (the Giant Swing) are the kind of places that instantly give you iconic shapes. They’re also a great chance to practice angles.
These locations let you work on:
- making tall subjects feel strong in your frame
- learning how to shoot from viewpoints that emphasize structure
- avoiding clutter when there’s a lot happening around the subject
A good photo coach can help you avoid the common mistake of photographing these landmarks like a postcard. Instead, you want images that show you understand the scene—where your viewer’s eye goes first, and how the lines in the environment guide the story.
Even if you’re not a professional, learning that kind of framing here gives you repeatable skills. After you learn it once, you’ll start noticing good photo angles everywhere.
Train Night Market Ratchada: the payoff for low-light practice
If you choose the nighttime option, this is the stop that makes the whole experience feel like a real night photography lesson. Train Night Market Ratchada is the kind of environment that gives you lots of photo problems to solve at once: mixed lighting, shiny surfaces, moving people, and fast-changing scenes.
This is where you can practice night photography technique in real conditions instead of just reading about it on your phone. Your instructor’s job is to help you find workable settings and compositional approaches so you can get shots that look more than just dark and blurry.
I like that the experience also focuses on personal photographic expression at night. That’s important, because low-light shooting can become a technical grind if you only care about exposure numbers. You still want your photos to feel like you were there.
If you leave Bangkok with a few strong night market images—and a better understanding of how to get them—you’ll consider the lesson time well spent.
So/ Spa area: a final scene to test what you learned
The lesson doesn’t just stop after the big night market moment. You also have an additional stop at So/ Spa, which gives you another urban photo setting to experiment in before you head back.
Even without knowing exactly what angle your instructor will favor here, the purpose is clear: you get another chance to apply what you’ve been coached on. By the final stretch, you’ll usually have a better idea of:
- how to compose quickly
- how to handle background clutter
- how to adapt your shooting approach as light changes
This last bit matters. In photography, it’s easy to learn ideas earlier and then forget to apply them later. A final practice stop helps you lock in the skills while everything is still fresh.
What you’ll walk away with after 3 hours
A 3-hour lesson can’t turn you into a full-time photographer. But it can absolutely change how you shoot. The best outcomes here are practical: you get new skills, better composition instincts, and more motivation to keep improving.
One reason the experience stands out is that it’s taught by a local who knows how Bangkok looks through a camera lens. Paul’s coaching is repeatedly associated with:
- strong enthusiasm for photography
- helpful tips that actually translate to better shots
- leading people to unexpected places they might otherwise skip
That last point is key. Photography improvement isn’t only about settings. It’s also about being in the right spot at the right time with the right angle.
By the end, you should have:
- at least a handful of images you feel proud of
- a clearer idea of what to focus on when you see a scene
- a repeatable approach for composition and framing
And because it’s customized for your skill level, you’re less likely to feel lost—or bored.
Who this masterclass fits best
This works best if you want guided practice and you like learning by trying things right away. It’s a strong fit for:
- first-time Bangkok photographers who feel overwhelmed by the city’s visual noise
- intermediate shooters who want composition coaching and faster decision-making
- night photography fans who want real practice in Chinatown and night markets
It also helps if you’re traveling with a specific goal—street photos with story, temple images with strong structure, or night market scenes with mood. The private setup makes it easier to focus on your preference.
If you’re the type who already knows your camera inside out and only needs a list of places, you might find this more expensive than a self-guided walk. But if you want feedback and direction, the private coaching is the difference.
Should you book this Bangkok Photography Masterclass?
I’d book it if you want better photos without spending days trial-and-error-ing across Bangkok. The private format, the focus on composition, and the option to shoot day or night make this a smart use of limited time.
Choose daytime if you want cleaner detail and easier shooting as you learn framing. Choose nighttime if you want low-light practice and dramatic street atmosphere at places like Train Night Market Ratchada.
Skip it only if you’re unwilling to experiment for a few hours, or if your main goal is just to tick off famous spots with no coaching component.
If you want Bangkok through a camera with intention, this lesson is the kind of help that pays off fast.
FAQ
How long is the Bangkok Photography Masterclass private lesson?
It lasts about 3 hours.
What is the price per person?
The price is $160.00 per person.
Is this a private tour or a group tour?
It’s private. Only your group participates.
Can I choose a daytime or nighttime experience?
Yes, you can choose from daytime or nighttime tours.
Where does the tour start?
The tour starts at สถานีรถไฟหัวลำโพง (Rong Mueang), Pathum Wan, Bangkok 10330, Thailand.
Where does the tour end?
The experience ends back at the meeting point.
What’s included in the tour?
Bottled water is included.
Does the tour provide a mobile ticket?
Yes, it includes a mobile ticket.
Are service animals allowed?
Yes, service animals are allowed.
What is the cancellation policy?
You can cancel for a full refund if you cancel up to 24 hours in advance of the experience start time. Free cancellation applies with that timing rule based on local time.