REVIEW · ANCHORAGE
Turnagain Arm Highlights Photo Tour
Book on Viator →Operated by Alaska Photo Treks · Bookable on Viator
Turnagain Arm makes a simple drive photographic. This 5-hour tour out of Anchorage mixes short, well-timed photo stops with a pro photographer guide and practical help for shooting wildlife, water, and reflections. You’re moving along the Turnagain Arm area instead of spending the whole time stuck in one spot, which keeps the day feeling active and doable—especially if you want results without a ton of guesswork. Turnagain Arm is the star here, but the way the tour is paced is what makes it work.
I really like the small group size (max 10), because it keeps questions from getting lost in the crowd. I also love that the instruction is both creative and technical: you can get composition tips and real guidance for camera settings (or phone shooting), and the guide supports both smartphone and DSLR/mirrorless shooting with provided tripods.
The main drawback is that wildlife is never guaranteed. If conditions limit sightings—like bright sun or timing shifts—you might end up focusing more on birds you can see reliably (often bald eagles) and scenery photos than on the bigger-mammal stuff you hoped for. Wildlife timing is the variable.
In This Review
- Key highlights that make this tour worth your time
- Turnagain Arm photo magic: why this half-day works
- Your guides and why the teaching style matters
- Price and value: what you’re really paying for
- The flow of the day: four stops, 45 minutes each
- Stop 1: Falls Creek Trail and quick ways to practice composition
- Stop 2: Bird Point and getting serious about birds
- Stop 3: Portage Valley Recreation Area for water mood and steady framing
- Stop 4: Twentymile River for wildlife scouting and wider scenes
- What’s included: the practical stuff that improves your photos
- What’s not included: the one thing you must pack
- Pickup and logistics: where the tour will meet you
- How weather changes your photo plan (and what to do about it)
- Who should book this tour—and who might skip it
- Should you book the Turnagain Arm Highlights Photo Tour?
- FAQ
- FAQ
- How long is the Turnagain Arm Highlights Photo Tour?
- What time does the tour start?
- Where is the meeting point in Anchorage?
- Is pickup from Anchorage-area hotels included?
- Are tripods provided for both phones and cameras?
- Do I need to bring a camera?
- What kind of photography help do you get during the tour?
- How many people are on the tour?
- What happens if weather is poor?
- Is this tour suitable for children or limited mobility?
Key highlights that make this tour worth your time
- Pro photographer instruction for both phones and DSLRs so you’re not just sightseeing
- Small group (10 max) with more attention on your specific questions
- Four focused stops in about five hours so you get time to shoot, reset, and learn
- Stops chosen for wildlife and water scenes along the Turnagain Arm corridor
- Tripods included plus coffee and snacks to keep you comfortable
- Hotel pickup available for many Anchorage-area hotels (with a few specific exclusions)
Turnagain Arm photo magic: why this half-day works
If you’re in Anchorage with limited time, Turnagain Arm is a smart target. The shoreline and tidal-area scenery create strong photographic variety in a short distance: water textures, birds in flight or perched, and that distinctive Alaskan light that can swing from soft to dramatic fast.
What makes this tour feel efficient is the structure. You’re not spending hours between stops. Instead, you get short blocks (about 45 minutes each) at multiple locations, which is perfect for practicing what you’re learning right away. You can change your approach from one stop to the next: foreground framing at a trail spot, longer-lens bird or detail work at a birdier turnout, and then wider “look for reflections and patterns” thinking when the water cooperates.
This is also the kind of place where conditions matter. In one tour experience, low tide and bright sunshine reduced the chance of seeing moose and Dall sheep, but the lighting still made for excellent water-and-sky photography. That’s the honest trade-off: you’re chasing both wildlife and the visual mood of the moment.
You can also read our reviews of more tours and experiences in Anchorage.
Your guides and why the teaching style matters
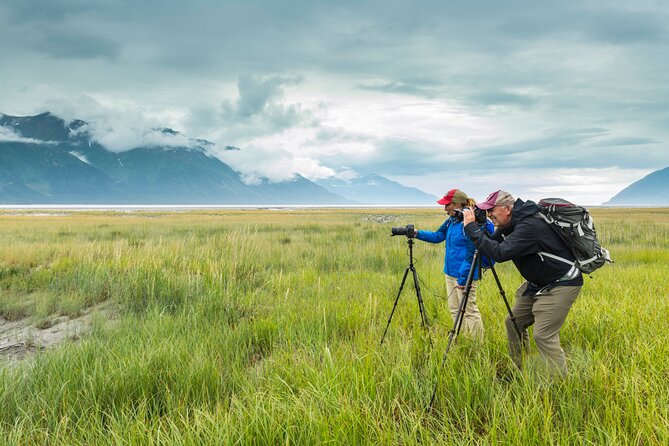
Alaska Photo Treks runs this tour with a professional photographer guide, and the instruction is clearly hands-on. The most consistent praise is about how the guide helps you get better shots fast—whether you’re working with manual camera settings or relying on your phone.
Colin Tyler is a name that shows up again and again in feedback. The common theme: he’s conversational, and he doesn’t treat photography like a mystery you have to study for months. Instead, he gives practical adjustments you can use immediately—like how to set your manual settings and how to think about framing.
On some days, a guide named Erica has also been mentioned in the same breath as Colin. The point for you: this isn’t a “stand here and hope” situation. You’re getting creative and technical support, and the day is built around teaching you how to see and how to respond when the light or wildlife situation changes.
Price and value: what you’re really paying for
At $209 per person for about five hours, this is not a budget “just drive around” outing. But it also isn’t only about transportation. The value shows up in the package:
- A pro photographer guide focused on practical shooting instruction
- Tripods provided for both smartphone and DSLR/mirrorless setups
- Natural history narrative en route, so you’re learning while you travel (not only at photo stops)
- Coffee and/or tea plus snacks, which matters in a cold, windy coastal setting
- Pickup and drop-off if you select the option
One thing to keep straight: cameras are not included. You bring your own camera or phone, and the tour supports your technique with the tripods and guidance. If you’d otherwise spend money on an informal “photo tips” session or try to wing it with no help, this format can be a good deal—especially since the group is capped at 10.
The flow of the day: four stops, 45 minutes each
The tour runs from 10:00 am and ends back at the meeting point. You start at Alaska Photo Treks, 907 E Dowling Rd #9, Anchorage, AK 99518. The stops are designed to keep you actively shooting, not just looking.
Here’s how to think about the timing: 45 minutes is enough to (1) get situated, (2) try a couple of compositions, (3) take a wildlife scan or two if conditions allow, and (4) then adjust once the guide’s advice clicks.
That pacing also helps you avoid the usual frustration of “I waited forever and then missed the shot.” Even if you don’t get moose every day, you can still leave with strong results—water texture, birds, reflections, and better composition choices.
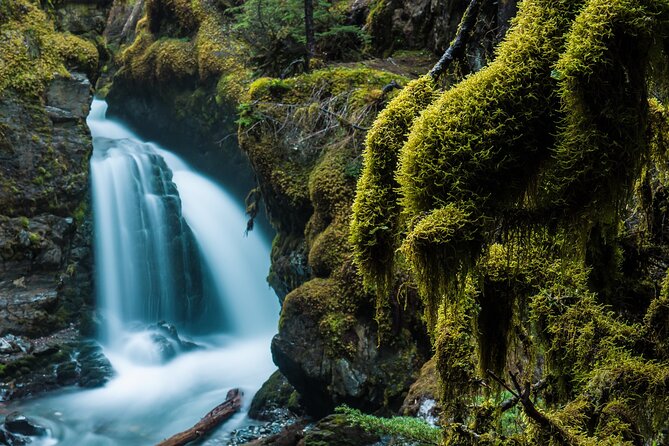
Stop 1: Falls Creek Trail and quick ways to practice composition
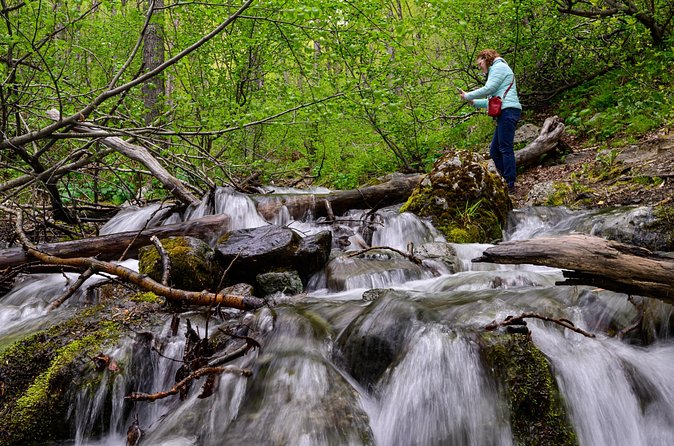
You’ll spend about 45 minutes at Falls Creek Trail. The admission is free, and the format is simple: use the time to create photos with intention.
Because you’re on a trail area, you can use foreground and leading lines more easily than you can from a wide turnout. That’s useful if you’re learning. You can practice a basic loop:
- Take a few frames to establish your viewpoint
- Change your angle slightly (a few steps matters)
- Try one tighter shot and one wider shot, then compare
A big plus of having a guide here is that you don’t waste time guessing what will work. The teaching style is geared toward giving you composition and camera-setting tips you can apply immediately, so this first stop often becomes your warm-up phase that sets you up for the more “wildlife and water” locations later.
Stop 2: Bird Point and getting serious about birds
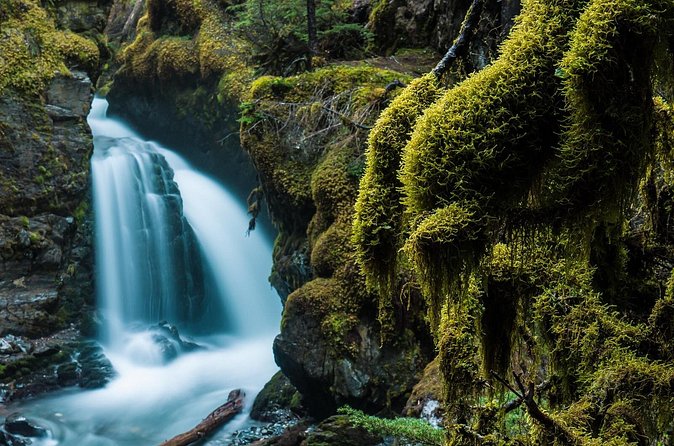
Next is Bird Point for another 45-minute photo window. This is the part of the tour where you’re most likely to shift into “watch, wait, shoot” mode.
Bird Point is where you’ll want to keep your eyes up and your camera ready. The feedback from past tours includes bald eagles, which fits the idea of focusing on birds and coastal wildlife along Turnagain Arm. If you’ve got a long lens, this is where it can earn its keep. If you don’t, you can still do a lot with good framing, steady support, and patient shooting.
One of the nicest practical benefits is that the tour isn’t only for people using a heavy camera. The guide’s help can extend to phones too, and the included tripods make it easier to hold still for a sharp shot. That matters because birds move fast, and phone cameras punish shaky hands.
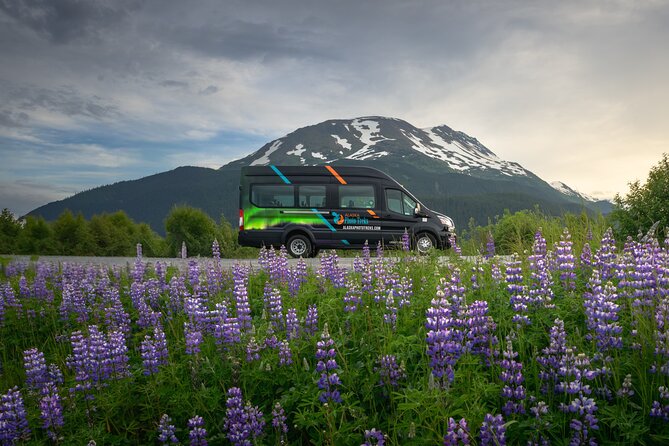
Stop 3: Portage Valley Recreation Area for water mood and steady framing
Then you head to Portage Valley Recreation Area for about 45 minutes. This is a great stop for turning your attention from “spot the subject” to “make the scene work.”
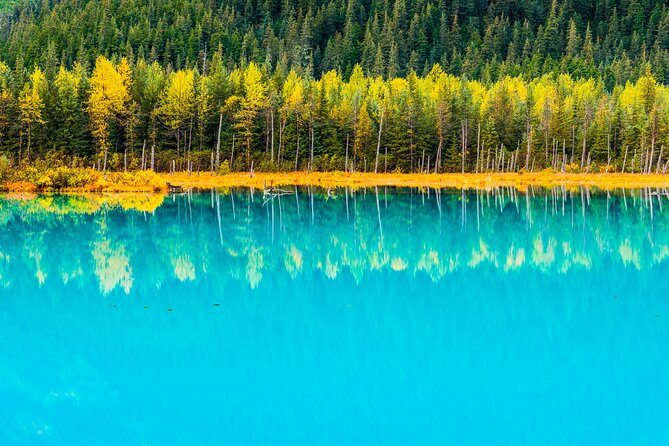
In real-world terms, this is where reflections and water texture can take over as the main story. One review highlights Portage Lake areas as a standout, and another mentions using reflections in the lake for striking shots. Whether you’re pointing at birds or just capturing the mood, reflections are one of those photo ingredients that instantly look more advanced when you handle them well.
The guide can help you with composition decisions quickly: where to place the horizon, how to balance the bright sky with darker water, and how to avoid the common problem of everything looking flat. This is also a good stop to experiment, because you’ve already warmed up your shooting habits at the first two locations.
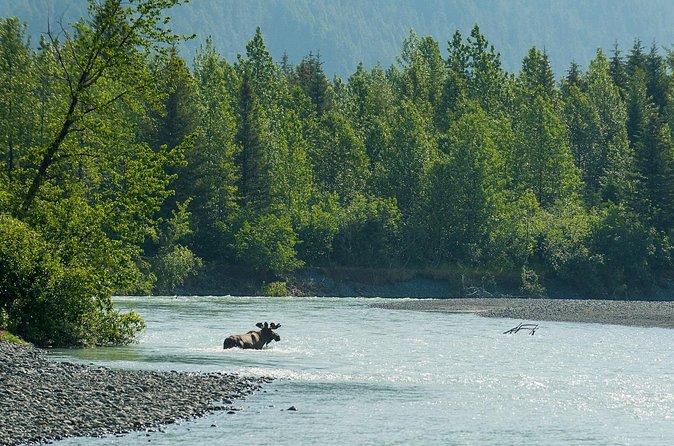
Stop 4: Twentymile River for wildlife scouting and wider scenes
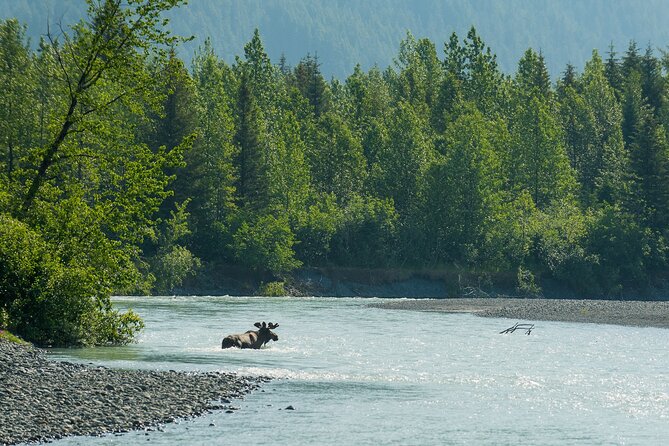
Your last stop is Twentymile River, again roughly 45 minutes. Rivers add another layer of variety: they guide your eye, they create movement in the frame, and they can attract wildlife depending on the moment.
This is a smart place to combine two skills:
- Wildlife scanning (where possible)
- Scenic framing (when wildlife is quiet)
In some experiences, moose-rut hopes didn’t lead to a sighting, and Dall sheep hunts came up empty. That doesn’t mean the stop is wasted. It usually means the best work shifts toward the visual elements that are still there: water flow, shoreline shape, and the way light hits the landscape.
And that’s the key takeaway for you: you’re not only booking a wildlife tour. You’re booking a photography tour that helps you produce results even when wildlife is elusive.
What’s included: the practical stuff that improves your photos
This tour includes more than instruction. The details are built for real shooting.
You get:
- Coffee and/or tea
- Snacks
- Tripods for smartphones and DSLR cameras
- Professional photographer guide
- Natural history narrative en route
- Creative and technical photography instruction and support
- Hotel pickup and drop-off if you choose it
Tripods are a big deal because they change what you can do. With steadier support, you can slow down and concentrate on composition. You can also frame longer, shoot multiple takes for timing, and reduce blur from wind or hand movement.
The coffee/snacks part is underrated. Coastal Alaska can be cold and damp, and waiting in place gets harder when you’re hungry or underdressed. A small comfort like this helps you stay in “shoot mode” rather than “survive mode.”
What’s not included: the one thing you must pack
Cameras are not included. Bring your own camera or phone and any normal accessories you need. The tour provides tripods suited to both.
If you’re planning on smartphone photography only, you’re in good shape. The instruction and support are not limited to camera users. The key is having your device set up to shoot steadily and being ready to adjust when the guide recommends changes to settings or technique.
Pickup and logistics: where the tour will meet you
The standard meeting point is Alaska Photo Treks on E Dowling Rd in Anchorage. The tour ends back there.
If you select pickup, hotel pickup is available for guests staying at Anchorage-area hotels. Not included: Girdwood, Chugiak, and Eagle River. Airbnb pickup can happen on a case-by-case basis if you’re near an Anchorage-area hotel in the Downtown, Midtown, or Spenard neighborhoods.
Two practical notes:
- You’ll receive a pickup schedule by email no later than 24 hours before the start time.
- The tour is near public transportation, but using a pickup is the easiest way to start focused and stress-free.
Because the group is capped at 10, logistics are also simpler. There’s less shuffling, and the guide can keep the day moving without long delays.
How weather changes your photo plan (and what to do about it)
This experience requires good weather. If it’s canceled due to poor weather, you’ll be offered a different date or a full refund.
Even on a day that does run, conditions affect wildlife odds and photo results. One review noted that low tide and bright sun reduced wildlife opportunities. Another described days where Turnagain Arm and Portage Lake areas became the real focus because the light and scene were strong.
So plan to be flexible. If wildlife doesn’t show up the way you imagined, you can still work with what’s present:
- Shoot water texture
- Use reflections when they appear
- Focus on birds that are likely to stay visible longer (when present)
- Let the guide’s composition tips guide your backup plan
Who should book this tour—and who might skip it
This works for most travelers, and it’s ideal if you want a guided day that improves your photography without turning into a full-time class.
It’s also a good fit if:
- You want help with manual settings or phone shooting
- You like small-group experiences
- You’re okay with wildlife being unpredictable and want strong scenic photos too
But it’s not recommended for:
- Children under 12
- Travelers with severe mobility limitations
Also, the tour requires people to be able to move and reposition at different stops. If walking is difficult for you, it’s worth thinking carefully before booking.
Should you book the Turnagain Arm Highlights Photo Tour?
Book it if you want a half-day in Anchorage that mixes real teaching with multiple shooting locations along Turnagain Arm. The tripods, instruction style, and small group cap make it more useful than a general sightseeing drive. You’ll come away with both photos and a better way to think about framing, settings, and timing.
Consider a different option if you’re only chasing a specific wildlife outcome and can’t handle a day where sightings are quiet. Wildlife timing varies, and bright conditions or tide shifts can change what you see. The good news is that even when animals are slow, the tour still gives you a structure that helps you produce strong images.
FAQ
FAQ
How long is the Turnagain Arm Highlights Photo Tour?
It runs for about 5 hours.
What time does the tour start?
The start time is 10:00 am.
Where is the meeting point in Anchorage?
You meet at Alaska Photo Treks, 907 E Dowling Rd #9, Anchorage, AK 99518, USA.
Is pickup from Anchorage-area hotels included?
Hotel pickup and drop-off are available if you select the option, for many Anchorage-area hotels. Pickups are not included for hotels in Girdwood, Chugiak, and Eagle River.
Are tripods provided for both phones and cameras?
Yes. The tour includes tripods for smartphones and DSLR cameras.
Do I need to bring a camera?
Yes. Cameras are not included, so you’ll need to bring your own.
What kind of photography help do you get during the tour?
You get creative and technical photography instruction and support, plus natural history narrative while you travel between stops.
How many people are on the tour?
The tour has a maximum of 10 travelers.
What happens if weather is poor?
The experience requires good weather. If it’s canceled due to poor weather, you’ll be offered a different date or a full refund.
Is this tour suitable for children or limited mobility?
It’s not recommended for children under age 12 and not recommended for travelers with severe mobility limitations. Service animals are allowed.