REVIEW · BROOKLYN
Brooklyn Bridge at Night Photography Tour
Book on Viator →Operated by New York City Photo Safari · Bookable on Viator
One night photo trip, big results.
This small-group Brooklyn Bridge at Night Photography Tour turns the iconic span and skyline into a hands-on lesson—so you’re not just staring at pretty lights, you’re learning how to capture them well. With a professional photographer guide, you’ll work from multiple viewpoints—on the bridge, then around Brooklyn Bridge Park—and practice core night techniques while the city does its thing.
I especially like the one-on-one style coaching built into a group of up to 6. I also love that you’re shooting the bridge and skyline from different angles in the same outing, which makes your photos feel more intentional than a single “stand here and hope” stop.
One possible drawback: this is a night walk. If you’re not comfortable moving on sidewalks after dark (or you hate cold weather), you’ll want to plan your gear and expectations accordingly.
In This Review
- Key Highlights You’ll Actually Use
- Why Brooklyn Bridge at Night Works So Well
- Meeting at Wholesome Farms Market (and Getting Rolling Fast)
- Price and Value: What $150 Buys You at Night
- The Brooklyn Bridge Stop: Shooting From the Actual Bridge
- Brooklyn Bridge Park: Skyline Angles and Real Night Skills
- Empire State and the Building Boom Detail You’ll Remember
- Manhattan Bridge Finish: Quick Frame, Big Payoff
- Group Size: Why Small Beats Private Here
- What to Expect With Your Camera (No Matter the Brand)
- Logistics That Make or Break a Night Photo Tour
- Who This Tour Suits Best
- A Quick Stop-By-Stop Summary (So You Can Plan Your Mindset)
- Should You Book Brooklyn Bridge at Night Photography?
- FAQ
- What time does the Brooklyn Bridge at Night photography tour start?
- How long is the tour?
- Where is the meeting point, and where does the tour end?
- How much does it cost?
- What’s included in the tour price?
- What happens if the weather is poor?
Key Highlights You’ll Actually Use
- Small group (max 6) means you’re getting real feedback, not vague tips
- On-the-bridge shooting gives a perspective most people never get
- Night basics made practical so you can fix exposure and composition on the spot
- Multiple skyline angles helps your photos go beyond one postcard view
- Techniques like bracketing and bulb mode show up in the teaching
- Professional guide energy includes composition prompts and quick corrections mid-shoot
Why Brooklyn Bridge at Night Works So Well
Night on the Brooklyn Bridge is more than atmosphere. The dark sky and the grid of city lights create strong contrast, and that’s exactly what makes night photography teachable—exposure, focus, and composition suddenly matter.
The best part is that you don’t just get a view. You get a working route across a handful of iconic sights, which helps you learn how to approach a scene instead of repeating the same framing every minute. When you’re standing under bridge structure with the skyline in the background, you can practice controlling light while you move.
Also, your eyes adjust faster than your camera does. A good night-photo guide helps you translate what you see into what your camera can record, without turning it into a science class.
You can also read our reviews of more tours and experiences in Brooklyn.
Meeting at Wholesome Farms Market (and Getting Rolling Fast)
You start at 108 Jay St, Brooklyn, NY 11201 at 8:30 pm. The tour ends back at the meeting point, so you’re not left figuring out a late-night transit puzzle.
The meeting spot matters more than it sounds. Starting near public transportation and keeping things simple helps the group get on task quickly—especially when it’s dark and you’re dealing with camera setups. You’ll have a mobile ticket, so you’re not hunting for paper.
From a practical angle, it’s also helpful that the tour is offered in English and is listed as easy for most travelers to join. If you’re arriving from elsewhere in Manhattan, the city’s subway connections are part of the plan—downtown subway routes can get you over to the A train line direction, then it’s a walk to the start.
Price and Value: What $150 Buys You at Night
At $150 per person for about 1 hour 50 minutes, this isn’t a bargain tour. But the value comes from how it’s structured: small group size plus an active photographer guide means you’re paying for instruction and time with the right viewpoints at the right moment.
If you’re traveling with a capable camera but no confidence at night, you’ll get the most out of that $150. You’ll learn the why behind things like exposure settings and how to correct them while you’re still in front of the scene. That’s the difference between taking a few decent shots and leaving with photos you actually feel proud of.
If you’re the type who only wants scenery and zero instruction, it might feel like extra cost. But if you want the skyline and bridge shots plus the technical guidance that makes your photos better, this is a solid use of your evening.
The Brooklyn Bridge Stop: Shooting From the Actual Bridge
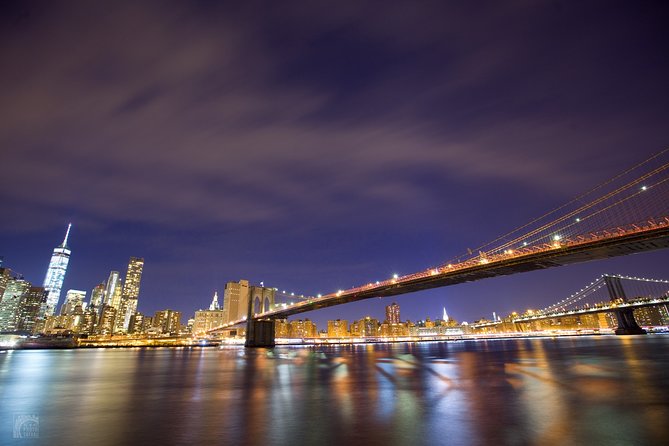
The first big chunk is about 1 hour 30 minutes at the Brooklyn Bridge. You’re there long enough to do more than take a quick set of images—you can test settings, change framing, and refine your composition as you learn what works.
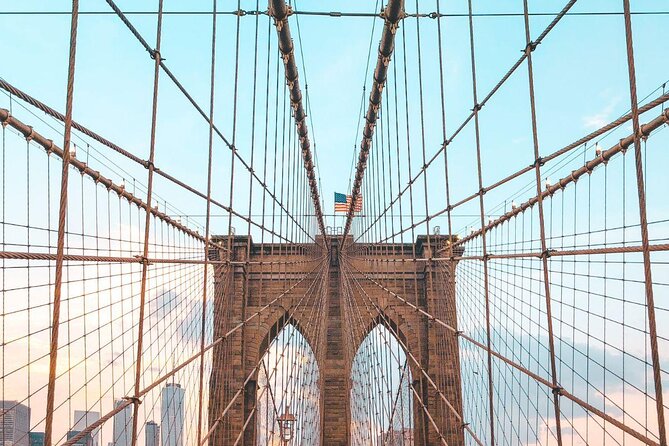
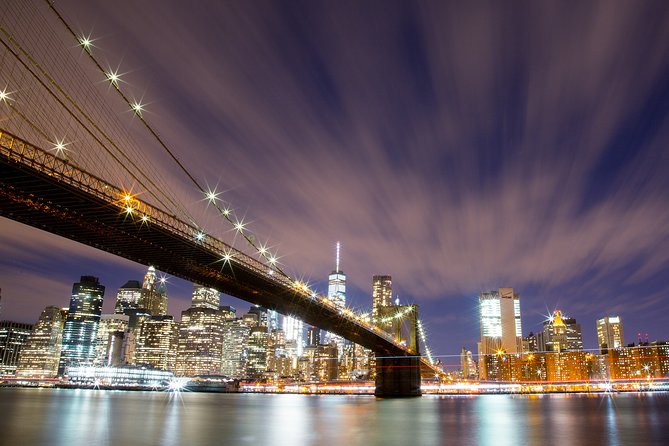
Here’s what makes this stop worth it. Shooting from the bridge itself puts you closer to the structure and leads you naturally into strong leading lines. The bridge cables, roadway, and support angles all help you build compositions that feel more dynamic than a shot taken from a distance.
Practical tip: night photography is all about light control. A good guide will help you get your exposure right before you waste a whole series of images. In past sessions with guides like Zim, the coaching focuses on checking your exposures and nudging your compositions so you’re not just grabbing whatever the camera gives you.
Also, if you’re using a tripod, you’ll appreciate time to set up and reframe safely. If you’re shooting handheld, you’ll still benefit from learning what shutter speed and technique to aim for—because that’s usually what separates sharp city light photos from blurry ones.
Brooklyn Bridge Park: Skyline Angles and Real Night Skills
After the bridge segment, you shift to Brooklyn Bridge Park. This is where the views open up and where your learning starts to pay off in the form of better skyline frames.
From these park viewpoints, you’ll see the Manhattan skyline with major landmarks in the mix—World Trade Center, Chrysler Building, and Empire State Building. You’ll also get a clear sense of how the bridge connects with the city on the other side, which helps you compose images that include both foreground structure and background lights.
This part is also where the technical lessons often feel most obvious. Skyline lights give you predictable highlights, so you can practice things like managing brightness and keeping the buildings from turning into blown-out blobs.
One of the most praised aspects in these shoots is the instruction style. Zim is known for explaining advanced techniques in a way that’s easy to follow, plus encouraging you to think in terms of composition rather than just settings. In particular, you’ll see emphasis on methods like bracketing (taking multiple exposures to increase your chances of a well-balanced result) and bulb mode (useful for long exposures when you want more control than standard shutter speeds).
If you’ve ever tried night skyline photos and felt like your images came out either too dark or too bright, this is where you learn a path to fix it.
Empire State and the Building Boom Detail You’ll Remember
You’ll also pick up fun NYC context while you shoot—like the idea that it wasn’t the Empire State Building that kicked off the building boom. The teaching includes the point that it was actually the Woolworth Building. That’s the kind of detail that makes your photos feel tied to place, not just to subject.
You may also hear about the World Trade Center as one of the newest landmarks viewed from here, which can add meaning to what you’re photographing even if you don’t consider yourself a “history person.”
Manhattan Bridge Finish: Quick Frame, Big Payoff
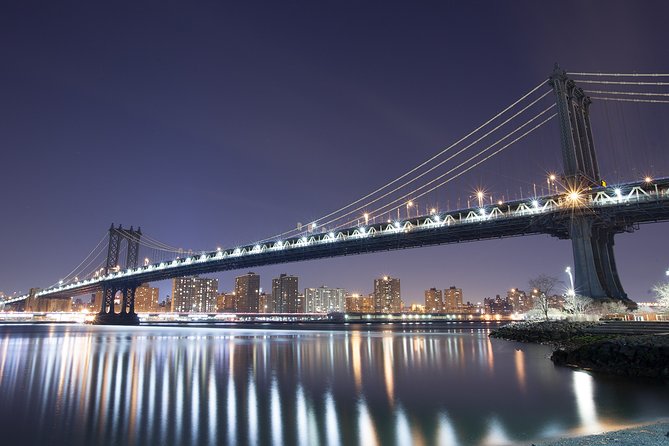
Near the end, you photograph the Manhattan Bridge from Brooklyn Bridge Park. This portion is shorter—around 20 minutes—but it’s a useful capstone because it changes the composition challenge.
The Manhattan Bridge has its own geometry, and switching bridges keeps you from getting stuck using only one favorite framing trick. In a small-group guided shoot, those short time windows matter: you’re forced to make decisions faster, then refine them with quick feedback.
If you want a simple strategy for your final stretch, it’s this: use the last segment to test what you learned earlier. Try your refined exposure approach, adjust composition, and take your best shots where you can still see the bridge clearly against the background lights.
Group Size: Why Small Beats Private Here
A maximum of 6 travelers keeps things focused. You’re not waiting while someone else’s camera gets debugged, and the guide can check your work quickly—exposure, framing, and whether your approach matches the look you’re aiming for.
That matters because night photography often includes tiny adjustments. You might change just one setting and suddenly your results improve. When you’re with a group of 6, you can actually notice what changed because you’re not cycling through a long wait for help.
This is also why the guide names matter in the real experience. Sessions led by Zim have a reputation for combining punctuality, professional teaching, and real-time corrections. And there’s also a mention of Mike helping troubleshoot a small issue by phone—an example of the team not disappearing once the shoot starts.
What to Expect With Your Camera (No Matter the Brand)
You don’t need to know everything before you come. The tour focuses on night photography basics and then tests your learning through practice. You’ll be encouraged to set up, shoot, review what you captured (at least in your mind while you’re still there), and adjust.
The most common skills emphasized in these kinds of bridge shoots are practical ones:
- how to think about exposure when the scene has bright and dark areas
- how to use bracketing to improve your odds
- when bulb mode is useful for longer light trails or controlled brightness
- how to build better compositions using the bridge lines and skyline shapes
If you’re using a camera with manual options, you’ll get more out of the teaching. If you’re on a simpler setup, you’ll still benefit from guidance on how to approach night lighting without guessing endlessly.
Logistics That Make or Break a Night Photo Tour
This outing requires good weather. If it’s canceled due to poor weather, you’ll be offered a different date or a full refund. That’s important because bridges and skyline shooting depend on visibility—and wet conditions can turn “beautiful lights” into “muddy chaos” fast.
Another practical note: you start at 8:30 pm, and you’re on foot afterward. Wear layers. One participant even noted how cold it was, and that’s the kind of detail that should shape your packing decision. Bring what you need to stay comfortable so you can focus on photography instead of shivering through the lesson.
The tour says it’s near public transportation and allows service animals. It also notes that children must be accompanied by an adult, so it’s family-possible, but keep in mind the activity is centered on nighttime walking and camera work.
Who This Tour Suits Best
This is a great fit if you:
- want to learn night photography basics without a dry classroom vibe
- have a camera (or advanced phone) and want more consistent results
- care about skyline composition and not just quick snapshots
- like shooting with a guide who can help with both settings and framing
It might be less ideal if you:
- only want casual sightseeing and prefer to wander without structured stops
- struggle with night walking and moving between viewpoints
- need a fully accessible route and rely on specific mobility accommodations (the tour is “readily accessible” via transit, but the details of step-free movement aren’t spelled out)
A Quick Stop-By-Stop Summary (So You Can Plan Your Mindset)
- Brooklyn Bridge (about 1h30): practice bridge framing, get exposure guidance, and capture the bridge from the place most tourists never photograph from. Expect the “learn by doing” part to be strongest here.
- Brooklyn Bridge Park: skyline views with major landmarks, plus deeper night-photo practice like bracketing and bulb mode. This is where your images start looking more intentional.
- Manhattan Bridge (about 20 min): a shorter final segment that lets you apply what you learned while switching to a new bridge composition challenge.
Should You Book Brooklyn Bridge at Night Photography?
I think you should book it if you want one evening in NYC that does two things at once: gives you iconic images and teaches you how to make better night photos on your own afterward.
If you’re on the fence because of the $150 price, focus on the goal. This tour is at its best when you want coaching—small-group attention, real-time exposure help, and guidance that covers both technique and composition. If you just want the skyline with no learning, you can always DIY from public viewpoints. But if you want your camera to finally behave at night, the guide-led approach is the whole point.
FAQ
What time does the Brooklyn Bridge at Night photography tour start?
It starts at 8:30 pm.
How long is the tour?
The duration is about 1 hour 50 minutes.
Where is the meeting point, and where does the tour end?
Meet at Wholesome Farms Market, 108 Jay St, Brooklyn, NY 11201. The tour ends back at the same meeting point.
How much does it cost?
The price is $150.00 per person.
What’s included in the tour price?
A professional photographer guide is included, along with a mobile ticket.
What happens if the weather is poor?
The experience requires good weather. If it’s canceled due to poor weather, you’ll be offered a different date or a full refund.