REVIEW · CAPE COD
Private Guided Night Photography Tours on Cape Cod (for one photographer.)
Book on Viator →Operated by Cape Nights Gallery · Bookable on Viator
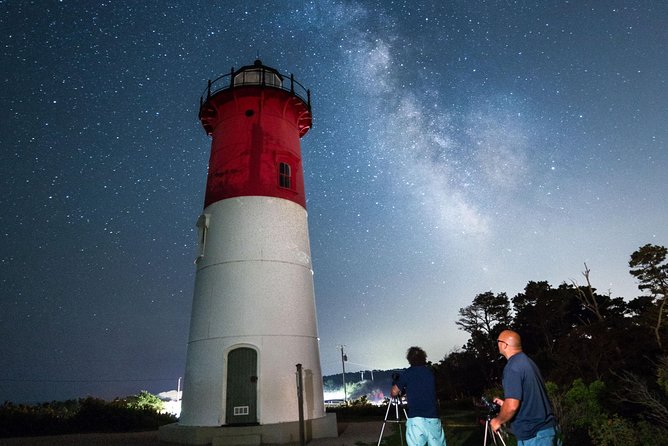
A night sky lesson with real Cape Cod views. This private tour is built for photographers who want moonlight or starlight images that actually look intentional, not accidental snapshots. I like that Tim’s teaching stays practical, from exposure settings to light painting, while still pairing you with landmark backdrops like Nauset Light and the Cape Cod Canal bridge area. The main thing to consider is that it runs on dark-sky timing and weather, so you may need some flexibility when the sky cooperates less than planned.
You’ll also get a route that’s paced for spotting compositions in low light, with enough stops to feel like you’re building a real night portfolio. You’ll receive printed course material plus a matted print from one of the night’s locations. One possible drawback: it’s a 4-hour plan focused on the best dark-sky targets, so it’s not the right choice if you’re looking for a long, casual scenic drive.
If you’re the kind of photographer who wants the “how” as much as the “where,” this experience is an efficient, value-rich way to upgrade your night results on Cape Cod.
In This Review
- Key highlights to look for
- Why Cape Cod at night is different (and worth planning)
- Price and what you really get for $425 per person
- The 8:00 pm timing that makes the whole night work
- Pickup, getting to the shots, and keeping your gear happy
- Moonlight vs starlight: how the sky choice changes your images
- Stop-by-stop: what to expect at each Cape Cod night target
- Stop 1: Nauset Light
- Stop 2: Cape Cod National Seashore
- Stop 3: Chatham Lighthouse Beach
- Stop 4: Cape Cod Canal Railway Bridge opening schedules
- Stop 5: Rock Harbor Marsh
- Stop 6: Nobska Point Lighthouse
- Stop 7: Woods Hole Drawbridge
- Stop 8: The Three Sisters Lighthouses
- Techniques you’ll likely work on: light painting, long-exposure control, and astro-style thinking
- What you’ll take home besides photos: the printed material and matted print
- Weather reality check: how to handle clouds and shifting skies
- Should you book this Cape Cod night photography tour?
- FAQ
- Is this a private photography tour?
- How long is the Cape Cod night photography tour?
- What time does the tour start?
- Do you pick me up, and is transportation included?
- Do I need to be an experienced photographer?
- What happens if the weather is poor?
Key highlights to look for
- Moonlight vs starlight choices driven by the moon calendar
- Tim’s full-time night focus, including light painting and astro-style settings
- A tight Cape Cod National Seashore + outer Cape route with lighthouse and beach options
- Transportation in an SUV with pickup that covers much of the Cape
- Printed course material and a matted print from one stop
- A private setup with just your group, so you’re not rushed
Why Cape Cod at night is different (and worth planning)
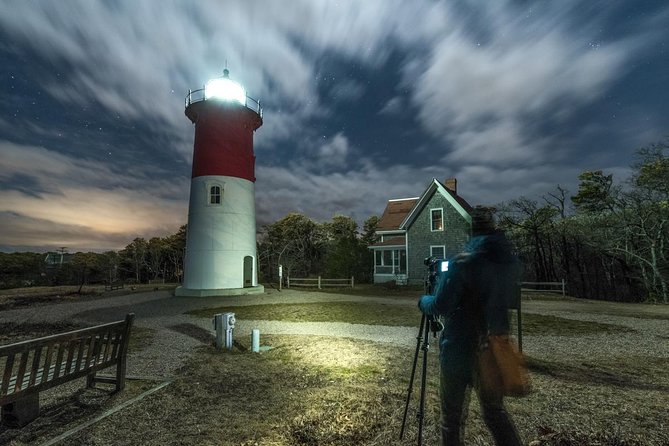
Cape Cod at night has a special kind of structure: lighthouses, marsh edges, beaches with long sightlines, and roads that connect everything fast enough to matter for astronomy. During the evening, the light changes fast, and that’s exactly where most night photos go wrong. A guide who thinks in nighttime terms helps you move with the clock, not against it.
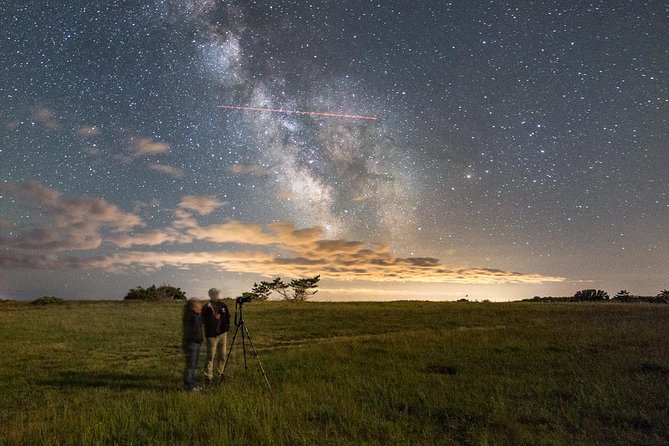
This tour is also designed around the sky you’ll actually get. You can choose between moonlight and starlight tours, and the moon calendar determines what conditions show up. That matters because moonlight can make lighthouses and sand look detailed, while darker sky supports stronger stars and a more “space-like” look.
The route leans into Cape Cod’s most recognizable night subjects, but the teaching is what turns those subjects into images you’ll want to print. If you’ve tried night photography before and felt stuck, this format gives you specific ways to correct exposure and handle light sources.
Price and what you really get for $425 per person
At $425 per person for about 4 hours, the price may sound steep if you’re comparing it to a casual sightseeing tour. The value here is mostly in what’s included and what you’ll likely learn in one sitting.
You get:
- Private guiding tailored to your pace and skill level
- Transportation to multiple locations across Cape Cod
- Printed course material
- A matted print from one of the night’s stops
That combination matters because night photography is gear- and knowledge-heavy. A private guide saves time figuring out which settings work, how to treat bright lighthouse lights, and how to plan shots when the sky and tide-related lighting shift. You’re not just being driven to pretty spots; you’re being coached on how to produce keepers.
If you’re a solo photographer, the private setup is a strong fit. You’ll also get more benefit if you already own the basics (camera, tripod, and anything you use for long exposures), because the tour is built around technique rather than renting equipment.
The 8:00 pm timing that makes the whole night work
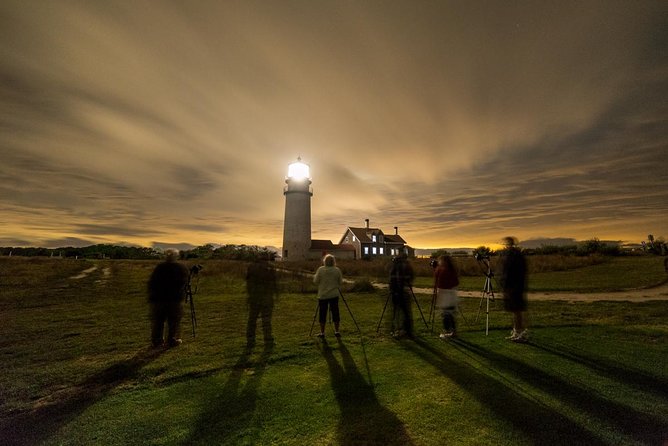
The tour starts at 8:00 pm and runs about 4 hours. That timing is deliberate: it’s late enough for dark-sky opportunities, but early enough to still have workable light at many stops for composition and focusing.
You’ll be moving between lighthouse and beach points where night scenes can shift from usable to tricky as skies change. With limited hours, you want a guide who can sequence stops so you’re not waiting around with a dead camera. This tour’s stop list is paced to keep you shooting instead of only looking.
Bring patience for the sky. One highlight from a 5/5 review: even when clouds showed up, the teaching and planning helped produce great shots. That’s the right mindset for night work anyway—clouds can soften contrast and still be useful if you know how to adapt settings.
Pickup, getting to the shots, and keeping your gear happy
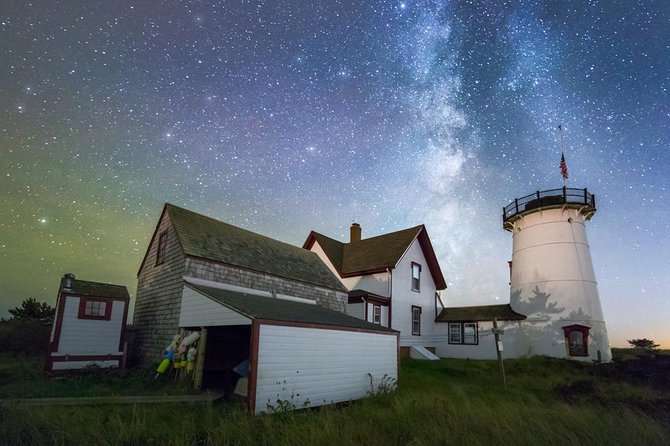
You can be picked up at your hotel, Airbnb, or residence on Cape Cod between Falmouth and Eastham. If you’re staying outside that range, you’ll meet the guide along the National Seashore. The tour also offers an option to meet at each location in your own vehicle as you travel through the evening.
Transportation is provided via an SUV that can comfortably handle you and your gear. That detail sounds small, but at night it’s huge: you don’t want to be juggling tripods, lenses, and bags in the dark while also worrying about parking near fragile dunes or busy areas.
The meeting point is the Cape Cod National Seashore – Salt Pond Visitor Center (50 Nauset Rd, Eastham, MA 02642), and the tour ends back there. Knowing it returns to the same starting point helps you plan your night meal or lodging without a complicated post-tour transfer.
Moonlight vs starlight: how the sky choice changes your images
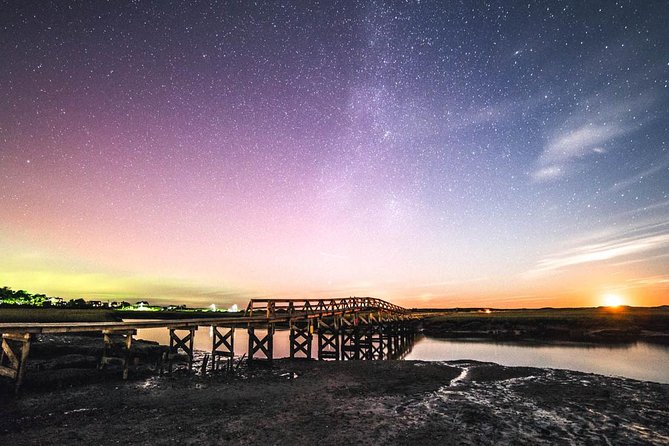
You’ll be choosing between a moonlight or starlight approach, and the moon calendar decides what sky conditions you’ll see. Think of it like choosing a lighting style.
Moonlight tours tend to reveal more texture in sand, rocks, and lighthouse surfaces. That can help your images feel grounded and cinematic without needing to push everything to the extreme long-exposure end.
Starlight tours aim for darker sky conditions where stars and the night sky become a stronger part of the scene. That typically means you’ll focus more on star-friendly exposures and techniques meant for astrophotography-style results.
Either way, you’re learning how to respond to the conditions in real time instead of following a single “perfect” camera recipe. That adaptability is what separates tourist night photos from images that look intentional.
Stop-by-stop: what to expect at each Cape Cod night target
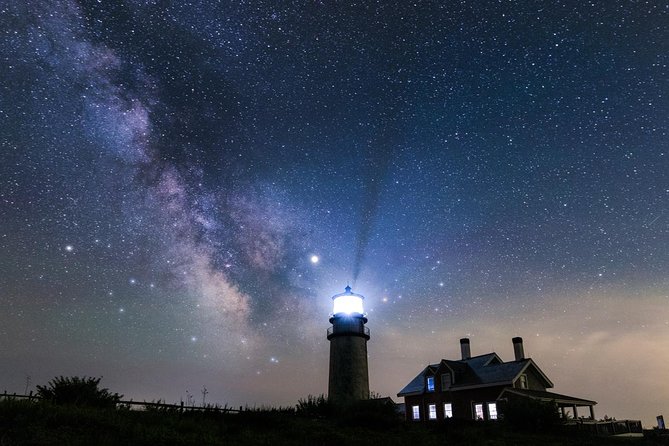
Stop 1: Nauset Light
Nauset Light is a classic night subject on Cape Cod for a reason: it gives you a clear focal point and a dramatic coastline context. At night, lighthouses also bring bright artificial light into the frame, which can easily wreck your exposure if you’re guessing.
This is where the technique side becomes practical. You’ll get coaching on how to handle the contrast between strong lighthouse illumination and the darker ocean or dunes around it. If you’ve ever wondered why your lighthouse looks blown out or your sky goes gray, this kind of guided stop usually helps you correct that fast.
A possible drawback: lighthouse areas can feel busy at certain times, and nighttime conditions can make it harder to find exact footing. The payoff is that the composition potential here is high.
Stop 2: Cape Cod National Seashore
The National Seashore stretch gives you flexibility for compositions that use beaches, dark shorelines, and open sightlines. At night, those long lines are your friend because they help the viewer’s eye move into the frame.
This stop is valuable because it’s not just one “icon” photo. It’s a chance to work on the fundamentals: positioning, horizon management, and how to compose with low-light depth. You’ll also be thinking about what the sky is doing, since moonlight or clouds can change the overall look quickly.
The consideration: this part of the route can be more about building frames than landing one guaranteed masterpiece. If you stay patient and follow the guide’s direction on settings and framing, that’s when it pays off.
Stop 3: Chatham Lighthouse Beach
Chatham Lighthouse Beach blends beach dynamics with a lighthouse presence, which is a strong recipe for night storytelling. Beaches can give you shoreline reflections, leading lines, and a sense of scale when you include the right foreground elements.
At night, you’ll want to manage exposure carefully so the sand doesn’t turn into a muddy gray blob. That’s where the coaching you’ll receive—especially around exposure settings—tends to matter the most. If you’re aiming for stars, you’ll also want to balance how bright your foreground is compared to the sky.
Possible drawback: sand and horizon edges can be tricky to compose in darkness. A guided moment to get your bearings fast helps a lot here.
Stop 4: Cape Cod Canal Railway Bridge opening schedules
This stop is built around timing. Bridge and canal-area light patterns can offer a powerful nighttime scene, but the “moment” matters, which is why opening schedules are part of the plan.
Even if everything doesn’t happen exactly as hoped, this type of stop usually teaches you a useful night skill: waiting for light or movement, then shooting decisively when conditions align. It’s not only about taking one photo; it’s about learning the rhythm of nighttime observation.
The drawback is simple: when you’re working on a schedule-based location, you’re depending on real-world timing and weather. That’s also why the tour emphasizes conditions and uses the moon calendar approach for the sky side.
Stop 5: Rock Harbor Marsh
Marsh scenes can look magical at night because of the mix of land shapes and the chance for soft, atmospheric reflections. When there’s enough sky contrast, marsh edges can become a silhouette with depth—great for moody night compositions.
This stop is valuable if you want more than lighthouses. It helps you practice seeing nighttime forms and managing contrast so dark marsh areas don’t crush all your detail.
Possible drawback: marsh lighting can be subtle. If you only shoot on auto settings, you might miss the moments where small exposure tweaks make a big difference.
Stop 6: Nobska Point Lighthouse
Nobska Point Lighthouse is another strong lighthouse anchor, and it’s the kind of stop that rewards careful exposure choices. In night photography, lighthouses often create the hardest challenge: bright light sources in a frame full of dark tones.
This is where hands-on coaching about how to treat bright highlights becomes a practical education. You’ll also likely cover a better way to build a scene: not just pointing the camera at the light, but placing the lighthouse in relation to foreground and sky.
The consideration: lighthouse zones can involve uneven ground or viewing angles that are hard in the dark. A guide’s knowledge of where to stand and how to frame helps keep you safe and productive.
Stop 7: Woods Hole Drawbridge
A drawbridge at night can add a sense of motion potential and industrial-lights texture that you don’t always get at coastal lighthouse points. If your goal is a more dynamic nighttime story, this stop can deliver.
It also supports a useful learning theme: composing with man-made light and figuring out exposure settings that keep your scene readable rather than washed out.
Potential drawback: like the canal area, the “best moment” can depend on timing. So it’s good if you’re okay with waiting a few minutes for the right light.
Stop 8: The Three Sisters Lighthouses
Ending with The Three Sisters is a smart move. Multiple lighthouse elements let you practice composition decisions that are harder with a single subject: spacing, alignment, and how to keep multiple lights from blowing your frame.
This stop is great for reviewing what you’ve learned across the night. By the time you reach the final lighthouse cluster, you usually have a better sense of how your camera behaves in the moonlight or starlight conditions you’re experiencing.
Possible drawback: the final stop can feel like a “pressure moment” because you want to nail it. The private setup helps because you’re not sharing time with a large group, so you can take a few extra frames while you refine.
Techniques you’ll likely work on: light painting, long-exposure control, and astro-style thinking
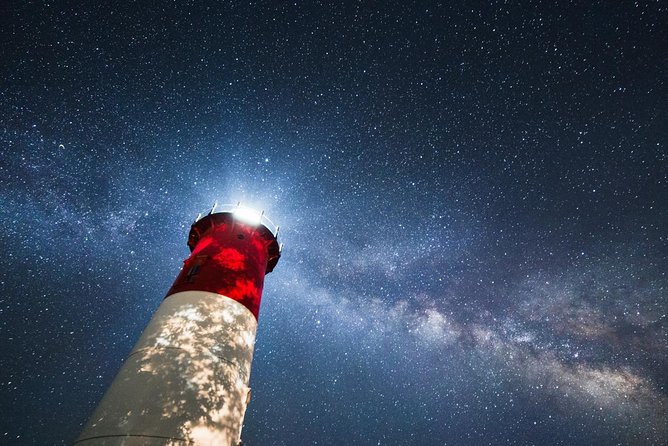
Night photography success usually comes down to a handful of controllable variables. This tour is built around learning those variables in context, at actual Cape Cod locations.
Based on the kinds of lessons people praise from this experience, you can expect hands-on focus on:
- Light painting methods (how to add controlled glow without wrecking exposure)
- Exposure settings for night scenes with bright points of light
- Astro photography approaches, especially when the sky supports stars
Even if your end goal is not star photography, these skills help across lighthouse and beach scenes. Correct exposure is the foundation for everything else. When you understand it, your images start looking more consistent from shot to shot.
You’ll also receive printed course material, which is useful for reference after the tour when you’re reviewing your photos at home and trying to remember why a specific frame worked.
What you’ll take home besides photos: the printed material and matted print
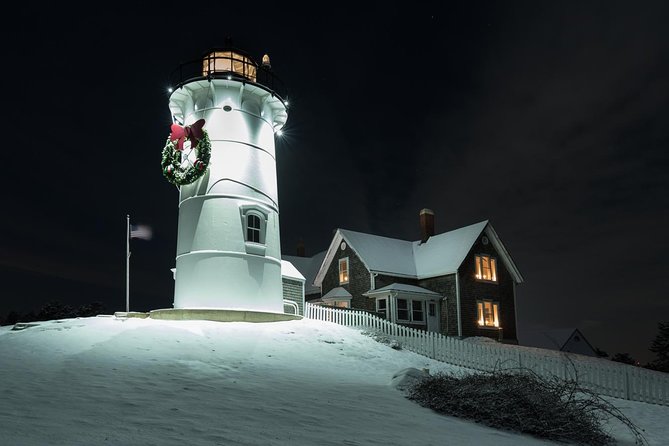
Most photography experiences end when you stop shooting. Here, you get more support to turn the night into an actual keepsake.
You’ll receive:
- Printed course material you can use to repeat your results later
- A matted print of one of the night’s locations
The matted print is a nice touch for two reasons. First, it gives you an instant physical memory without needing to process your own workflow right away. Second, it encourages you to think like a photographer with a final output, not only a camera collector with thousands of files.
Weather reality check: how to handle clouds and shifting skies
This is a night photography tour, so weather matters. The experience runs in good weather, and if it needs to be canceled due to poor weather, you’ll be offered a different date or a full refund.
Even when the sky isn’t perfect, you can still get results. One glowing review specifically noted great shots even after clouds came in. The lesson there is practical: a good night photographer doesn’t just wait for the perfect sky. They learn how to work with what arrives.
If you book, dress for chilly Cape Cod evenings. Bring layers you can move in, and keep your hands warm so you can adjust settings and shoot confidently.
Should you book this Cape Cod night photography tour?
Book it if you want a guided path to Cape Cod night icons plus real technique coaching in the field. The private format, the inclusion of transportation, and the combination of lighthouse, beach, marsh, and canal/bridge-style scenes makes this a strong “one night” upgrade for your skills.
Skip it if you’re purely browsing for scenery and you don’t want to adjust settings, practice shooting, or learn a night workflow. This tour is photography-first. It’s not a slow walk through dark streets—it’s a focused shooting session where you learn what to do next.
If you’re willing to plan around moon choice and be flexible with weather, you’ll likely leave with images you’re proud of and a clearer plan for your next night shoot on your own.
FAQ
Is this a private photography tour?
Yes. It’s a private tour/activity, and only your group participates.
How long is the Cape Cod night photography tour?
The duration is about 4 hours.
What time does the tour start?
The start time is 8:00 pm.
Do you pick me up, and is transportation included?
Transportation is included. The guide picks you up at your hotel, Airbnb, or residence anywhere on Cape Cod between Falmouth and Eastham, and you’ll meet along the National Seashore if you’re outside that range. It can also be possible to meet at each location in your own vehicle.
Do I need to be an experienced photographer?
No. All skill levels are welcome, and you only need your camera gear and a passion for photographing Cape Cod at night.
What happens if the weather is poor?
The experience requires good weather. If it’s canceled due to poor weather, you’ll be offered a different date or a full refund.