REVIEW · BAR HARBOR
Milky Way Photography Workshop in Acadia National Park
Book on Viator →Operated by Wildscape Adventure · Bookable on Viator
Watching the Milky Way over Acadia feels unreal. This workshop turns that moment into real technique, with guided shooting around iconic spots and practical instruction from Christopher. I like two things most: the focus on how to make the image (not just admire it), and the structured editing plan using Lightroom and Photoshop.
The biggest drawback to know up front: you’re signing up for late-night field time. Sessions run into the early morning and again at night, so it’s not a casual, daytime photo walk.
You’ll be doing more than one “click and pray” session. Expect help setting exposure, focus, and composition, plus follow-through in post-processing, including a one-on-one help time on Discord.
In This Review
- Key things that matter before you book
- Why Acadia at night is such a good classroom
- The rhythm of the 5-day workshop (and why it’s intense)
- Jordan Pond and the early lesson: planning first, shooting second
- Otter Cliff: turning a famous spot into a repeatable method
- Bubble Pond: practicing stacked frames and focus discipline
- Sand Beach: blending exposures so the foreground tells the story
- Eagle Lake in Acadia: seeing the whole workflow, not just the sky
- The actual camera skills you’ll practice (no shortcuts)
- The editing workflow: Lightroom + Photoshop, then real follow-up
- Transportation, snacks, and staying sane at night
- Price vs. what you actually get
- Who this workshop is best for (and who should think twice)
- Should you book this Milky Way workshop in Acadia?
- FAQ
- How long is the Milky Way photography workshop in Acadia?
- Where does the workshop take place?
- Do you get pickup and transportation during the workshop?
- Is instruction included, and do you get editing help after?
- What camera gear do I need to participate?
- Do you use PhotoPills during the workshop?
- What’s not included in the price?
- What if the weather is bad?
Key things that matter before you book
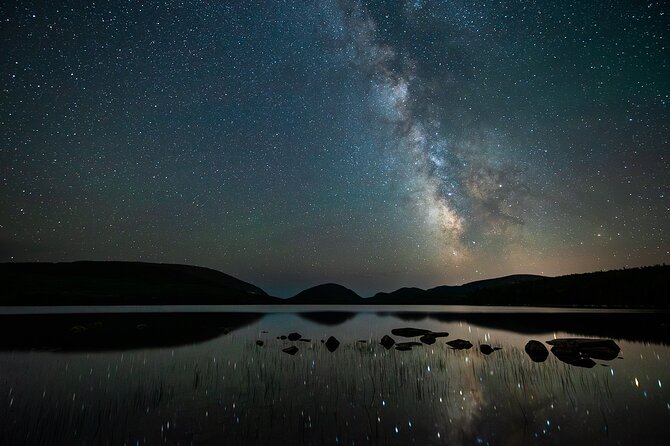
- Small group (max 5) means you’re not lost in the dark with 30 other people.
- Christopher’s teaching pace blends classroom and field work so you understand what to do before you try it.
- PhotoPills planning is part of the workflow, so you’re not guessing where the Milky Way will land.
- Single-exposure, stacked, and blended approaches cover multiple ways to get strong night-sky results.
- Editing support in Lightroom + Photoshop, plus Discord follow-up, helps you finish images you’re proud to share.
Why Acadia at night is such a good classroom
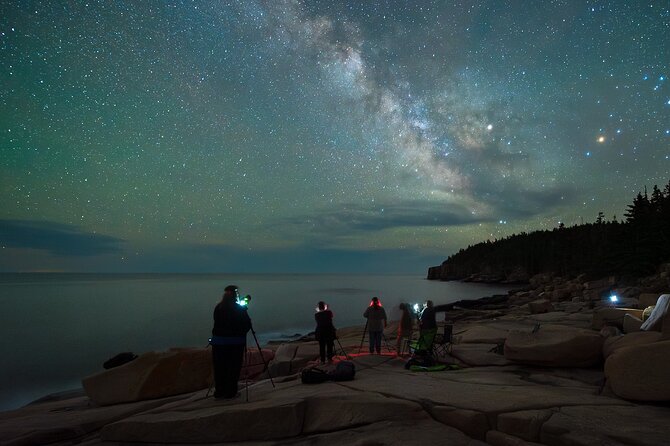
Acadia National Park is the kind of place where the night sky feels like it has a frame. The workshop’s whole premise is storytelling: stars aren’t the only subject. You’re also working in the foreground—ponds, cliffs, and shoreline-style scenes—so your final images have depth and direction.
The best part is that the instruction stays practical. You’re not just learning what the Milky Way looks like. You’re learning how to capture it in a way that looks intentional: exposure choices, timing, and blending so the foreground doesn’t turn into a black blob.
Also, the workshop is designed for people who want to keep improving. The format includes both in-field shooting and post-processing, which matters because night work lives and dies in editing. A great capture can still become a mess in post; a tricky capture can become great with the right workflow.
The rhythm of the 5-day workshop (and why it’s intense)
It runs about 5 days, and the schedule centers on the hours when you can actually photograph the Milky Way. The listed session windows show late night and early morning blocks: Tuesday through Saturday, with windows that run from 12:00 AM to 3:30 AM and again from 7:00 PM to 11:30 PM.
That timing shapes the entire experience. You’ll spend real time outside setting up, shooting, checking results, and adjusting as conditions change. If you’re the type who gets cranky after lack of sleep, plan to treat this like a photo boot camp.
Group size is capped at 5 travelers, and transportation is private within the park. That combination matters because it reduces waiting around. When you’re chasing a narrow weather window and a specific sky position, fewer variables help.
Jordan Pond and the early lesson: planning first, shooting second
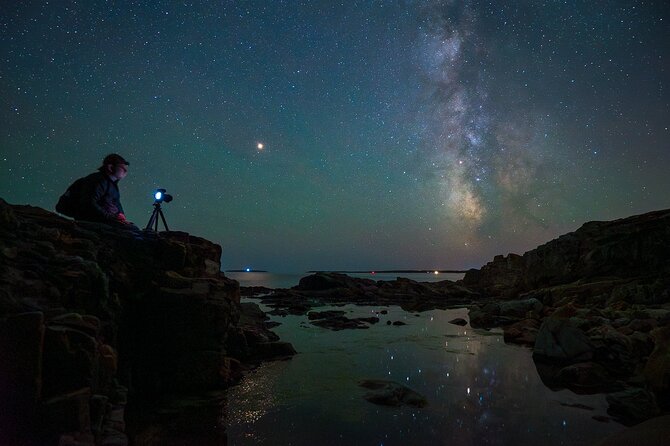
Jordan Pond is one of the first stops. This is a smart way to start because still-water scenes are unforgiving in a useful way: your framing, your focus, and your exposure decisions show up clearly.
The workshop’s approach leans on planning. You’re guided on how to use the PhotoPills app to line up compositions for the Milky Way, including timing for alignment. That’s huge if you’ve ever shown up at a location only to realize the sky angle isn’t what you imagined.
What you’ll focus on here is not only capturing stars, but capturing them with intention. You’ll practice settings for the night sky and learn how to think about the foreground as part of the final picture, not as an afterthought.
Otter Cliff: turning a famous spot into a repeatable method
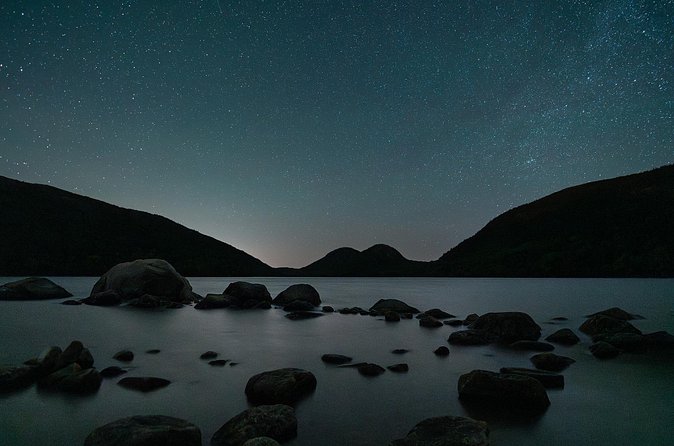
Otter Cliff is on the list, and it’s one of those places where photographers tend to come with expectations. The workshop helps you move past that.
Here’s what changes when instruction is part of the game: you stop treating every stop as a brand-new puzzle. You build a repeatable process—set up, test, refine focus, shoot, and then adjust based on results.
This workshop also teaches two main ways to tackle the sky:
- Single-exposure strategies for clean, sharp frames
- Stacking for stronger results when conditions or camera noise are working against you
That’s where the night-sky photography skill jumps. You’re learning choices, not magic.
Bubble Pond: practicing stacked frames and focus discipline
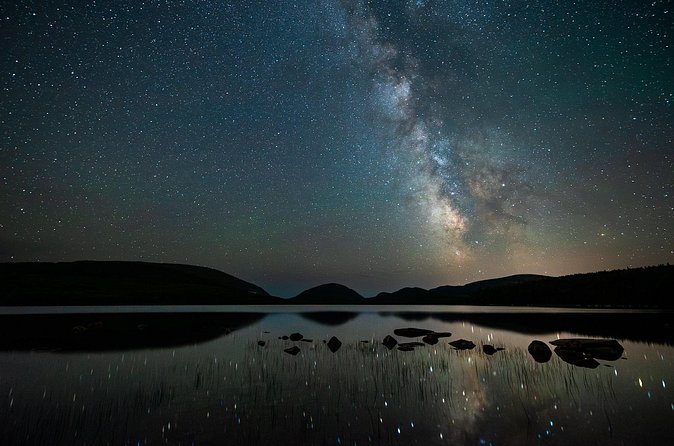
Bubble Pond is another key stop. Ponds are great for night work because they often give you strong foreground geometry and a calmer scene to anchor the composition.
This is where stacking starts to make sense. Stacking is often the difference between stars that look like they’re floating nicely versus stars that look soft or noisy. The workshop includes instruction aimed at capturing stacked night-sky images, and the workflow is meant to carry through into editing.
You’ll also work on focus technique. One of the biggest practical frustrations in Milky Way work is nailing focus in the dark. The instruction approach here aims to solve that, including workflows like focus stacking (covered as part of the broader learning).
Sand Beach: blending exposures so the foreground tells the story
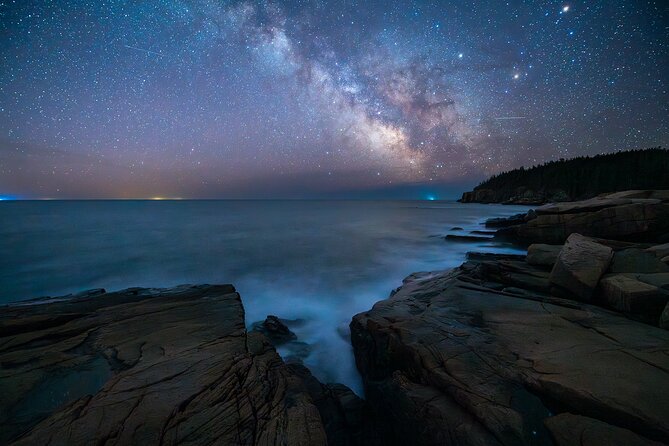
At Sand Beach, the foreground becomes a central character. The workshop trains you to combine sky and foreground in a way that feels natural rather than mismatched.
One of the most useful skills taught is the concept of blending different exposures:
- a longer exposure for the Milky Way
- a separate exposure for the foreground
- then combining them in Photoshop
That blend method is a big deal because Milky Way exposures often prioritize star quality, while foreground exposures prioritize detail. Doing them separately gives you control, and the workshop teaches an advanced workflow to bring the frames together into one image.
This stop is also a reminder of why timing matters. Coastal and shoreline-style scenes can look completely different with the tiniest changes in clouds, moonlight, or wind. You’re learning how to respond rather than freeze.
Eagle Lake in Acadia: seeing the whole workflow, not just the sky
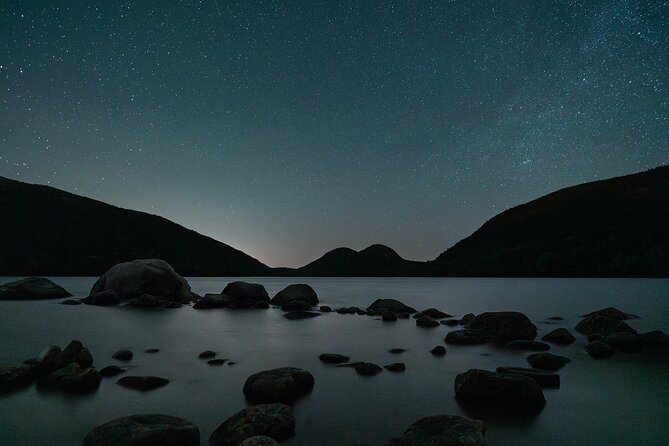
Eagle Lake rounds out the park stops. By this point, you’ve usually built at least a basic rhythm for:
1) planning,
2) setting up,
3) capturing,
4) checking results,
5) adjusting.
That final stop matters because it helps you apply the skills as a system. You’re not only photographing the night sky; you’re practicing how to create a finished image pipeline.
And you’re learning more than still images. The workshop also covers timelapse concepts and how to process timelapse work with Lightroom software designed for that purpose. Some photographers also work with panoramas and multi-shot approaches, depending on what you decide to create that night.
If you want one reason to justify the price beyond the shooting itself, it’s this: you leave with a workflow, not just a memory.
The actual camera skills you’ll practice (no shortcuts)
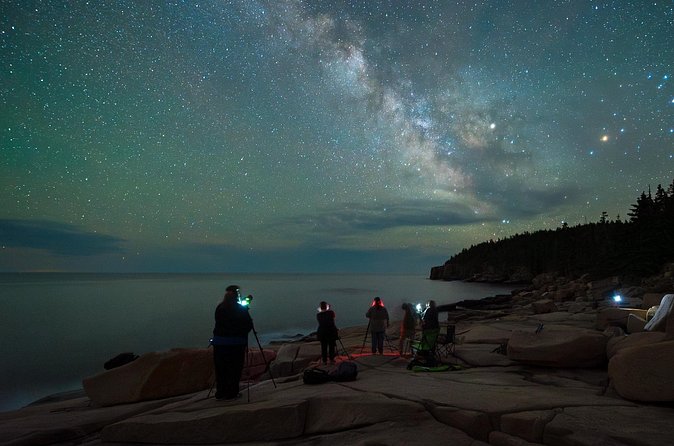
This workshop expects you to come with a baseline. The prerequisites are clear:
- a DSLR or mirrorless camera that can do long exposures
- a wide-angle lens with f/2.8 or faster
- a sturdy tripod
- an external intervalometer if your camera doesn’t have one
- basic comfort with manual settings and editing
That matters because night astrophotography is unforgiving. If your camera can’t hold exposure stability, or your lens can’t gather light quickly enough, your results will be limited no matter how good the instruction is.
In the field, you’ll learn techniques aimed at:
- single-exposure Milky Way images
- stacked night-sky images
- planning compositions with PhotoPills
- creating images with foreground elements for depth and storytelling
In other words, you’re building skills across the whole chain, from capture to final picture.
The editing workflow: Lightroom + Photoshop, then real follow-up
The workshop doesn’t stop at the shutter click. Editing is where most beginners get stuck, because night images often look flat, noisy, or incomplete right out of the camera.
You’ll get instruction on advanced post-processing workflows in Lightroom and Photoshop to create night-sky images that look finished. The teaching focus includes blending foreground and sky exposures—plus workflows like focus stacking—and it connects those methods to what you did in the field.
A standout extra is the one-on-one post-processing instructional session via Discord. That’s practical because it gives you a chance to bring your own files and not just follow a generic tutorial.
One of the best signs of quality is follow-through. In accounts tied to this workshop, Christopher stayed available after the sessions for questions, which is exactly what you want when you’re staring at your own hard drive at 1 a.m. trying to figure out why the foreground looks muddy.
Transportation, snacks, and staying sane at night
You get private transportation within Acadia National Park. Bottled water and snacks are provided in the vehicle, which sounds basic until you realize how much you’ll rely on it when you’re out shooting across two late-night blocks.
Pickup is offered, and you’ll use a mobile ticket. The combination of transport and a small group helps keep energy focused where it matters: camera setup and shot planning.
Also, the workshop is listed for service animals, and it asks for a moderate physical fitness level. That’s worth taking seriously because you’ll be outdoors in the dark while setting up equipment.
Price vs. what you actually get
At $2,500 per person, this is not a casual add-on. It’s a premium workshop.
So what are you paying for?
- Private transportation inside the park
- expert instruction
- hands-on field time across multiple iconic photo locations
- advanced editing training using Lightroom and Photoshop
- a one-on-one post-processing session via Discord
The biggest cost you should expect on your own is that meals and lodging aren’t included. There’s also an entrance fee mentioned in the info: it’s not included, and it’s listed as $20 per person with a note about a valid Yellowstone National Park pass for the duration of the workshop. I’d plan your budget around having some entrance fees ready so there are no surprises when you’re counting pennies in the parking lot.
If you already know how to edit your Milky Way files well, you might feel the cost more sharply. But if you want the full pipeline—capture + blending + stacking + finishing—this price starts to feel more reasonable because you’re buying time, guidance, and structure.
Who this workshop is best for (and who should think twice)
This fits best if:
- you can shoot manual long exposures
- you own or can access a fast wide-angle lens (f/2.8 or faster)
- you want to learn multiple approaches: single frames, stacking, and blended foregrounds
- you want instruction that keeps going into editing, with a personal follow-up session
It may feel like overkill if:
- you only want one casual Milky Way photo and don’t care about editing workflows
- you’re not comfortable with manual camera settings yet
- the late-night schedule would derail you
If you’re serious about nightscape results in Acadia, this workshop is built for you.
Should you book this Milky Way workshop in Acadia?
Book it if you want a structured pathway to better night-sky images, especially if you’ve struggled with any part of the process: focus, planning, stacking, or finishing in Lightroom/Photoshop. The combination of small group size, private park transportation, and real editing support is the difference between collecting photos and building results.
Skip it if you’re hoping for a low-effort, daylight-friendly outing, or if you’re missing the core equipment and manual skills the workshop is designed around. Also think carefully about the sleep factor; the time windows are intense, and your best photos will come from your ability to stay alert enough to adjust and keep shooting.
If you’re ready to treat astrophotography like a craft—with a guide you can ask questions to—this workshop is a strong value for the skill you’ll leave with.
FAQ
How long is the Milky Way photography workshop in Acadia?
It runs for approximately 5 days.
Where does the workshop take place?
It’s based around Bar Harbor, and you’ll photograph multiple locations inside Acadia National Park.
Do you get pickup and transportation during the workshop?
Pickup is offered, and private transportation is included for all travel within Acadia National Park during the workshop.
Is instruction included, and do you get editing help after?
Yes. You get expert instruction in the field, and there’s a one-on-one post-processing instructional session via Discord.
What camera gear do I need to participate?
You’ll need a DSLR or mirrorless camera capable of long exposures, a wide-angle lens with an aperture of f/2.8 or faster, and a sturdy tripod. You may also need an external intervalometer if your camera doesn’t have one.
Do you use PhotoPills during the workshop?
Yes. The workshop includes how to plan Milky Way shots using the PhotoPills app.
What’s not included in the price?
Meals and lodging are not included. An entrance fee is also not included; the info lists it as $20 per person, with a note about a valid Yellowstone National Park pass for the duration.
What if the weather is bad?
The experience requires good weather. If it’s canceled due to poor weather, you’ll be offered a different date or a full refund.