REVIEW · BOLOGNA
Bologna Surroundings Photo Tour: Rolling Hills and Ravines
Book on Viator →Operated by Francesco Fanti · Bookable on Viator
This is a countryside photo day with a purpose. You’ll spend 6–7 hours with Francesco Fanti planning your route around the light, not the loudest landmarks. I like that the tour includes private transportation, so you’re not hunting taxis or fighting traffic between hill towns and viewpoints, and I love the slow, patient pace that lets you get the shot you want. One drawback: you’re expected to bring your own camera gear, so this isn’t a hands-off sightseeing day.
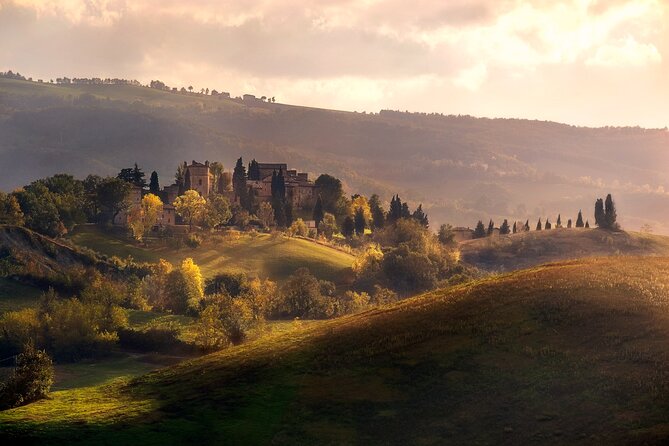
If you book for the afternoon, you’re setting yourself up for the best payoff: that golden-to-blue shift as you watch the sunset over the badlands and hills. The mix of medieval villages, abbeys, and ravine-style valleys is the kind of scenery that looks different every minute, which is exactly what a photographer guide is best at.
In This Review
- Key highlights worth planning around
- Why Bologna Hills Look Better Off the Main Roads
- Timing Matters: Golden Hour and Blue Hour Photography
- Stop 1: Monteveglio Abbey Park (Parco Regionale dell’Abbazia di Monteveglio)
- Stop 2: Valsamoggia for Hill Town Texture and Depth
- Stop 3: Monte San Pietro for Dramatic Angles
- Stop 4: Rocca dei Bentivoglio for Medieval Presence
- The Ravines Between Villages: How Fog and Light Can Upgrade Everything
- Sunset Over Badlands and Hills: The Big Payoff
- Price and Logistics: What $481.65 Buys You
- What to Bring (and What to Expect if You’re a Beginner)
- Weather, How Much It Changes the Plan, and Why That’s Not Bad
- Should You Book This Bologna Surroundings Photo Tour?
- FAQ
- How long is the Bologna surroundings photo tour?
- What does the tour cost?
- Is transportation included?
- Where will we visit?
- What kind of guide is this?
- Do I need my own camera or photography gear?
- Are food and tickets included?
- What language is the tour offered in?
- What should I do if weather isn’t good?
- Can I cancel for a full refund?
Key highlights worth planning around
- Light-first planning focused on golden hour and blue hour tones
- Private transport that keeps you moving between countryside stops
- Off-the-tourist-trail locations that are harder to reach without a car
- A real sunset finale above the badlands and surrounding hills
- A flexible, patient teaching style for beginners through advanced shooters
- Route variety from an abbey park to hill towns and dramatic ravines
Why Bologna Hills Look Better Off the Main Roads
Bologna itself is compact, walkable, and full of life—but the moment you leave the city center, the region changes fast. This tour is built for that shift. You get driven out to rolling hills and ravines where the views stretch, the air feels wider, and the background isn’t packed with other tour buses.
A big practical win is how the pickup works. The city center has traffic limits, so the meeting point is set based on where you’re staying, with a handoff that avoids you getting stuck in the wrong zone. Once you’re out in the countryside, the guide’s local knowledge matters even more: these are places you can’t easily reach if you’re depending on public transport.
Another quiet bonus: because it’s a private group (up to 3), the day doesn’t feel like a conveyor belt. You’re not squeezed into a fixed schedule where you’re rushing to the same photo spot as everyone else.
You can also read our reviews of more tours and experiences in Bologna.
Timing Matters: Golden Hour and Blue Hour Photography
The whole experience is organized around one idea: the camera needs the right light. Francesco’s approach is strict in the best way—he prioritizes warm golden tones for a softer look, and he’s also interested in the cooler blue hour mood when shadows get longer and contrast changes.
You’ll notice the pace reflects that. Instead of “stop, snap, move on,” the plan is designed to let you settle. You can wait for that moment when clouds break, fog shifts, or the valley catches the first direct sun.
If you’re newer to photography, this is where it helps. You’re not just shown where to stand—you’re given time to set up, try a couple angles, and refine your settings while conditions evolve. If you’re more experienced, the patience is still real: time on location is part of the deal, not a rare treat.
Stop 1: Monteveglio Abbey Park (Parco Regionale dell’Abbazia di Monteveglio)
This is your first base point, and it sets the tone for the whole afternoon. The Parco Regionale dell’Abbazia di Monteveglio gives you a mix of architectural interest and countryside framing, which is perfect for the first stretch of the tour when you’re warming up your eye and your camera rhythm.
Why it works for photos:
- You get a chance to layer structures with surrounding terrain instead of shooting one flat subject.
- The park setting can offer varied compositions without you constantly changing location.
What to watch for:
- Since the tour is light-driven, you might find yourself moving at a slower rhythm here than you expect. That’s not wasted time. It’s built into the style of the guide—getting the scene when the colors are right.
Stop 2: Valsamoggia for Hill Town Texture and Depth
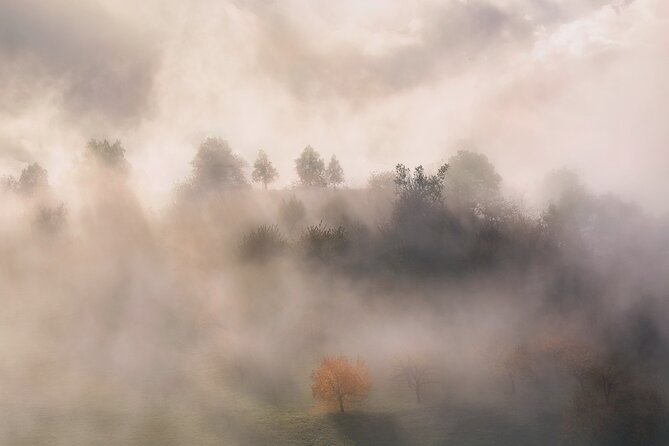
Valsamoggia brings in more of the lived-in hill-town feel. Think texture, slopes, and the kind of angles that make a photo feel like you’re looking into a place rather than just standing in front of it.
This stop is where many people start to see the region the way locals do: not as one postcard view, but as a chain of viewpoints that all connect.
Why it’s useful:
- It adds variety after the abbey park—new shapes, new lines, and different background depth.
- It’s the kind of location where waiting a few minutes can change the entire mood, especially if clouds or haze are in the mix.
A practical note: bring patience for walking and repositioning. Even when you’re driving between spots, you’ll still do the most important work—choosing where to frame.
Stop 3: Monte San Pietro for Dramatic Angles
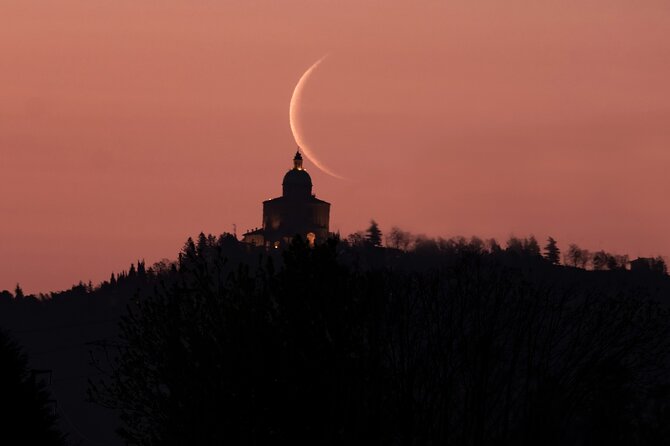
Monte San Pietro is a strong mid-tour stop because it leans into elevation and viewpoint potential. When the tour hits these higher areas, you’re more likely to get that layered “hills-on-hills” look that makes an image feel cinematic.
This is also where the photographer-guide advantage really shows. The point isn’t just to find a view—it’s to match the view to the moment. If the light is cooperating, you’ll have time to explore different compositions instead of grabbing one quick shot and leaving.
What I’d plan for:
- Expect some repositioning, likely multiple frames from similar viewpoints.
- If you’re traveling with someone who doesn’t care about photography, you’ll still get scenery value here because the area itself is visually interesting even without camera settings.
Stop 4: Rocca dei Bentivoglio for Medieval Presence
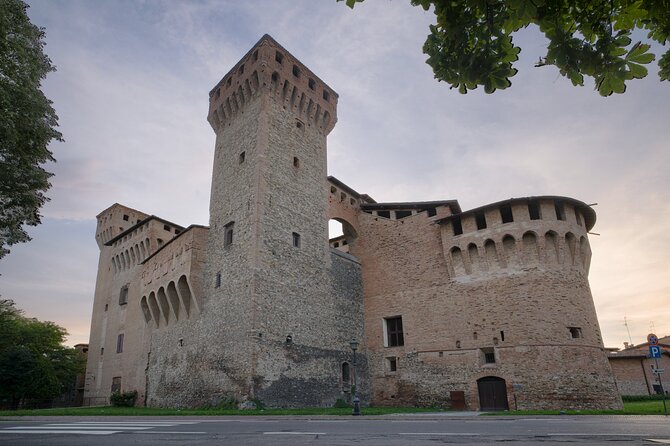
Then comes Rocca dei Bentivoglio, which adds a medieval note to the route. This kind of stop is valuable for photos because it gives you more than “pretty hills.” You get history-like shapes and a stronger focal point, which helps when you’re trying to make an image feel complete.
Why this matters in a photo tour:
- When you only shoot nature, every photo depends on timing and light.
- When you add stone, towers, and strong silhouettes, you have another layer of composition to lean on, even as light changes.
The likely drawback: if you’re dead set on wide, open scenery only, this stop may feel more “architectural” than you expect. But for most photographers, it’s a nice balance in the middle of the hills-and-valleys theme.
The Ravines Between Villages: How Fog and Light Can Upgrade Everything
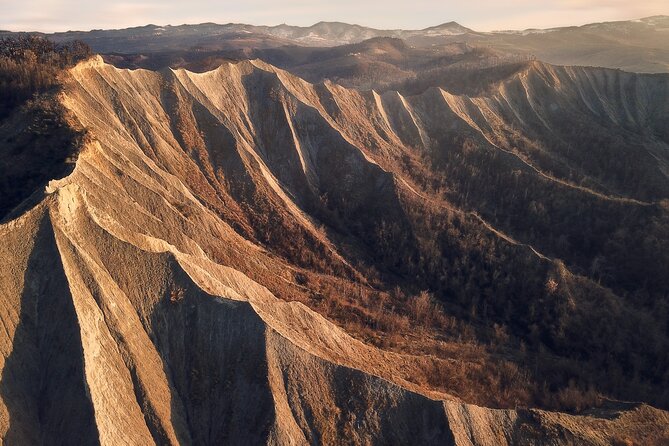
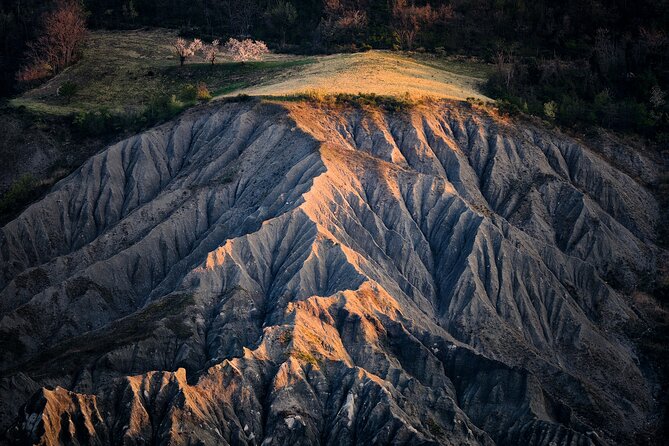
One of the most praised parts of this experience is the way it handles the “in-between” moments—when the valley has fog or low cloud and then the light finally hits. In ravine-style terrain, small shifts in cloud cover can create a dramatic gradient: darker foreground, glowing midground, and a sky that changes the mood with every minute.
That matters because you’re not just capturing a view. You’re capturing an atmosphere. And a guide who thinks in light angles and timing helps you avoid the common mistake: arriving at the scene too early or too late and missing the magic window.
This is also where the tour’s interactive approach shows up. You’re not just told where the viewpoint is—you’re likely coached through how to frame, when to wait, and how to tweak your settings for the changing contrast.
Sunset Over Badlands and Hills: The Big Payoff
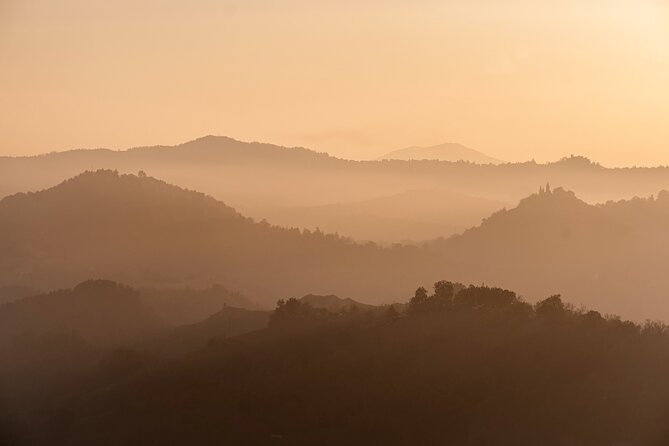
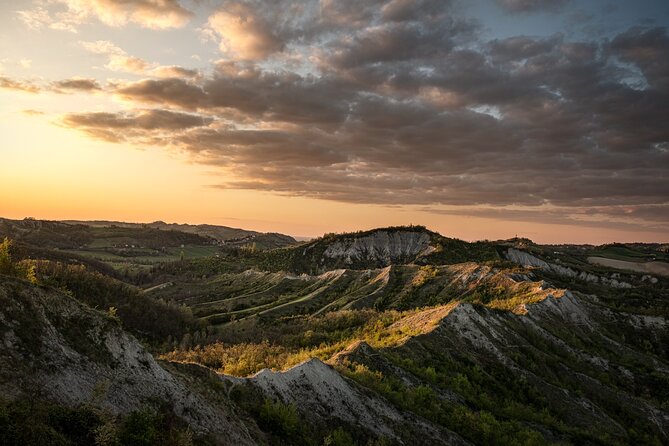
The finale is built around sunset, specifically the moment when the hills and the badlands start to glow. This is the part you should plan for with the most care—because it’s the reason to schedule the afternoon instead of just booking any time slot.
Why it’s worth it:
- Golden hour color can soften shapes, then blue hour can deepen shadows and add mood.
- If weather gives you clouds, the valley and sky can turn into a layered show of tones instead of a flat orange sky.
Also, the guide doesn’t treat sunset like a time stamp on a clock. The whole tour is designed so you end in the right light range, with time on location rather than a rushed sprint. That makes a real difference if you’re trying to shoot both wide scenery and more detailed frames.
In some cases, the evening has room for a small local touch while you wait for the final light (the kind of detail that turns sunset into a memory, not just a photo).
Price and Logistics: What $481.65 Buys You
At $481.65 per group (up to 3), this isn’t the cheapest way to see countryside near Bologna. But you’re not paying for a bus tour. You’re paying for a private route, private transportation, and a photographer-led teaching approach for 6–7 hours.
Here’s how I think about the value:
- If you’re splitting cost among a couple of photo-minded friends, the per-person hit can feel reasonable.
- The private transport removes the biggest friction point for this region—getting to places off the main routes without wasting your limited daylight.
- The guide’s time on location matters. If you want better photos, time isn’t a luxury. It’s part of the process.
One more value factor: the tour is tailored to your needs. Many photo workshops fail because they teach a style but don’t adapt. This one is built around light, timing, and you adjusting while the scene changes.
What to Bring (and What to Expect if You’re a Beginner)
The tour explicitly asks you to bring your own photography gear. That means you can’t count on the experience functioning like a camera rental or a full gear workshop. If you’re unsure what to pack, stick to what you already know how to use.
Beyond gear, think about your posture:
- Wear shoes that handle uneven countryside ground.
- Be ready to stand, reposition, and wait for the light shift.
Who this tour suits best:
- If you’re a photographer (beginner to advanced), you’ll likely love the time and patience.
- If you have a non-photography companion, it can still work because the countryside stops are scenic in their own right, even when you’re locked in on a viewfinder.
Who it might not fit:
- If you want a checklist of famous sights, this isn’t that kind of day. The goal is countryside atmosphere and photo conditions, not a rapid museum-style sampler.
Weather, How Much It Changes the Plan, and Why That’s Not Bad
This experience requires good weather. That doesn’t mean it’s only for bright skies—it means conditions matter because the light is the main ingredient. If weather doesn’t cooperate, you’ll be offered an alternative date or a full refund.
In practice, this is what you should expect:
- Light conditions can vary fast in the hills.
- You may spend extra moments watching, waiting, and adjusting your approach rather than chasing the next stop.
This is exactly the reason a photo-specific guide works here. A normal sightseeing guide can’t easily “read” the light the way a photographer does.
Should You Book This Bologna Surroundings Photo Tour?
Book it if you care about photos more than ticking off famous places. The mix of private transport, a slower light-focused pace, and countryside stops that are harder to reach on your own makes it a strong use of a half-day to full-evening.
Skip it if your main goal is casual wandering without equipment planning. And if you don’t have a camera setup you can confidently use, you might feel like you’re missing half the point.
One smart move before you go: choose the afternoon window when possible. The sunset over the badlands is the payoff, and the whole day’s rhythm is built to reach that moment with enough time to work the scene.
FAQ
How long is the Bologna surroundings photo tour?
It runs about 6–7 hours.
What does the tour cost?
It’s listed at $481.65 per group, up to 3 people.
Is transportation included?
Yes. Private transportation is included, and hotel pickup is offered (city-center pickup points are set based on traffic restrictions).
Where will we visit?
The tour includes stops at the Parco Regionale dell’Abbazia di Monteveglio, Valsamoggia, Monte San Pietro, and Rocca dei Bentivoglio, ending with a sunset shoot above the badlands and hills.
What kind of guide is this?
It’s led by a local photography teacher/photographer who focuses on light conditions and takes you to less-known countryside locations.
Do I need my own camera or photography gear?
Yes. You should have your own photography gear.
Are food and tickets included?
No. Food and drinks aren’t included, and you’re responsible for tickets to any attractions.
What language is the tour offered in?
It’s offered in English.
What should I do if weather isn’t good?
The experience requires good weather. If it’s canceled due to poor weather, you’ll be offered a different date or a full refund.
Can I cancel for a full refund?
You can cancel up to 24 hours in advance for a full refund. If you cancel less than 24 hours before the start time, the amount paid won’t be refunded.