York is a photo set in stone. This 3-hour York photography walking tour turns famous sights into real practice, with a patient guide and time to ask questions as you shoot the cobbles, walls, and alleyways around the center of town.
I especially like the hands-on photo coaching approach, not just a sightseeing stroll, and I also like the small group size (max 6), which keeps the pace friendly and your questions from getting lost.
One thing to plan for: some stops are exterior-only and there are no admission tickets included, so if you were hoping everything would be fully entered, you’ll want to manage expectations and budget for any tickets you decide to add.
In This Review
- Key things I’d watch for before you go
- A 3-Hour York Photo Walk That Actually Teaches
- Start at York Art Gallery: Why the Meeting Point Helps
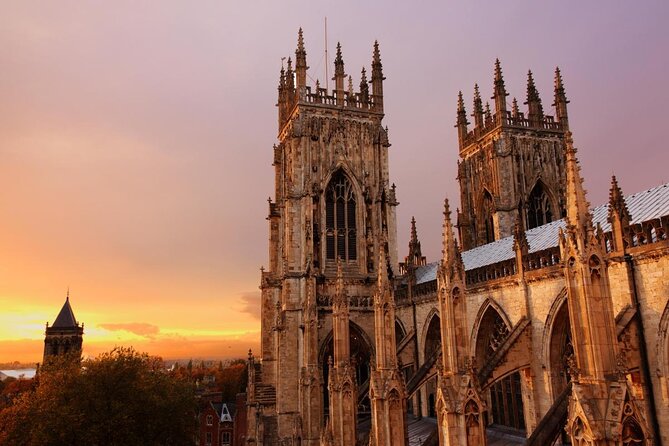
- York Minster: 360 Degrees of Light and Angle Practice
- Bootham Bar and the City Walls: Shooting From the Walls
- The Shambles: Framing Medieval Lanes Without Getting Overwhelmed
- Fossgate and Snickleways: Small Details, Big Payoff
- Shambles Market and the Color of Street Life
- Museum Gardens: Roman Walls, Abbey Remains, and the Hospitium
- Lendal Bridge and the Dame Judy Dench Walk: A Strong Closing Shot
- What the Photography Tuition Feels Like in Real Life
- Coffee and Pacing: Keep the Energy Up
- Price and Value: Is $102.88 a Good Deal?
- Should You Book This York Photography Walking Tour?
- FAQ
- FAQ
- How long is the York 3-Hour Photography Walking Tour?
- Where does the tour start and end?
- Is the tour in English?
- What’s included in the price?
- Are admission tickets included for the stops?
- How big is the group?
- Do I need good weather for the tour?
- Is there a mobile ticket?
- Is free cancellation available?
Key things I’d watch for before you go
- Small group (up to 6): more time with your guide, less standing around.
- Photo tuition built into the route: camera settings and composition tips happen as you walk.
- A heavy hitters route: York Minster, the Shambles, Museum Gardens, and Lendal Bridge.
- Coffee and/or tea included: a simple reset during the 3 hours.
- Admission not included: you’ll photograph many sights from outside, and a few stops may require separate tickets.
- Weather dependent: cobbled streets are great, but this works best when conditions are dry.
A 3-Hour York Photo Walk That Actually Teaches
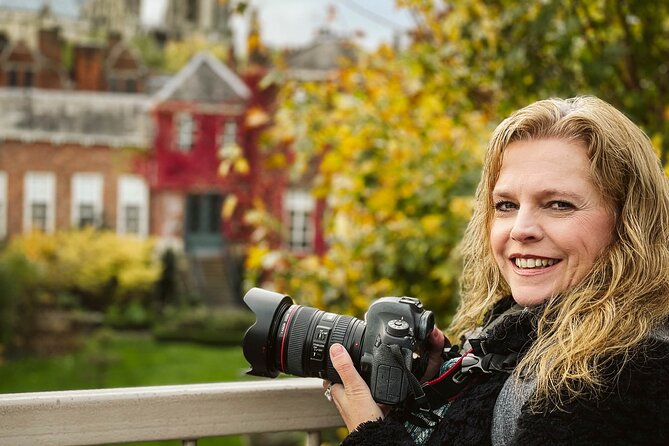
If you’ve ever tried to photograph York on your own, you know the problem: the city is too photogenic. You turn one corner and the next view is even better, and suddenly you’re rushing, changing settings too often, and coming home with blurry shots—or a bunch of near-identical angles.
This tour solves that by slowing you down in the right places. You’re not just told where to stand. You get focused guidance for light, angles, and composition, and you practice those ideas immediately while you’re there.
And that coaching matters for beginners and for people who already own a camera. If you’re using a phone, you’ll still get practical advice on framing and where to place yourself. If you’re using a DSLR or mirrorless, you’ll benefit from the kind of step-by-step camera tweaks that make a big difference on stone buildings and low-contrast street scenes.
The result is a route that feels structured but not rigid. I like that the tour is designed around photo learning, not a checklist.
Start at York Art Gallery: Why the Meeting Point Helps
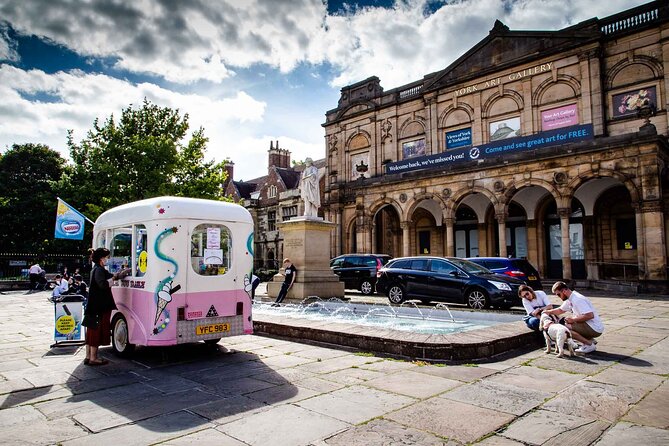
The tour starts at York Art Gallery, Exhibition Square (YO1 7EW). That location is convenient because it sits in the central York area—easy to reach by public transport and simple to find.
It also gives you a clean setup for the rest of the walk. Right away, you’re in the old-city atmosphere: streets with texture underfoot, buildings close to the pavement, and plenty of opportunities to practice basic composition rules such as leading lines, symmetry, and foreground framing.
One practical upside: with a mobile ticket, you’re not scrambling to print anything. You just show up with your phone and you’re good.
The tour ends at Museum Gardens (the main entrance), on Museum St (YO1 7FR). That end point is smart if you want to keep exploring afterward, because Museum Gardens is a great place to roam for a while without doubling back across York.
Group size is capped at 6 travelers, which is the difference between a “teacher-led walk” and a “guide trying to herd cats.” You’ll have room to ask questions without feeling like you’re holding up the whole group.
York Minster: 360 Degrees of Light and Angle Practice
Your first stop is York Minster, with a 360-degree walk around the building. You spend about 25 minutes there—enough time to get past the first wow moment and start thinking like a photographer.
The best part here is what your guide does with that time: tips on the best light and angles. York Minster is tall, detailed, and visually complex. Without guidance, you end up with a bunch of shots that are either too wide (and lose detail) or too close (and cut off key shapes).
With a guided approach, you’ll practice how to:
- Choose an angle that lets the building lines lead the eye
- Adjust your viewpoint so the scene isn’t crowded
- Take advantage of changing light as you walk around the perimeter
Admission isn’t included for this stop. So if you want interior access, plan on adding a separate ticket. If not, you can still get a satisfying session from outside, especially because you’re rotating your position instead of only shooting from one corner.
This is also a good stop to reset your settings. You’ll likely be switching between bright stone surfaces and shadowy recesses, and the Minster teaches you fast how exposure and contrast behave in real street conditions.
Bootham Bar and the City Walls: Shooting From the Walls
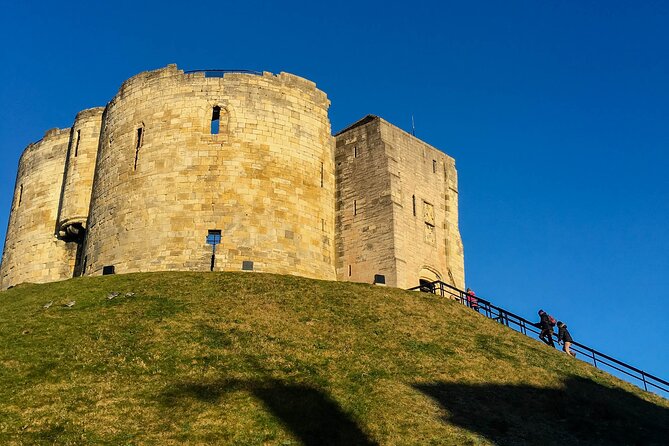
After the Minster, you head to the Bootham Bar area, taking photo opportunities along the city walls toward Monkgate Bar. This part runs about 25 minutes and it’s a lovely change of pace from the Minster’s sheer scale.
Why the walls matter for photography: they force a different kind of framing. Instead of searching for a single “perfect” front view, you’re working with layered lines—wall curves, openings, and the narrow-to-wide rhythm that comes from walking along elevated edges.
You’ll use this stop to practice:
- How to photograph architecture with depth (foreground wall detail plus background view)
- How to keep shots from looking flat when the stone color is similar across the scene
- How to compose for texture, not just height
This is also the kind of place where you can ask direct questions. If you’re unsure whether to use a wide angle, how to meter a darker opening, or what shutter speed to use on hand-held shots, this is where your guide can help you apply it immediately.
No admission ticket is included for this stop either, which is fine—much of the value here is your route and positioning, not entry.
The Shambles: Framing Medieval Lanes Without Getting Overwhelmed
Then you move to the Shambles, spending about 20 minutes walking toward it and photographing the street.
The Shambles is famous, but the guide’s job is to help you shoot it with intention. The challenge is simple: you want the charm of the street, but you also need to avoid flat, cluttered compositions where everything is equally important.
A good coach helps you choose what story your photo tells:
- The narrow perspective that makes the street feel enclosed
- Doorway details and stonework textures
- Repetition in shopfront shapes and window patterns
This stop rewards you if you take a slower approach. Instead of firing off frames nonstop, you’ll likely do a few deliberate compositions, then refine one idea from a slightly different position.
From a practical standpoint, this is one of the best stops for smartphone shooters too. With phones, you can still work the basics—steady stance, clean lens, and framing that doesn’t cut off important lines.
And since the tour continues to market and adjacent lanes soon after, you won’t spend all your time trying to get the one perfect Shambles shot. You’ll learn how to vary your angles quickly, so your photo set actually looks like a series, not a copy-paste.
Fossgate and Snickleways: Small Details, Big Payoff
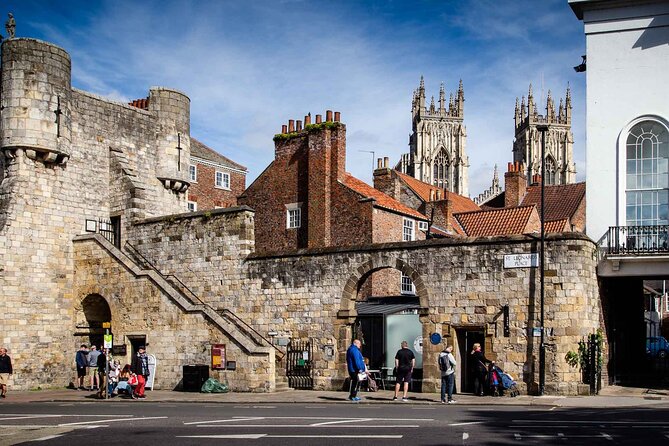
Next up is Fossgate (about 15 minutes). You’re walking along the street, photographing medieval buildings and the scene around you. Fossgate gives you a different feel than the Shambles: more of a working-street energy with plenty of architectural surfaces to study.
This is where I like to think about textures—stone, timber details, and the way buildings meet the street at odd angles. Your guide’s tuition can help you choose composition that makes those details readable, even in tight spaces.
Then you’ll pass through a snickleway to reach the Merchant Adventurers’ Hall area. Snickleways are those narrow pedestrian lanes that make York feel like a puzzle. For photography, they create instant perspective and drama. You get a defined path, converging lines, and a sense of depth without needing to travel far.
Merchant Adventurers’ Hall is next for about 15 minutes, with time to look around the grounds and photograph the medieval building. Even if you focus on exterior shots, the setting helps you frame the hall in context rather than as an isolated postcard.
One drawback to keep in mind: because these are short stops, you’ll want to move with purpose. If you pause to endlessly review your photos in the middle of the walk, you’ll feel rushed later. Tip: review quickly, then commit to the next angle.
Shambles Market and the Color of Street Life
After Merchant Adventurers’ Hall, you head to the Shambles Market stop for about 20 minutes.
This is where you can switch from architecture to real-world scene building. Markets change the look of the street—people, products, colors, and small gestures all become part of the photo.
Your guide will help you photograph the liveliness of the market and keep the focus where it should be. That matters because busy scenes can swallow your subject if your composition is weak. You might practice:
- Choosing a clear focal point
- Using framing to cut down distractions
- Timing your shot so the subject isn’t blurred or lost
Also, this stop is a strong reason to bring your camera skills (or phone skills) into play. You’ll likely be shooting under mixed lighting conditions—some bright surfaces and some shaded corners.
Admission isn’t included here either, so it stays practical. You’re shopping-free unless you want to buy something, and your main task is to capture the energy of the market without overcomplicating it.
No lunch is included, so if you think you’ll get hungry during the walk, you’ll likely want to plan a snack break before or after. Coffee and/or tea is included as a lighter mid-tour stop.
Museum Gardens: Roman Walls, Abbey Remains, and the Hospitium
The walk to Museum Gardens takes about 30 minutes of photo time, and this section is a smart way to add variety. You’re not only shooting the medieval city center—you’re also photographing visible remains of earlier York.
In Museum Gardens, you’ll focus on:
- Remains of the Roman walls and a multangular tower
- Remains of St Mary’s Abbey
- A walk around the Hospitium
- The observatory
This stop is valuable because it gives you different textures and different shapes than the streets. Roman wall segments and tower geometry photograph differently than shopfronts. They encourage you to practice structural composition—straight lines, angles, and the relationship between big stone features and smaller surrounding details.
It’s also a great opportunity for both exposure practice and patience. Garden light can shift quickly as you move between open areas and shaded corners. Your guide’s suggestions on where light is best can save you time compared with wandering alone.
If you like your travel photos to show variety—architecture plus layers of time—this is a key part of the tour. It turns York from a single famous look into a broader set of visual chapters.
The tour ends at the main entrance to Museum Gardens. If you have the energy, you can keep walking after the guided portion ends.
Lendal Bridge and the Dame Judy Dench Walk: A Strong Closing Shot
The final stop is Lendal Bridge, with about 15 minutes for photos. You walk down along the Dame Judy Dench Walk to admire the bridge and take interesting shots.
Bridge scenes are all about angles and reflections—especially if you’re shooting from different positions along the path. Even without any special access, a guided ending makes sense because your guide can help you think about how to frame the bridge so it doesn’t become just a long horizontal line.
This is a good place to experiment. By now you’ve practiced Minster-wide angles, alley composition, and market focusing. Lendal Bridge is where you put it all together with a cleaner, more linear subject.
Because it’s near the end of the tour, this stop also helps you recover anything you missed earlier. If you wanted one more “wow” photo, this is a solid place to get it—without dragging your feet back toward the start.
What the Photography Tuition Feels Like in Real Life
The standout feature is how the guide teaches while walking, not after the fact. In particular, I like the approach linked to guide Paula from York Photo Walks, because she doesn’t just point at places—she supports you as you try.
One thing that really helped in an account I reviewed: Paula answered questions ahead of the walk about what equipment to bring, and her advice was practical and spot on. On the day, she gave helpful guidance on camera settings and composition, and she stayed encouraging while people made attempts they were unsure about.
For you, that kind of support matters. It means the tour works even if you’re not confident yet. You’re not being judged by your gear. You’re learning how to get better results with what you already have.
What this looks like on the ground:
- Short, timed stops so you can practice without freezing
- Coaching tied to where you’re standing and what the light is doing
- Time to ask questions because the group is small
If you already know your basics, you can still improve quickly. Tiny adjustments—like refining your angle, changing how much of the scene you include, or setting exposure to avoid washed-out stone—add up fast.
And yes, you’ll likely come away with a more coherent set of photos. Instead of random shots, you’ll have a series that shows York from multiple angles and moods.
Coffee and Pacing: Keep the Energy Up
Coffee and/or tea is included. That’s a small thing, but it’s the kind of thoughtful detail that keeps a 3-hour walk comfortable, especially if you’re taking photos continuously and not stopping often.
The tour has timed stops ranging from about 15 to 30 minutes. That pacing is ideal for staying engaged without getting exhausted. You still cover a meaningful stretch, but it never feels like you’re sprinting across York just to reach the next viewpoint.
Also, because there’s plenty of time with your guide in a group of six, the “photo walk” doesn’t turn into a photo lecture. You can ask quick questions, get answers, and immediately try the adjustment.
The only pacing consideration: it’s a walking tour, and York streets can be uneven underfoot. If you’re traveling with mobility limits, you’ll want to gauge your comfort level for cobbled surfaces and continuous walking.
Price and Value: Is $102.88 a Good Deal?
At $102.88 per person, this isn’t the cheapest activity in York. But it can still be good value if you care about results.
Here’s why the price may make sense:
- You’re paying for guided photography tuition, not just access to landmarks
- The group is limited to 6, so your guide attention doesn’t evaporate
- The route is packed with high-photography locations in a short timeframe
- Coffee and/or tea are included, which adds a small practical bonus
If you only want to do a casual walk and you’re happy taking photos on your own with zero guidance, you could spend less. But if you want your time to produce stronger photos—better angles, better settings, fewer wasted shots—then the coaching is what you’re really buying.
For photographers on a short trip to York, this is especially compelling. Three hours is enough to collect a real set of images without needing full-day planning.
Should You Book This York Photography Walking Tour?
I’d book it if you fit one of these profiles:
- You want to learn practical photography skills while traveling, not just see landmarks
- You’d rather have a small group and direct Q&A than follow a vague self-guided route
- You’re visiting York briefly and want a tight route that covers iconic streets and architectural variety
- You’re using a phone or camera and want help making your shots look more intentional
I’d skip it if:
- You’re mainly interested in indoor entry and long museum time, because admission isn’t included for listed stops and many highlights are about exterior views
- You hate structured photo practice and prefer total freedom to wander without guidance
FAQ
FAQ
How long is the York 3-Hour Photography Walking Tour?
It runs for about 3 hours.
Where does the tour start and end?
It starts at York Art Gallery, Exhibition Square, York, and ends at the main entrance to Museum Gardens on Museum St.
Is the tour in English?
Yes, it’s offered in English.
What’s included in the price?
You get photography tuition with the guided walking tour and coffee and/or tea.
Are admission tickets included for the stops?
No. Admission tickets are not included for the stops listed.
How big is the group?
The tour has a maximum of 6 travelers.
Do I need good weather for the tour?
Yes. The experience requires good weather, and if it’s canceled due to poor weather, you’ll be offered a different date or a full refund.
Is there a mobile ticket?
Yes, you’ll use a mobile ticket.
Is free cancellation available?
Yes. You can cancel up to 24 hours in advance for a full refund.