REVIEW · ROME
Unique Photo Tour and Workshop in Rome Dusk to Dawn
Book on Viator →Operated by RomePhotoFuntours Giulio D'Ercole · Bookable on Viator
Rome at night, without the crowd crush.
This Rome dusk-to-dawn photo workshop is built for sharper night skills and fewer people in your frame, with a professional photographer guide calling out settings and angles as you shoot. I especially like that you’re working through the full light show—from night to blue hour to sunrise—so your photos don’t all look the same.
The main trade-off is the schedule: you’re out from 10:00 pm to dawn, and the experience depends on good weather, so you’ll want to plan for a long, cold (sometimes), late evening.
In This Review
- Key Things I’d Watch For
- Rome Dusk to Dawn: Why This Night-Shooting Workshop Works
- Price and Value: What $420.08 Buys You
- Group Size and Pace: Four People, Private Transport, Real Feedback
- The Dusk-to-Dawn Lesson Plan: Light, Settings, and Composition
- Piazza del Campidoglio at Night: Framing With Leading Lines and Symmetry
- Pantheon After Dark: Handling Bright Surfaces and Mixed Light
- Piazza Navona: Symmetry, Water Reflections, and Layered Depth
- Castel Sant’Angelo and Museo Views: Making Big Shapes Feel Intimate
- St. Peter’s Square: From Night Mystery to Dawn Clarity
- Teatro di Marcello to Isola Tiberina: Quiet Angles and Storytelling Detail
- Rione Parione and Piazza Venezia: Urban Texture at the Right Exposure
- Tempio di Vesta and Terme di Caracalla: Long-Exposure Practice in Open Air
- Fontana di Trevi at the End: Make It Glow, Don’t Just Photograph It
- Optional Photo Review: Turning Your Shots Into a Better Next Trip
- Who This Workshop Fits Best (and Who Might Want Something Else)
- Should You Book the Dusk to Dawn Rome Photo Workshop?
- FAQ
- What time does the Rome dusk-to-dawn workshop start?
- How many people are in the group?
- Where do we meet?
- Is pickup available?
- What language is the tour taught in?
- What photography skills does the workshop focus on?
- Will I get help while I’m shooting?
- Can I rent a camera and tripod if I don’t have one?
- Is there an optional photo review?
- What happens if the weather is bad?
- Is free cancellation available?
Key Things I’d Watch For
- Four-person max means more time for personal feedback, not group herding.
- Manual-mode coaching covers ISO, shutter speed, aperture, and white balance—practical, not theory-only.
- Long-exposure practice helps you handle moving light, glowing facades, and tricky contrast at night.
- On-the-spot shot guidance covers tripod setup and execution while you’re actively shooting.
- Optional photo review after the tour can turn your best images into a repeatable skill set.
- Private transportation keeps you comfortable between distant spots so you can focus on photographs.
Rome Dusk to Dawn: Why This Night-Shooting Workshop Works
A night photography tour in Rome can go two ways. Either it turns into a slow walk with vague tips, or you actually learn how to control light when the city stops cooperating. This experience is designed for the second option.
What makes it work is the pace and the structure. You start at Castel Sant’Angelo (with an easy meetup at Lungotevere Castello by the Bridge of Angels area), then you move through some of Rome’s most recognizable spaces—Pantheon area, Piazza Navona, St. Peter’s Square, Trevi—while the photographer coach guides you through real camera decisions. It’s not just where to stand; it’s how to make the camera behave in low light.
I also like the promise you can feel in the itinerary: you’re chasing that moment when Rome shifts from dark to blue hour, then into the first warm glow of morning. That’s where a lot of standard night photos fall short, because people stop shooting when the sky is still black. Here, the emphasis is on timing your exposures to what the sky is doing.
You can also read our reviews of more tours and experiences in Rome.
Price and Value: What $420.08 Buys You
At $420.08 per person for about 7 hours, the price isn’t cheap on paper. But here’s what you’re actually paying for: private guiding with a professional photographer, plus private transportation between stops, plus time spent teaching settings while you shoot.
Many photo tours in Rome sell convenience, but fewer spend that convenience budget on hands-on coaching. Since this one is limited to four people, you get more chances to ask questions and get corrections on things like shutter speed and white balance. That matters a lot if you’re aiming to move beyond auto mode.
If you need gear, there’s an extra option: you can rent Nikon camera gear plus tripods for 50 euros per kit, paid in cash. That’s not included in the base price, so if you’re traveling with nothing, budget for it.
One more value point: the tour is typically booked in advance (on average 89 days ahead). That’s a sign people trust the timing and the coaching, especially for night work where weather and schedules can make or break results.
Group Size and Pace: Four People, Private Transport, Real Feedback
This is not a big-group “everyone look this way” kind of night tour. It’s a small workshop, capped at four travelers, which changes the whole vibe. You’re less likely to feel rushed into one spot, and you’re more likely to get repeated technical feedback while you adjust your settings.
The tour also mixes on-foot time with car time, using private transport to get you between areas without turning the evening into a walking endurance contest. For night photography, that’s a big deal. When your goal is long exposures and tripod work, you want to arrive ready—not sweaty, late, and frustrated.
From what I’ve seen work best in real workshops, this format keeps your brain in photography mode. You can focus on three things: exposure (how bright), color (white balance), and composition (what you include). The guide’s job is to keep those choices connected to what you see in front of you.
The Dusk-to-Dawn Lesson Plan: Light, Settings, and Composition
The workshop is built around hands-on repetition. You’ll practice the tools that actually control night images:
- Long exposures for smooth light trails and dramatic building glow
- Light balance so bright areas don’t blow out while shadows still hold detail
- Manual mode decision-making, including ISO control, white balance, aperture, and shutter speed
- Composition techniques like leading lines, symmetry, foreground interest, and layering
The clever part is how the teaching matches the sky. You’re not learning night photography as if it’s one fixed lighting condition. You’re learning it as a transition.
Night light is about warmth from street lamps and mixed indoor/outdoor lighting. Blue hour is about cooler tones and longer-lasting sky gradients. Then sunrise brings a different brightness curve entirely—plus the chance to make those same landmarks feel new without changing the location.
The result you want isn’t just “a pretty night photo.” It’s a set of images that show Rome evolving across the same session.
Piazza del Campidoglio at Night: Framing With Leading Lines and Symmetry
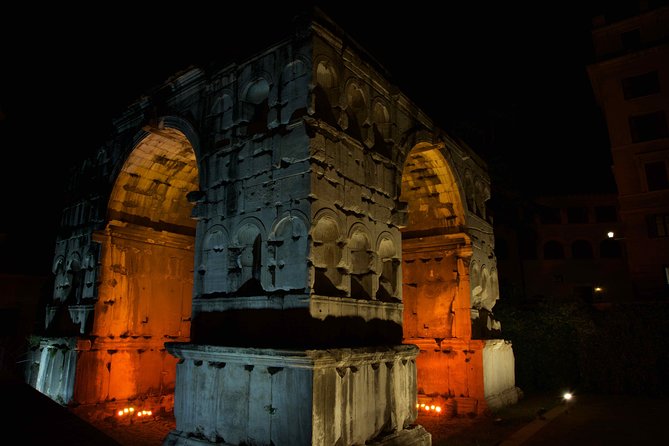
Your first stop sets the tone: Piazza del Campidoglio. This area is well-suited to teaching composition because you can work with strong geometry and intentional sightlines. Night helps too, because the darkness makes the illuminated edges and highlights feel more structured.
Here’s where I’d expect you to focus (and where coaching usually pays off fast):
- Leading lines—using the architecture to guide your viewer’s eye
- Symmetry—centering or balancing elements so the frame looks deliberate, not accidental
- Foreground interest—including nearby texture so the image has depth
At night, it’s easy to let your camera chase brightness and ruin contrast. A good coach nudges you toward settings that protect highlights (especially on stone and statuary) while keeping shadows usable. If you’ve ever taken night photos that look gray, this is the type of location where improved white balance and exposure control make a huge difference.
Pantheon After Dark: Handling Bright Surfaces and Mixed Light
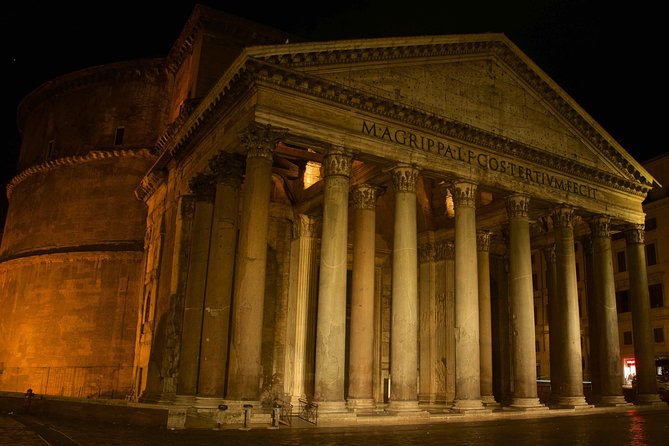
Next up is the Pantheon area. Even when you’re photographing exterior spaces, the light can be tricky: bright highlights, deep shadow pockets, and that famous dome presence that loves to overwhelm your exposure meter.
This is exactly where the workshop’s focus on ISO, shutter speed, and aperture becomes practical. You’ll want shutter speed that fits your intent: crisp architecture for sharp detail, or slower shutter speed when you want the atmosphere and smoother light.
White balance matters here too. Mixed artificial lighting can push stone toward greenish or orange tints if you’re leaving everything to auto settings. The guide’s real-time feedback should help you choose a white balance approach that makes the scene look natural rather than tinted.
Also, the Pantheon area is a perfect place for the “timing” skill. Night shots are one thing; blue hour and early dawn can turn the same setting into a totally different photograph.
Piazza Navona: Symmetry, Water Reflections, and Layered Depth
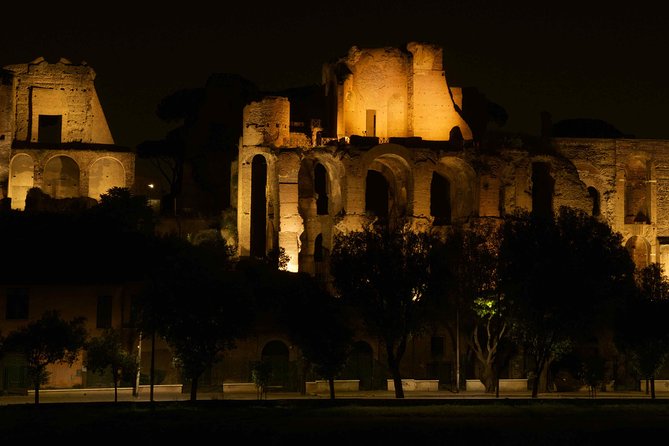
Piazza Navona is one of Rome’s best squares for layering. Even when the space is busy in the daytime, at night it can feel calmer—useful when you’re building compositions that need foreground-to-background structure.
For photography, this stop rewards the exact tools the workshop emphasizes:
- Symmetry (frame the square’s layout so it feels balanced)
- Foreground interest (don’t treat it like only a center-stage subject)
- Layering (capture how light hits surfaces at different distances)
Night photography can flatten depth. Layering is your fix. It’s where you can include architecture details in the foreground, then let the illuminated square guide your eye toward the main scene.
If you’ve been relying on one exposure time all night, Piazza Navona is where you learn to vary your approach. The light intensity and reflections can change your ideal shutter speed from shot to shot.
Castel Sant’Angelo and Museo Views: Making Big Shapes Feel Intimate
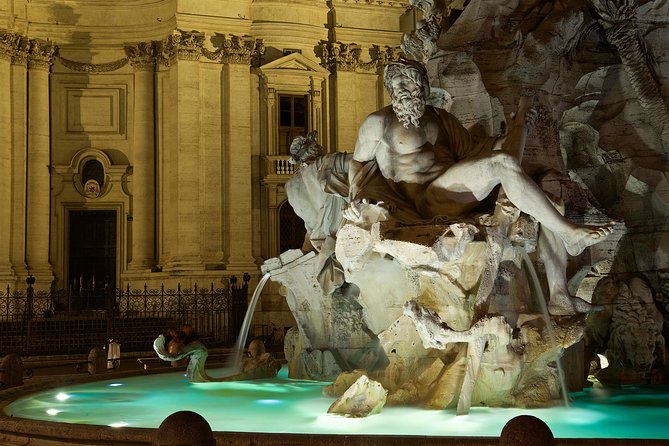
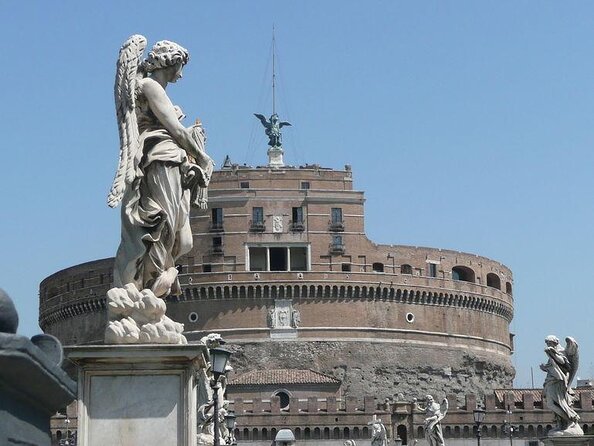
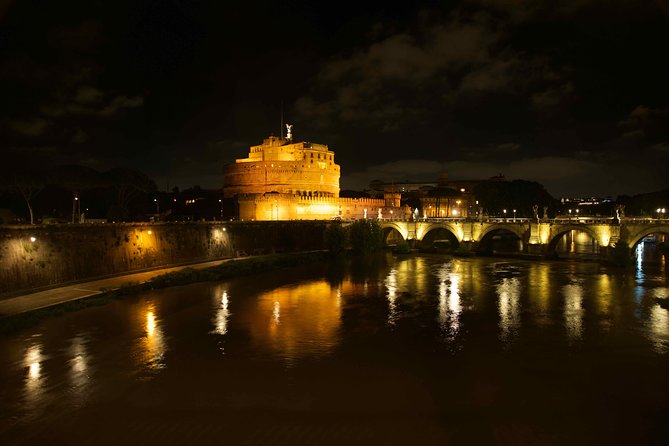
You’ll also spend time around Museo Nazionale di Castel Sant’Angelo, starting from the Castel Sant’Angelo meeting point area and then revisiting it as part of the sequence. The setting gives you a strong mass of structure with water and bridges nearby, which is great for long-exposure practice and for creating mood.
This stop is a good place to get comfortable with tripod setup. When you’re learning shutter speed and exposure control, tiny mistakes become obvious—blur from hand movement, uneven horizon, or a composition that feels off once you review.
I like that the workshop includes coaching for tripod setup and shot execution. That’s one of those details that separates learning from frustration. Once your base setup improves, you can trust your settings and spend energy on composition.
St. Peter’s Square: From Night Mystery to Dawn Clarity
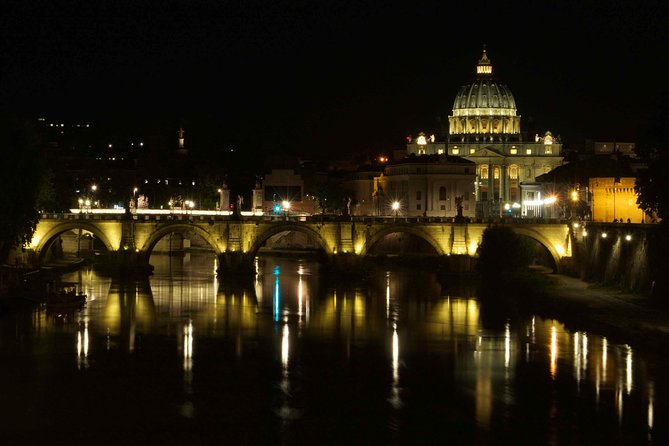
At St. Peter’s Square, the challenge is scale. Big places trick your camera because your settings need to fit both the illuminated details and the wide open darkness around them.
This is where the workshop’s timeline matters. If you only shoot early at night, you often miss the “breathing” look you get when the sky changes. With dawn in play, you can shift from pure night atmosphere toward a clearer, warmer look.
Expect the guide to help you think through:
- shutter speed choices that keep structures sharp
- exposure balance so highlights don’t burn out
- composition choices that avoid turning a grand square into a tiny, flat postcard
The payoff is real: you can build a small set of photos that show the same space under different sky conditions. That’s how you create a story, not just a collection.
Teatro di Marcello to Isola Tiberina: Quiet Angles and Storytelling Detail
The workshop keeps moving through Teatro di Marcello and Isola Tiberina, and these stops are where your photography brain can slow down and think about character.
Roman ruins and river islands tend to reward the “foreground-to-main-subject” approach. You can use darkness to isolate forms, then let highlights define the shapes.
A strong coaching moment here is when you’re choosing what to leave out. Night photography can tempt you to photograph everything lit. But for storytelling, you want a clear subject and clean visual structure—leading lines, symmetry if it fits, and a deliberate point of view.
If you’re learning composition rules (leading lines, symmetry, layering), this is the sort of scenery where the rules start making sense rather than feeling like classroom homework.
Rione Parione and Piazza Venezia: Urban Texture at the Right Exposure
Rione Parione and Piazza Venezia bring you into a different type of night scene: more urban texture, more movement, more variety in light sources.
This is where white balance and exposure control get tested. Street lighting is rarely uniform. Your camera may see everything as mid-gray and make your photo look dull or over-bright in certain sections.
The workshop’s focus on light balance and manual control helps you avoid that. Instead of fighting the camera after each shot, you’ll practice how to steer your exposure with shutter speed and ISO, then protect your highlights.
This is also a great stop for photographers who enjoy walking and composing in motion. Even if you’re using long exposures, you can choose compositions that use the city’s lighting patterns as part of the scene, rather than treating them as distractions.
Tempio di Vesta and Terme di Caracalla: Long-Exposure Practice in Open Air
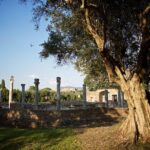
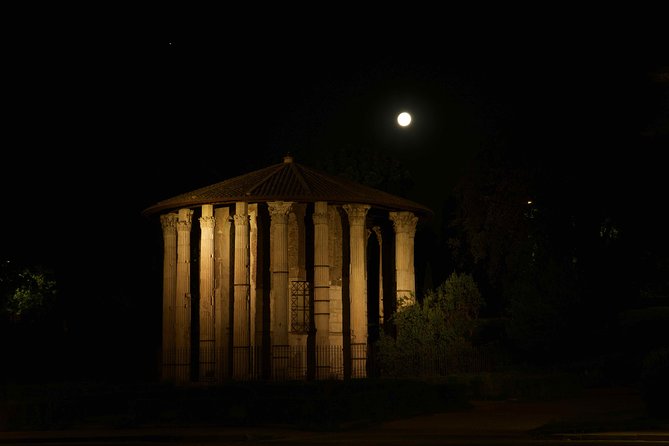
The sequence includes Tempio di Vesta and Terme di Caracalla—two locations that are especially useful for the workshop’s long-exposure focus.
Open-air ruins and large outdoor spaces are perfect for practicing:
- longer shutter speeds without losing control
- how to manage brightness differences between lit and unlit areas
- when to dial down ISO to keep noise under control
Carrying this into dawn is where the day-to-night learning really clicks. Long exposure in early morning light can behave very differently than in deep night. The sky brightness rises, contrast changes, and your best shutter speed might not be your first instinct.
If you’ve ever wondered how photographers get those smooth, atmospheric results instead of messy blur, this is the sort of environment where the instruction makes sense fast.
Fontana di Trevi at the End: Make It Glow, Don’t Just Photograph It
Finally, you reach Fontana di Trevi. This is a high-demand landmark, and the workshop’s pitch makes sense: you’re trying to photograph it without the daytime crowd pressure and with a controlled light plan.
Night can be tricky with fountains because water brightness and surrounding illumination can create a high-contrast mix. That’s where your manual settings training pays off. You can try:
- shutter speeds that capture water texture without smearing everything
- exposure choices that keep the stone details readable
- compositions that use foreground and layering so the fountain feels like part of a wider scene
Because this is the end of a long session, you also benefit from having already practiced. If you’ve been adjusting ISO and white balance all night, your last stop becomes more like a final exam you actually studied for.
Optional Photo Review: Turning Your Shots Into a Better Next Trip
One of the smartest add-ons is the optional photo review. You can submit images afterward for detailed critique and improvement tips.
This is the piece that helps you convert a great night into real progress. A lot of people take a night workshop and leave with photos they love—but without knowing why those shots work. A review helps you identify what to repeat: exposure strategy, white balance choices, composition structure, and where you need to refine technique.
If you’re serious about leveling up beyond auto mode, this is the kind of feedback that can save you hours of trial-and-error on your own.
Who This Workshop Fits Best (and Who Might Want Something Else)
This is a strong fit for:
- intermediate photographers and serious beginners ready to leave auto mode
- anyone who wants night-to-dawn photos that feel intentional
- people who want technical guidance while they’re actively shooting
- photographers who enjoy composing with geometry, ruins, and squares
It also can work for families and mixed ages—one review specifically mentions a 9-year-old staying interested throughout the night while the guide kept the experience lively.
You might consider a different kind of tour if:
- you don’t handle late nights well
- you want a more relaxed sightseeing-only experience (this one is photography-focused)
- you’re hoping for a tour where every minute is spent inside a building—most of this is outdoors with night shooting
Should You Book the Dusk to Dawn Rome Photo Workshop?
If your goal is better night photos and not just more pictures, I’d book it. The small group size, private transport, and real-time coaching are a good match for people who want to learn camera control in a city that rewards timing.
I’d especially recommend it if you care about:
- long exposures and controlling color at night
- composition skills like symmetry, leading lines, and layering
- capturing Rome across the shift from night to sunrise
If you’re sensitive to cold, tired easily, or hate weather-dependent plans, think twice. Late hours are part of the design, and good weather is required for the experience to run as expected.
FAQ
What time does the Rome dusk-to-dawn workshop start?
The start time is 10:00 pm. The experience runs for about 7 hours.
How many people are in the group?
The workshop is limited to a maximum of four travelers.
Where do we meet?
Meet at Castel Sant’Angelo Lungotevere Castello, 50, 00193 Roma RM, at the entrance of Castel Sant’Angelo opposite the Bridge of Angels.
Is pickup available?
Yes. Pickup is offered upon request at your hotel, Airbnb, or home.
What language is the tour taught in?
The experience is offered in English.
What photography skills does the workshop focus on?
You practice long exposures, light balance, and using natural and artificial light at night, plus manual mode skills like ISO control, white balance, aperture, and shutter speed. You also work on composition like leading lines, symmetry, foreground interest, and layering.
Will I get help while I’m shooting?
Yes. You get on-the-spot coaching with real-time feedback, including tripod setup and shot execution.
Can I rent a camera and tripod if I don’t have one?
Yes. The guide offers Nikon gear and tripods rental for 50 euros per kit, payable in cash.
Is there an optional photo review?
Yes. There’s an optional photo review where you can submit your images afterward for detailed critique and improvement tips.
What happens if the weather is bad?
The experience requires good weather. If it’s canceled due to poor weather, you’ll be offered a different date or a full refund.
Is free cancellation available?
Yes. You can cancel for a full refund if you cancel at least 24 hours before the experience starts.