REVIEW · ROCKY MOUNTAIN NATIONAL PARK
Sunset and Night Photography Tour on Trail Ridge Road
Book on Viator →Operated by Rock Light Photo Tours · Bookable on Viator
Sunset and night photos at 12,000 feet sound wild. This is a focused Trail Ridge Road photography tour built around real timing, real posing help, and guided camera settings when the light changes fast. I like that you’re led to good spots along the road for both the warm sunset glow and the darker night sky look, with a break for snacks in between.
Two things I especially liked: the guide’s calm, practical direction (Collin is specifically called out for being kind, funny, and skilled), and the way the tour helps you translate views into actual photos. The main drawback to keep in mind is that this depends on good weather, and you’ll also need to bring your own national park admission if you don’t have a pass.
In This Review
- Key Things I’d Write on a Postcard From This Tour
- Trail Ridge Road at Sunset and Night: The Idea Behind the Tour
- Where You Start: Beaver Meadows, Easy Meeting Point, Big Altitude
- The Photography Coaching: Poses + Camera Settings You Can Actually Use
- Sunset Stops Along Trail Ridge Road: Timing Is the Whole Game
- A practical consideration during sunset
- Snack Break Between Sunset and Night: Comfort Helps Your Photos
- Night Photography on Trail Ridge Road: What Changes After Dark
- Gear note (stated and unstated boundaries)
- Timed Entry Permit vs. Park Admission: What Your Money Covers
- Small Group Size (Max 6) Means More Time With the Guide
- Weather Rules and the Pace of High-Altitude Photography
- Who Should Book This Tour (And Who Might Want Something Else)
- Price and Logistics: How to Judge Value Before You Pay
- Should You Book Sunset and Night Photography on Trail Ridge Road?
- FAQ
- How long is the Sunset and Night Photography Tour on Trail Ridge Road?
- Where does the tour start and end?
- What’s the price per person?
- What is included in the tour price?
- What’s not included?
- Is the tour suitable for everyone physically?
- What happens if the weather is poor?
Key Things I’d Write on a Postcard From This Tour
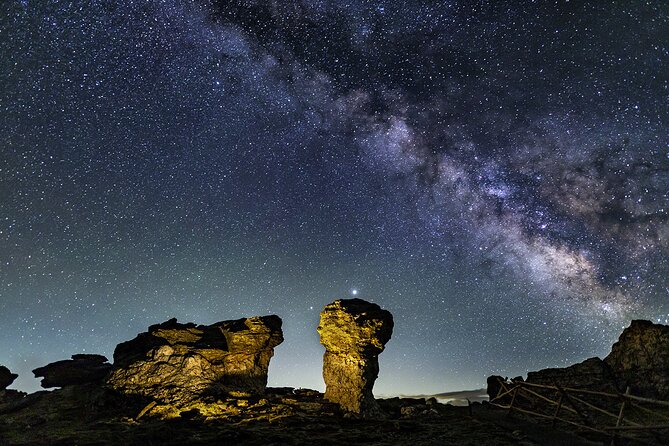
- Trail Ridge Road stops above 12,000 feet give you sky-level perspective without guessing where to stand
- Sunset and night photography coaching includes poses and camera settings, not just scenic suggestions
- Snack break between sunset and night helps you stay comfortable while the light shifts
- Small group size (max 6) means more attention and less time waiting around
- Timed entry permit included, but national park admission still isn’t covered
- Mobile ticket, English-only tour, easy to manage and straightforward to follow
Trail Ridge Road at Sunset and Night: The Idea Behind the Tour
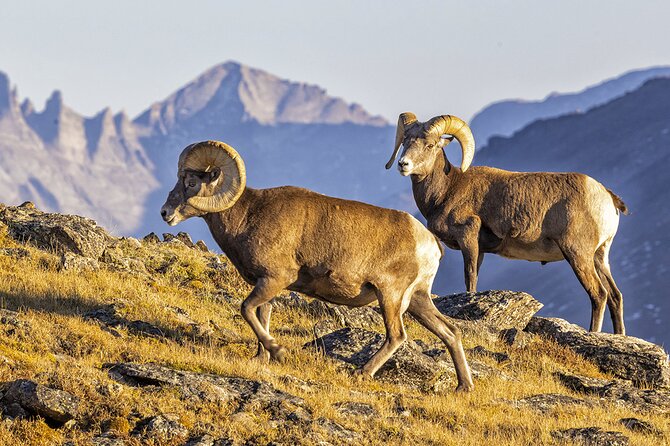
This tour is for you if you want photos that look like you planned them, even if you didn’t pack a shot list the size of a novel. Trail Ridge Road is a major scenic route in Colorado, but the real value here is what happens in front of the lens: you get help finding positions and adjusting settings for the exact moment you’re in.
The best part is the pacing. You don’t rush through sunset like it’s a checklist. You go to multiple locations before and during sunset, take a short break, and then continue to at least one place for night photography. That structure matters because sunset light changes quicker than your brain can. It also keeps you in the right place long enough to experiment rather than just click once and hope.
Where You Start: Beaver Meadows, Easy Meeting Point, Big Altitude
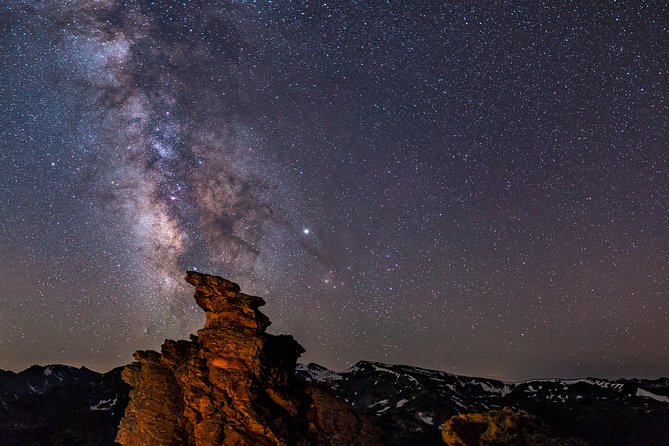
You begin at Beaver Meadows Visitor Center, located at 1000 US-36 in Estes Park. The activity ends back at the same meeting point, so you’re not dealing with any weird end-of-tour logistics.
A practical note: the tour is described as having a moderate physical fitness level, and some stops are above 12,000 feet. That doesn’t mean you’ll be doing a strenuous hike, but it does mean you should plan for cool air, thin-air feelings, and walking around on uneven roadside areas. If you’re prone to feeling lightheaded at elevation, take it slow and give yourself a minute before committing to photos.
Also, pets are not allowed on Trail Ridge Road for this activity. If you’re traveling with a dog, you’ll need to arrange other plans for them. On the plus side, the tour is listed as being near public transportation, which can help if you don’t want to spend the evening thinking about parking.
The Photography Coaching: Poses + Camera Settings You Can Actually Use
What makes this tour work is the focus on turning “I see something pretty” into “I captured something solid.” The highlights promise help with the right camera settings and “the perfect poses,” and that’s what you should expect the guide to be steering you toward.
This is especially helpful if you’re not fully confident with nighttime settings yet. Daytime composition is one thing; night photography changes exposure, focus, and stability. Even if you’ve shot night photos before, you often learn faster with live feedback tied to the exact spot and sky conditions you’re standing under.
The small group size (max 6) is a big deal for this. You’re not one face in a crowd. You can ask quick questions, adjust what you’re doing, and get back to shooting without losing your place in the plan.
Sunset Stops Along Trail Ridge Road: Timing Is the Whole Game
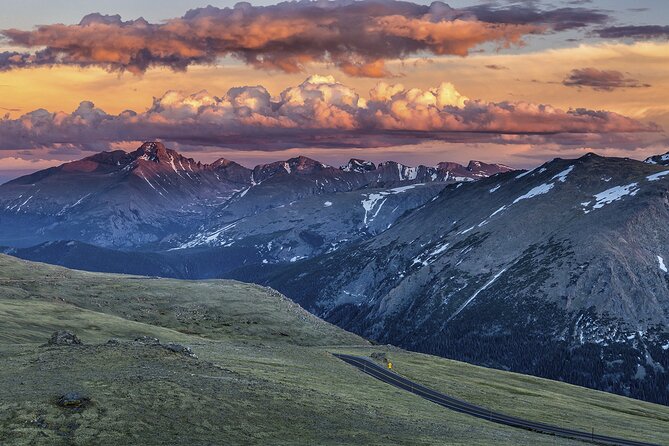
Your sunset portion isn’t one single viewpoint. You’ll visit several locations on Trail Ridge Road, including some higher up where the air is thinner and the horizon can feel wide open. The tour hits a couple of places before and during sunset, then builds in a short break for snacks before night shots start.
This kind of sequence helps you learn one of the most important truths about sunset photography: the best colors don’t appear on a schedule your camera controls. They show up based on where you are relative to the light, plus the exact minute the sun dips. Having multiple stops means you can compare angles and lighting without scrambling alone.
You’ll also be coached on posing. That usually means the difference between an empty-looking frame and a photo where people feel grounded in the scene. Think about it like this: the views are dramatic, but your pose is what makes the image feel intentional. The guide’s direction helps you avoid common problems like stiff body angles, awkward hand placement, or standing in a spot that looks great to your eyes but not to the camera.
A practical consideration during sunset
Bring layers. Even if you start the tour when it feels tolerable, higher elevations can cool down quickly. Also, keep your gear organized so you’re not digging through bags while the light changes. This tour gives you time, but the sunset itself still moves fast.
Snack Break Between Sunset and Night: Comfort Helps Your Photos
This is a small detail that can massively improve your results. You stop briefly for snacks in between the sunset and night photography locations, with snacks and bottled water refills provided (snack bars, trail mix, and water).
That break does two things. First, it keeps you from getting shaky and distracted when the temperature drops. Second, it gives you a moment to check settings, clear your head, and decide what you want to try next for night photos.
If you’ve ever tried night photography after skipping dinner and shivering for an hour, you already know why this matters. You don’t just need the perfect camera settings. You need enough energy to keep experimenting.
Night Photography on Trail Ridge Road: What Changes After Dark
Night photography is where many people stall. It’s not only about making images darker or brighter. It’s also about stabilization, exposure time choices, and focusing in low light. This tour addresses it by taking you to at least one night photography location and guiding you with camera settings and posing.
The key advantage here is specificity. A random tutorial video can’t tell you what your scene will look like in that exact location with that exact sky. A guide can point out what to change based on what you’re seeing right now—plus you can adjust while you’re there, not after you get home.
Also remember: you’re at high elevation. That can mean clearer skies more often, but you’ll still want to be ready for the opposite. Weather is a stated requirement for the tour to run well, and the experience operator will respond if conditions are poor.
Gear note (stated and unstated boundaries)
The tour data doesn’t list specific gear requirements, so don’t assume you must bring a particular lens or tripod. But you should be prepared to use your camera confidently in manual or semi-manual modes if you have them. If your camera only works in basic auto modes, you might still get something you like, but you may rely more on the guide’s help to dial things in.
Timed Entry Permit vs. Park Admission: What Your Money Covers
Price is $350 per person for a 5 to 7 hour experience, with a maximum group size of 6. That’s not cheap, but it can be good value if you compare it to the cost of trial-and-error.
Why it can be worth it:
- You’re getting coordinated photo stops on a demanding route (you’re not just paying for a scenic drive)
- You’re getting coaching for both sunset and night photography
- You receive snacks and water
- A timed entry permit is included, which helps with access planning
What you still need to budget for:
- National Park admission is not included, so bring a park pass or be ready to pay admission.
So the smart move is simple: make sure you cover the admission side separately, then treat the tour fee as paying for coaching, timing, and the extra comfort details that keep you shooting.
Small Group Size (Max 6) Means More Time With the Guide
A maximum of 6 travelers shapes the whole experience. It tends to reduce the “wait in line while other people shoot” problem. It also gives the guide room to notice what you’re doing—like whether your pose is working in the frame, whether your settings need a tweak, or whether you’re positioned in a spot that blocks your light.
This is the part I’d call out for solo travelers and couples. If you’re traveling alone, you’ll still get the attention you need. If you’re a pair, you can focus on coordinating your pose choices rather than constantly scanning for the next group stop.
Weather Rules and the Pace of High-Altitude Photography
The tour is marked as requiring good weather. If it’s canceled due to poor weather, you’ll be offered a different date or a full refund. That’s fair, and it’s better than forcing a low-quality shoot when the sky won’t cooperate.
Even with good weather, expect shifting conditions. At higher elevations, you can feel colder sooner, and you’ll likely spend time standing or repositioning between shots. The moderate fitness note is important—not because it’s a hike, but because you’re giving your body short bursts of standing and moving in altitude conditions.
Who Should Book This Tour (And Who Might Want Something Else)
This is a great fit if:
- You want help with camera settings and not just “go take pictures over there”
- You’re excited by both sunset and night photos, not one or the other
- You value a small group and practical coaching
- You’re comfortable standing outside in cold weather and at elevation
It may not be the best fit if:
- You dislike being outdoors for several hours in changing light and temperatures
- You’re not willing to bring a park pass for national park entry
- You don’t want a tour that depends on weather conditions
Price and Logistics: How to Judge Value Before You Pay
At $350 per person for 5 to 7 hours, you’re paying for a guided process with access support and photo coaching. You’re not paying for a generic “scenic drive with stops.”
Here’s the value check I’d use:
- If you already know exactly how you’ll handle sunset-to-night exposure changes and posing, you might find it pricey.
- If you want someone to guide your settings and positions step-by-step, that price starts to look more reasonable.
- If you care about convenience—snacks, water refills, and a timed entry permit—those details add up.
One more thing: the tour uses a mobile ticket and is offered in English. Confirmation is provided within 48 hours of booking, depending on availability. So you should plan to confirm your schedule closer to the day while still being ready for changes.
Should You Book Sunset and Night Photography on Trail Ridge Road?
If your goal is photos that look thoughtful—sunset mood plus real night results—this tour is a strong bet. I like how the plan builds from sunset into night, with an actual break and coaching that targets the two hardest parts: getting the pose right and setting the camera for the conditions.
I’d book it if you want guided help, appreciate a small group, and you’re okay being flexible with weather. I wouldn’t book it if you’re hoping for a casual, no-effort sightseeing evening or if you’re unwilling to handle national park admission separately.
In short: if you want to turn dramatic scenery into strong images with less guesswork, this is the kind of evening that can pay off fast.
FAQ
How long is the Sunset and Night Photography Tour on Trail Ridge Road?
The tour duration is listed as about 5 to 7 hours.
Where does the tour start and end?
It starts at Beaver Meadows Visitor Center (1000 US-36, Estes Park, CO 80517) and ends back at the same meeting point.
What’s the price per person?
The price is $350.00 per person.
What is included in the tour price?
Snacks are included (snack bars, trail mix, and water refills), and a timed entry permit is included.
What’s not included?
National Park admission is not included, so you should bring a park pass or be prepared to pay.
Is the tour suitable for everyone physically?
It’s described as requiring a moderate physical fitness level.
What happens if the weather is poor?
The experience requires good weather. If it’s canceled due to poor weather, you’ll be offered a different date or a full refund.