REVIEW · KILLARNEY
Killarney National Park Guided Private Full Day Photo Tour
Book on Viator →Operated by Killarney Photo Tours · Bookable on Viator
Killarney teaches your camera to see. This private full-day photo outing in Killarney National Park mixes big-name scenery like Ross Castle with real-world coaching on lighting and exposure for cameras and phones. It’s the kind of day that turns pretty views into photos you can actually repeat.
I like that the guide works with your starting point. Micheál (often mentioned as Micheál O’Sullivan) begins by asking about your experience, then adjusts the pace and instruction so you’re not stuck either copying settings or guessing your way through the day.
One thing to think about: the tour is weather dependent, and eight hours outdoors can feel like a long stretch when clouds roll in or light is flat. Still, that same weather focus is part of why the results tend to look more deliberate.
In This Review
- Key highlights you’ll notice fast
- Why this Killarney National Park photo day feels worth your time
- Meeting in Muckross: you start with your questions, not a lecture
- Stop 1: Ross Castle—turning a famous view into a photo with intention
- Stop 2: Torc Waterfall—capturing motion without overthinking
- Stop 3: Lough Leane—working with reflections and scale
- Stop 4: Gap of Dunloe—dramatic views that reward a shooting plan
- How Micheál’s teaching style helps you improve, not just shoot
- Price and value: $828.05 per group up to 4 people
- What to bring so your camera and phone work together
- Weather and timing: what “good weather required” really means for your photos
- Who this private tour suits best
- Should you book this Killarney private full-day photo tour?
- FAQ
- Where does the tour start?
- Is pickup available?
- What is the tour duration?
- Is this a private tour?
- How many people are in a group?
- What are the main stops during the day?
- What devices can I use for photos?
- What language is the tour in?
- What happens if the weather is bad?
- Is cancellation free?
Key highlights you’ll notice fast
- Private group up to 4 so you get time at each stop, not a rushed assembly line
- Starts in Muckross, Killarney National Park and returns to the same meeting point
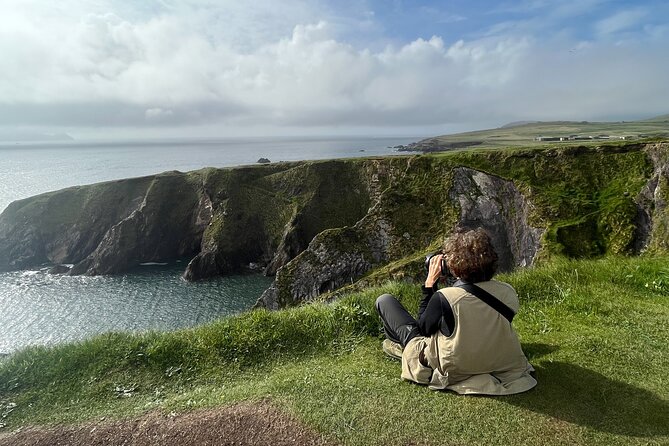
- Ross Castle, Torc Waterfall, Lough Leane, Gap of Dunloe cover castles, waterfalls, lakes, and dramatic passes
- Teaching that fits your level, since the day adapts to your photography experience
- Tips for multiple devices, from DSLR to smart phone to iPad
- Good-weather matters, since the plan relies on workable conditions for photos
Why this Killarney National Park photo day feels worth your time
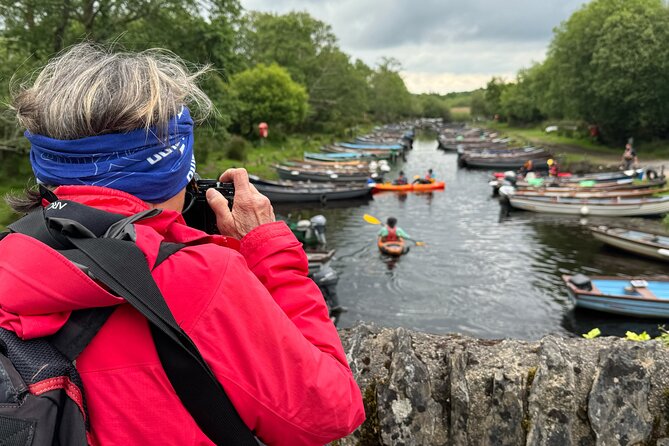
Killarney is already beautiful on its own. The win here is that you’re not just sightseeing and snapping. You’re working with someone who knows where to stand and when to shoot, then teaches you how to control the photo instead of hoping the scene does it all for you.
This is also a smart way to travel if you want variety without spending a week building an itinerary. In one long day you hit classic Killarney landmarks (Ross Castle and Lough Leane), plus the waterfall stop and the dramatic Gap of Dunloe views. You get enough changes in scenery to keep your attention, and enough time at each place to try more than one idea.
And since it’s private for up to four people, the lesson time actually lands. In a big group, you’d usually spend the whole day waiting for your turn. Here, you can ask questions in the moment and get adjustments that match what you’re trying to shoot.
The vibe is practical. The goal isn’t art-speak. It’s helping you notice light, choose a camera setting, and make a stronger image with whatever gear you brought.
You can also read our reviews of more tours and experiences in Killarney.
Meeting in Muckross: you start with your questions, not a lecture
You meet at Muckross, Killarney National Park. That matters because it keeps the day grounded: you’re starting in the park area itself instead of losing the morning to a long relocation.
Pickup is also offered, which can be a big quality-of-life upgrade if you’re staying in Killarney and don’t want to time buses and taxis while your camera bag is digging into your shoulder.
The tour uses a mobile ticket, so you’re not hunting for paper documents. And the day runs across wide hours (from morning through the evening), which gives you flexibility when you’re planning around daylight and weather.
Most importantly for photography, you don’t start with generic tips. Micheál’s approach is to ask about your level first. That makes a difference because beginners often get the wrong kind of advice: either too simple (no real help) or too technical (too much too fast). The day adapts so you can stay engaged and build a few changes you’ll actually use later.
Stop 1: Ross Castle—turning a famous view into a photo with intention
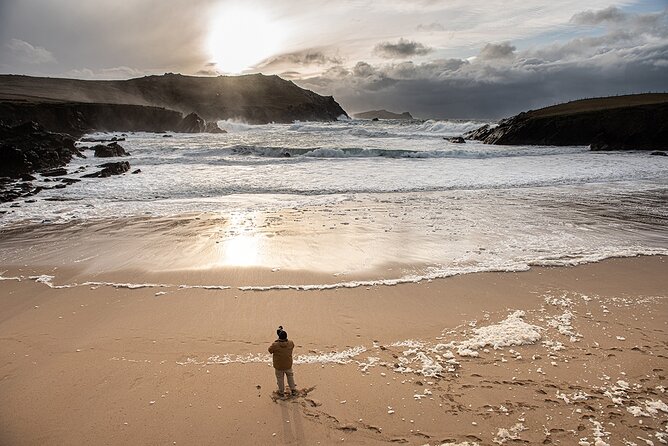
Ross Castle is the kind of subject that can go two ways: either you shoot a quick wide angle and move on, or you slow down and compose something that feels more like a moment than a postcard. This stop is set up for the second option.
You’ll be working on fundamentals that matter here:
- Framing the castle with the surrounding water and shoreline so your image has a clear focal point
- Managing contrast because castles and stone can swing from dark to bright quickly as clouds pass
- Choosing a viewpoint that gives you depth, not just a flat front-on shot
The teaching style is what elevates Ross Castle. Instead of telling you one magic camera setting, the guide focuses on the why behind exposure and lighting. That means when light shifts, you already understand what to change, and you can keep shooting without restarting from scratch.
Possible drawback: if the day starts dull and gray, castle scenes can look a bit flat unless you actively adjust. The good news is that this tour is built for that. The same coaching that helps in bright sun also helps when conditions are less cooperative.
Stop 2: Torc Waterfall—capturing motion without overthinking
Waterfalls are great teachers because they force a decision: do you want the water to look silky, or do you want it to show texture and drop detail? Either way can be compelling, but you need intention.
At Torc Waterfall, you’ll get a chance to try approaches that fit different gear and comfort levels:
- For DSLRs, you can experiment with longer exposures if you want smoother water
- With a smart phone, you can still work on stable framing and exposure so your water doesn’t blow out
- In both cases, you’ll pay attention to where the mist and highlights land, since waterfalls can throw back bright sparkles and dark shadows in the same frame
This is where that emphasis on lighting and exposure becomes more than a slogan. You learn how the settings change the story. And because the guide is patient and works at your pace, you’re not stuck with one idea that doesn’t work.
A practical consideration: waterfall stops can get busy with weather, mist, and shifting light. If it’s windy or there’s drizzle, plan for slower shooting and take your time stepping into and out of spots that block your view. The tour’s value is that you’re not doing this alone with trial-and-error.
Stop 3: Lough Leane—working with reflections and scale
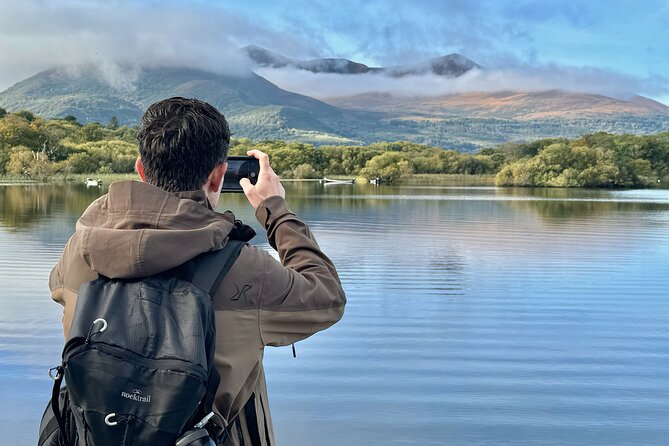
Lough Leane is where your photos can shift from dramatic action to calm composition. This stop is useful because it teaches you how to handle wide scenes, not just close subjects.
Here you’ll likely focus on:
- Layering: foreground details, midground subject, and background hills or shoreline
- Reflections: whether you get mirror-like water or ripples, you decide how much reflection to include
- Scale: how to show the size of the scene so it doesn’t feel empty in a landscape-shaped frame
This part of the day is also a nice contrast rhythm. After waterfalls and castle shots, lakescapes can feel like a reset. You get time to slow down, try a different focal length or crop approach, and use the exposure skills you’ve been practicing.
One small drawback to keep in mind: water and sky can look similar in tone on flat-light days. That’s when you want to pay attention to composition and color differences, not just chase brightness. The instruction on exposure helps here too, since small adjustments can restore separation between the water and sky.
Stop 4: Gap of Dunloe—dramatic views that reward a shooting plan
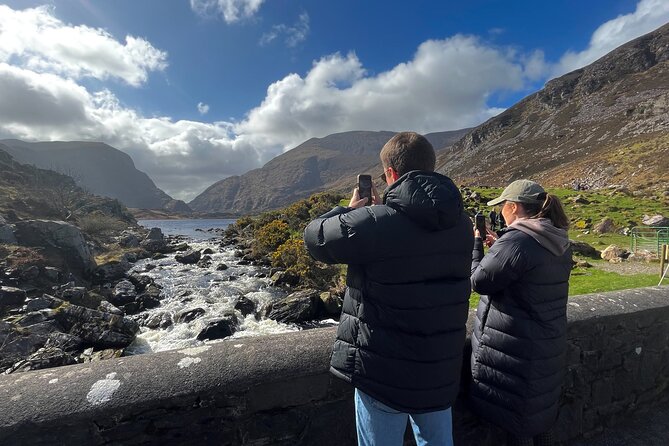
Gap of Dunloe is the kind of scenery that tempts you to shoot everything. The trap is ending up with ten very similar images: same angle, same framing, different luck.
The better way is to treat this stop like a mini photo assignment. The guide’s local instincts help you pick angles and times where the scene looks strongest. You also get help turning what you see into a photo that has layers and direction.
Where the coaching really helps:
- Light awareness: when clouds open, when they close, and what that means for contrast
- Exposure decisions: keeping highlights from washing out while still capturing enough detail
- Moment selection: choosing the shot that feels like the scene you remember, not just the scene you observed
This stop also tends to attract people who want more than a standard sightseeing photo. The tour approach is aligned with that: it’s about capturing a moment, not just documenting stops.
A consideration: because the Gap of Dunloe views are dramatic, your sense of orientation can shift quickly. It helps to keep an organized plan for your shots. Ask the guide what you should try next, rather than wandering with only luck as your strategy.
How Micheál’s teaching style helps you improve, not just shoot
The biggest reason this tour earns top marks is how the instruction lands in real time.
Micheál starts by figuring out your photography level. That means if you’re new, you don’t get buried in settings. If you’re more experienced, you can still work on refinements like exposure control, lighting decisions, and practical tricks that make your photos look more intentional.
You also get direct support throughout the day. People often assume a photo tour is a series of scenic stops with a few tips sprinkled in. Here, the teaching is part of the travel. You learn something at one location, try it immediately, and then carry that knowledge forward.
It’s also clear that the guide enjoys the work. That matters because patient, calm instruction is exactly what you want when you’re adjusting settings while the light changes. Quick explanations you can use right away beat long lectures you forget in ten minutes.
Another underappreciated value: the guide doesn’t just point at the most obvious spots. He scouts for places that feel more personal and less generic, including spots often described as hidden gems within the park. That gives your photos a better chance of feeling distinct.
Price and value: $828.05 per group up to 4 people
This isn’t a budget tour. It costs $828.05 per group for up to four people. That pricing structure is actually the first point of value: you’re paying for a private guide experience, not a per-person ticket where you’d quickly hit a higher total with a family or small group.
To judge whether it’s worth it, I’d look at what you’re getting beyond driving you between viewpoints:
- A private group experience with time to ask questions
- Instruction tailored to your level, rather than one-size-fits-all camera tips
- A full-day flow that covers multiple big subjects, so you aren’t paying for half a day and hoping the rest works out
- Flexibility in devices: DSLR, smart phone, or iPad can all be part of the plan
If you’re the type who loves learning and wants better photos without studying for weeks, you’ll likely feel the value quickly. If your goal is only casual snapshots and you’re already happy with your current camera skills, you might decide this is more guide-time than you need.
But if you want your vacation photos to look like you planned them, a guided day with hands-on teaching is one of the fastest ways to get results.
What to bring so your camera and phone work together
Because the tour is built for different devices, your gear can be simple. The key is knowing how to use it well enough to act on the tips you get.
Bring what you already own:
- A DSLR if you prefer controls and lenses
- A smart phone if you want convenience and easy sharing
- An iPad if that’s your comfort zone
Then bring a few practical extras if you have them:
- Something to keep your hands steady (a small support or steady stance)
- A way to manage battery life since you’ll likely be out for most of the day
- Comfort items for being outside (layers help if conditions swing)
Also, consider your plan for reviewing photos. If you can, check a few shots after each stop. It keeps you learning in the moment. You’ll see what exposure changes did, and you can fix it before the next location.
The tour’s teaching style is meant to be usable immediately. Your job is to keep experimenting, even if some shots don’t work. That’s how you end up with the better images by the end.
Weather and timing: what “good weather required” really means for your photos
This is an outdoor photo tour, so the conditions matter. The operator notes it requires good weather, and if it’s canceled due to poor weather, you’ll be offered another date or a full refund.
In real terms, this affects two things:
- Light quality: overcast days can be soft and flattering, but they can also reduce drama if you don’t adjust exposure and contrast
- Comfort and visibility: mist and wind can change what you can see and what you can safely shoot
The upside is that a guide who teaches exposure and lighting helps you work with what you get. You’re not locked into one look. If the sun breaks through, you learn how to use it. If it stays gray, you learn how to keep your images from looking flat.
One more tip for planning: if you’re scheduling the day around other activities, leave space for a slightly slower pace. Photography takes time, especially when you’re trying new settings.
Who this private tour suits best
This tour is especially well matched for:
- People who want better photos without figuring everything out on their own
- Small groups (up to four) who want personal attention
- Beginners who need a starting framework and more confidence
- Experienced photographers who want practical improvements they can apply quickly
It’s also a solid choice if you want to see multiple Killarney highlights in one outing. Instead of splitting your time between separate tours, you can keep the day focused and get a consistent teaching thread across stops.
If you’re traveling solo and want a private guide, this could be a premium way to do it. If cost is the main constraint, a group tour might feel more aligned. But for the quality-of-learning angle, this one tends to make sense.
Should you book this Killarney private full-day photo tour?
Book it if you want photos that look planned, not accidental. The private format plus the coaching approach (starting with your level, then teaching lighting and exposure, then letting you try) is the core reason this tour earns strong results.
Skip it or reconsider if your idea of a “photo tour” is mostly quick stops and minimal instruction. This is a hands-on day, and that’s exactly why it’s powerful for the right traveler.
If you’re even a little curious about how to control your images—no matter whether you shoot a phone or a DSLR—this is the kind of Killarney day that can genuinely level up how you see.
FAQ
Where does the tour start?
The tour starts at Muckross, Killarney National Park, Co. Kerry, Ireland.
Is pickup available?
Pickup is offered.
What is the tour duration?
It runs for about 8 hours.
Is this a private tour?
Yes. It’s private, and only your group participates.
How many people are in a group?
Up to 4 people per group.
What are the main stops during the day?
The stops are Ross Castle, Torc Waterfall, Lough Leane, and Gap of Dunloe.
What devices can I use for photos?
You can use a DSLR camera, smart phone, iPad, or any device that takes photos.
What language is the tour in?
The tour is offered in English.
What happens if the weather is bad?
The experience requires good weather. If it’s canceled due to poor weather, you’ll be offered a different date or a full refund.
Is cancellation free?
Yes. You can cancel for free up to 24 hours in advance for a full refund.